background image

6

PA

G

E

Operation

QUICK START

BPM DISPLAY & CONTROLS

If you want to quickly try out the basic performance of SoundBITE, please read the following points carefully:

Before making any connections, make sure that the power on all your equipment is turned OFF.

Connect the audio cables for a basic system setup as shown on page 4.

Make sure all connections have been made correctly and that the volume controls on

the mixing desk and amplifier system are completely turned down. Connect the power supply (included) to the
‘power in’ socket on the rear panel of SoundBITE and plug it into a suitable AC outlet. Turn on the power of the
mixing desk and then turn on the power to the amplifier system.

When SoundBITE is powered up, the BPM display will briefly show the current BPM

range setting (as defined by the position of the [BPM RANGE] switch) and then show four illuminated centre bars. If
this does not happen, check the power supply is of the correct type and the unit is connected as above.

Select a suitable audio track (dance orientated music with defined beat information), start the

playback on the connected sound source and route this signal to the headphone monitor output on the mixing desk
[check this using the headphones now connected to the monitor output on SoundBITE]. The input level is
automatically set by SoundBITE’s AGC (automatic gain control). The main BPM display should now show the BPM
reading of the audio track.

Set the [SAMPLE MODE] switch to the [CYCLIC] position. Now

simply press one of the six loop buttons when you want to start recording - the display will show ‘rEC’ and count
down the number of beats as the loop is sampled. If for instance, you pressed the [4 BEATS] loop button, the
display would count down 4-3-2-1 and then instantly playback the 4 beat loop. To mute the loop, simply press the
same loop button again [this button now switches the loop on/off].

Now try recording some of the other loops and playing them back in combination. To clear all the loops press the
[ERASE ALL] button once. To replace a single loop, press the [RE-SAMPLE] button once, then press the desired
loop button to start the re-sample recording process. Try changing the [SAMPLE MODE] setting to see the effect
this has on the sample playback.

Please read the following “OPERATION” section fully to appreciate the range of features and facilities SoundBITE
has to offer.

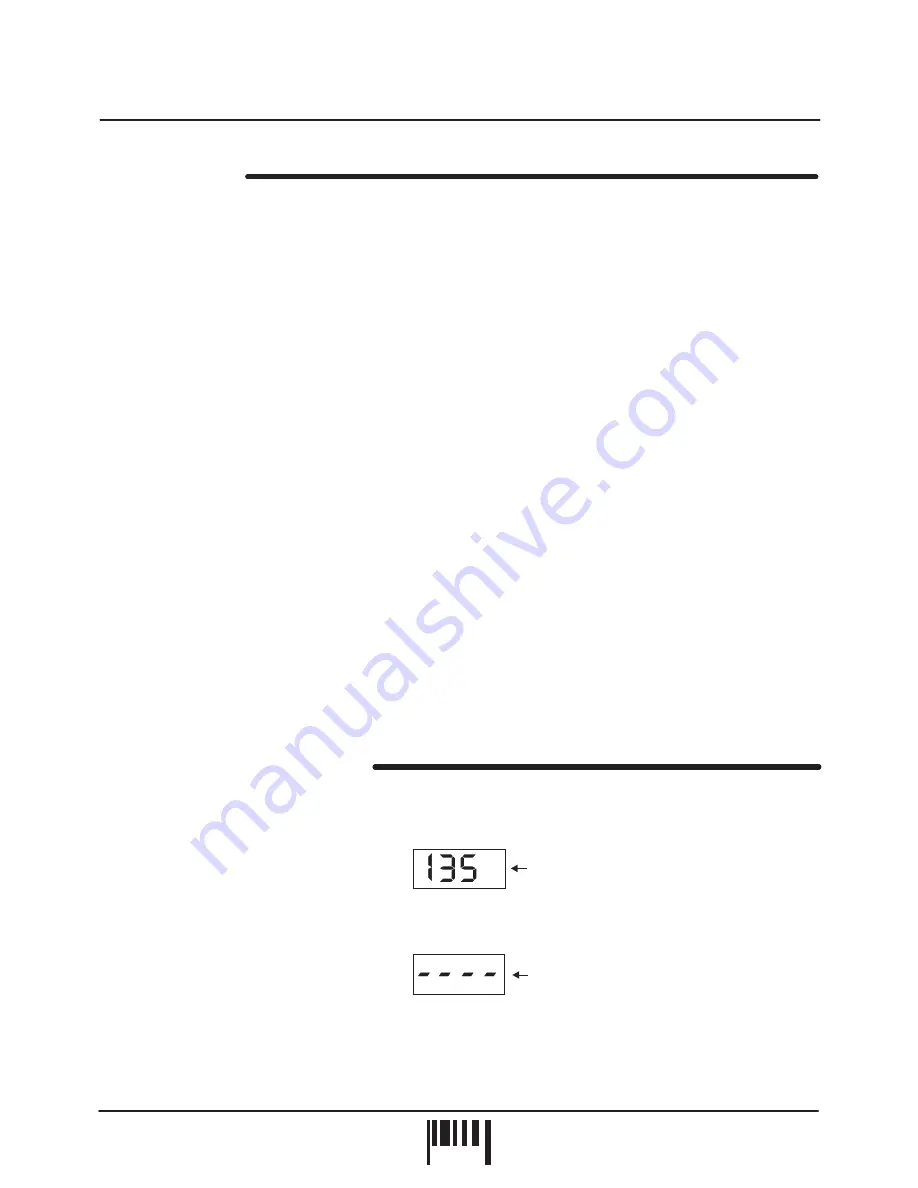
After connecting SoundBITE to your system as detailed on page 4, plug in the power connector on the rear panel
to turn the power on. The centre value of the default BPM range will now be shown briefly on the main display:

Afterwards, the four centre bars will illuminate to indicate the ‘IDLE’ status of the BPM engine.

SoundBITE is now ready to use!

CONNECTIONS:

TURNING ON THE POWER:

START UP INDICATIONS:

SETTING UP:

RECORDING/PLAYING BACK THE LOOPS:

Example = BPM range 90-180 currently selected -
mid point = 135

Four static centre bars
indicate no beat detected
‘IDLE’ condition

BPM

BPM

SoundBITE - DJ Loop Sampler

Summary of Contents for SoundBITE

Page 1: ...44 1kHz sounded pretty damn good lasted 6 seconds and only took a couple of minutes to loop well although the machine to do it on was now three thousand pounds 5 years ago major price breakthroughs b...

Page 2: ...ion point of recorded loops relative to the audio input source and also set the output level of each loop 6 20dB individual 2 PAGE SoundBITE DJ Loop Sampler Top Front Panels TOP FRONT PANEL FEATURES B...

Page 3: ...e output on your mixing desk for its audio input source so connect your headphones to this socket for normal DJ monitoring purposes This button is used to over record any pre recorded loop samples Thi...

Page 4: ...S OUT INPUT POWER 9vDC Red Sound R R L L R L TO AC WALL SOCKET RED PSU R L L R PHONO PHONO CD LINE CD LINE CHANNEL 2 CHANNEL 1 SIGNAL GND SIGNAL GND The unused CD line inputs on a 2 channel desk vinyl...

Page 5: ...es on your mixing desk 19 RACK Hole pitch range Min 90mm Max 240mm Alternatively you can use the supplied rubber feet or double sided sticky pads to flat mount SoundBITE in any convenient location BEA...

Page 6: ...now show the BPM reading of the audio track Set the SAMPLE MODE switch to the CYCLIC position Now simply press one of the six loop buttons when you want to start recording the display will show rEC a...

Page 7: ...the slowest Soul to the fastest Drum Bass The range setting can be changed at any time using the front panel TAP CLEAR button and the EDIT jog dial as shown in the following example The display will s...

Page 8: ...audio signal present or when the beat information becomes unavailable during a quite passage of the audio track intro middle eight etc The CLEAR feature can be used to cancel the current BPM reading...

Page 9: ...rom an idle condition as shown in the following example NOTE Subsequent valid beat information detected by the BPM engine will override manual changes made with the TAP function hold down CLEAR BPM Fo...

Page 10: ...ple When the recording cycle is complete the display will revert back to its normal BPM readout The recorded loop will now play back automatically the indicator in the button staying ON to show that t...

Page 11: ...desired You can even mute play other pre recorded loops as another loop pad is being recorded Aborting the Loop Recording NOTE SoundBITE s memory is non volatile so please remember that all recorded l...

Page 12: ...d down as shown in the following example The loop sample will re start from the beginning of the recording each time the button is pressed When the button is released the playback will be muted off A...

Page 13: ...e sample or record a loop simply press the desired LOOP button once whether it is pre recorded or empty The main display will show a count down of the number of beats in the loop whilst the sample is...

Page 14: ...o exit this mode simply release the LOOP button You can use this feature to manually adjust the synchronisation of each loop independently This may be necessary if the BPM engine loses input beat info...

Page 15: ...k To exit this mode simply release the LOOP button You can adjust the synchronisation point of ALL recorded loops simultaneously in a similar manner With more than one loop recorded simply move the SH...

Page 16: ...he start or the end of the track we recommend 8 or16 beat loops and using your cross fader blend the outgoing track into your long sample put a new record turntable and mix against the sample Just rec...

Page 17: ...sily achieved using the RED Sound INFADER and XS FX Because audio input loop sync can drift as time progresses due to factors such as fluctuating deck drive speed slipmat and the quality of the acetat...

Reviews: