background image

The default value (100BPM) will only apply if the BPM engine has not previously registered a value.

RECORDING & PLAYING ‘CYCLIC’ LOOPS

This is where you create the loop samples. There is no input level setting to adjust as the on-board AGC takes care
of all level adjustments automatically. You can record and play back up to 6 individual loops, each with different
durations. To automatically record perfect loops, the BPM engine must be active and registering a BPM value (you
can record loops without the BPM engine but these loops will not be automatically synchronised to the input - see
“HINTS AND TIPS” on page 16).

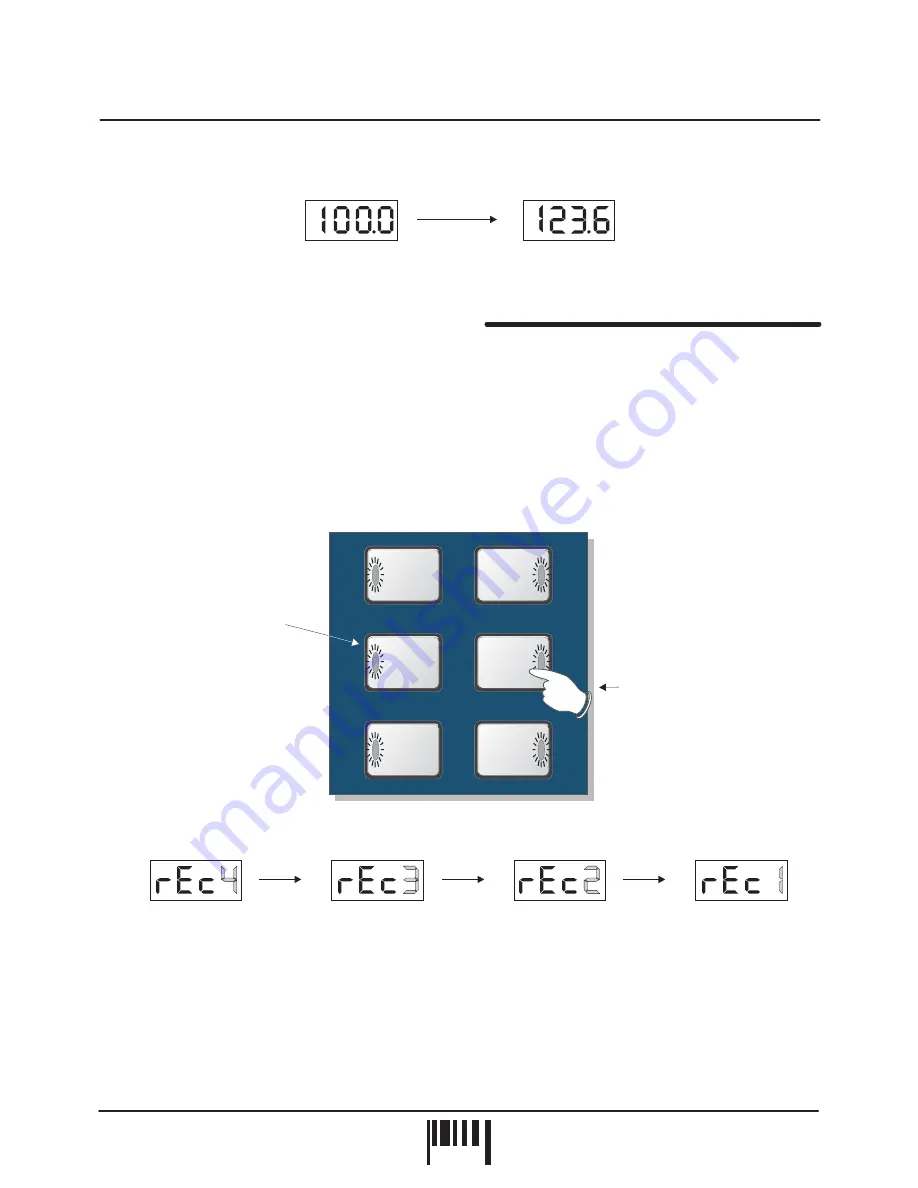
Only one loop can be recorded at a time. From boot-up (or after pressing the [ERASE ALL] button) the six loop
pads will be empty. Empty loop pads are shown by flashing indicators in the [LOOP] buttons. To start recording a
loop, first ensure the display is reading a BPM value (wait a few seconds for the BPM value to settle to ensure
accurate synchronisation), then simply press the desired [LOOP] button once, as shown in the following example:

During the sampling process the main display will show a count-down of the number of beats in the loop, as shown
in the following example:

When the recording cycle is complete the display will revert back to its normal BPM readout. The recorded loop will
now play back automatically, the indicator in the button staying ON to show that the loop pad contains a sample. To
mute the sample playback simply press the [LOOP] button again, the indicator in the button now goes OFF to show
that the loop is muted. Toggling the button on/off will play/mute the loop accordingly.

in [CYCLIC] mode the exact timing of when you press the button is not critical with regard

to loop creation e.g. if you start recording a 4 beat loop slightly after the beat (missing a down-beat kick drum for
instance), SoundBITE will automatically create a perfect 4 beat loop and include the last kick drum instead (i.e. the
loop will be in synchronisation and have a precise 4 beat duration no matter where you start recording). However,
when [SAMPLE MODE] is set to either [HOLD] or [REVERSE] the playback will always begin from the recording
start point so try to bear this in mind when using these modes.

Recording Start Point -

Also, ensure the [SAMPLE MODE] switch is set to [CYCLIC] mode.

10

PA

G

E

BEAT

BEATS

BEATS

BEATS

BEATS

BEATS

8

4

1

16

4

2

Press once to start recording
a 4 beat loop

Indicators flash
when loop pads
are empty

Operation

SoundBITE - DJ Loop Sampler

New, manually set
BPM value = 123.6

Default BPM = 100.0

BPM

BPM

incremented to...

BPM

BPM

BPM

BPM

Summary of Contents for SoundBITE

Page 1: ...44 1kHz sounded pretty damn good lasted 6 seconds and only took a couple of minutes to loop well although the machine to do it on was now three thousand pounds 5 years ago major price breakthroughs b...

Page 2: ...ion point of recorded loops relative to the audio input source and also set the output level of each loop 6 20dB individual 2 PAGE SoundBITE DJ Loop Sampler Top Front Panels TOP FRONT PANEL FEATURES B...

Page 3: ...e output on your mixing desk for its audio input source so connect your headphones to this socket for normal DJ monitoring purposes This button is used to over record any pre recorded loop samples Thi...

Page 4: ...S OUT INPUT POWER 9vDC Red Sound R R L L R L TO AC WALL SOCKET RED PSU R L L R PHONO PHONO CD LINE CD LINE CHANNEL 2 CHANNEL 1 SIGNAL GND SIGNAL GND The unused CD line inputs on a 2 channel desk vinyl...

Page 5: ...es on your mixing desk 19 RACK Hole pitch range Min 90mm Max 240mm Alternatively you can use the supplied rubber feet or double sided sticky pads to flat mount SoundBITE in any convenient location BEA...

Page 6: ...now show the BPM reading of the audio track Set the SAMPLE MODE switch to the CYCLIC position Now simply press one of the six loop buttons when you want to start recording the display will show rEC a...

Page 7: ...the slowest Soul to the fastest Drum Bass The range setting can be changed at any time using the front panel TAP CLEAR button and the EDIT jog dial as shown in the following example The display will s...

Page 8: ...audio signal present or when the beat information becomes unavailable during a quite passage of the audio track intro middle eight etc The CLEAR feature can be used to cancel the current BPM reading...

Page 9: ...rom an idle condition as shown in the following example NOTE Subsequent valid beat information detected by the BPM engine will override manual changes made with the TAP function hold down CLEAR BPM Fo...

Page 10: ...ple When the recording cycle is complete the display will revert back to its normal BPM readout The recorded loop will now play back automatically the indicator in the button staying ON to show that t...

Page 11: ...desired You can even mute play other pre recorded loops as another loop pad is being recorded Aborting the Loop Recording NOTE SoundBITE s memory is non volatile so please remember that all recorded l...

Page 12: ...d down as shown in the following example The loop sample will re start from the beginning of the recording each time the button is pressed When the button is released the playback will be muted off A...

Page 13: ...e sample or record a loop simply press the desired LOOP button once whether it is pre recorded or empty The main display will show a count down of the number of beats in the loop whilst the sample is...

Page 14: ...o exit this mode simply release the LOOP button You can use this feature to manually adjust the synchronisation of each loop independently This may be necessary if the BPM engine loses input beat info...

Page 15: ...k To exit this mode simply release the LOOP button You can adjust the synchronisation point of ALL recorded loops simultaneously in a similar manner With more than one loop recorded simply move the SH...

Page 16: ...he start or the end of the track we recommend 8 or16 beat loops and using your cross fader blend the outgoing track into your long sample put a new record turntable and mix against the sample Just rec...

Page 17: ...sily achieved using the RED Sound INFADER and XS FX Because audio input loop sync can drift as time progresses due to factors such as fluctuating deck drive speed slipmat and the quality of the acetat...

Reviews: