17
To make setting the blades an easier and
faster operation Record Power offer the
RPPSJ Planer Blade Setting Jig.
See the website for full details.
CAUTION! This procedure involves close
contact with the planer blade. Ensure
that gloves are worn at all times to
prevent injury to the hands and ensure
that the machine is disconnected from
the power source.
Use an aluminium straight edge or a perfectly
flat piece of timber preferably with quite a wide
body.
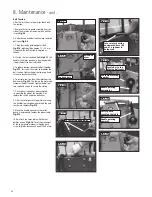
Mark on this straight edge a gap of 2-3mm
Fig.5.11
.
Take the straight edge, and place in the centre of
the block, with the front mark aligned with the
edge of the outfeed table
Fig.5.12
.
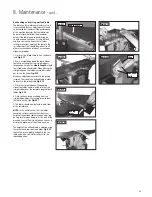
Turn the cutterblock by hand, one turn against
the direction of feed. Take care not to touch the
blades as they are very sharp and could cause
injury. The planer knives are set correctly if the
straight edge is moved forward 2 to 3mm when
the cutterblock is turned
Fig.5.13
.
If the straight edge move less than 2mm or
doesn't move at all
Fig.5.14
the knives are set
too low. If it moves further than 3mm they are
set too high
Fig.5.15
.
To set the knife projection, slacken the lock nuts
and turn the grub screws in the planer knife lock
bar with a 3mm allen key as required. Once the
centre is set, lock the two centre locking nuts
to secure the setting. Now check and adjust the
knife at both ends of the cutterblock.
Don't forget to repeat the whole process
on the second knife.
The knives are now set accurately to the
cutterblock and the table. The settings should be
given a final check and locked.
To lock the setting, turn the four 10mm headed
bolts anti-clockwise until they are tight. To
prevent distortion of the planer knife lock bar
start with the screws in the centre moving out to
the edges.
5. Machine Set Up
- cont.
Fig.5.11
Straight edge with 2-3mm
gap marked out
Fig.5.12
Centre jacking
screw
Edge of
outfeed table
Fig.5.13
2-3mm of
movement
Fig.5.14
Rotate cutter
block by hand
No movement
- knives are
too low
Fig.5.15
Rotate cutter
block by hand
Too much
movement
- knives are
too high
i
Kg
Rotate cutter
block by hand
Summary of Contents for PT260
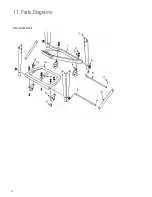
Page 28: ...28 11 Parts Diagrams Stand Wheel Kit ...
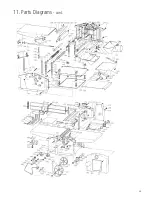
Page 29: ...29 11 Parts Diagrams cont ...
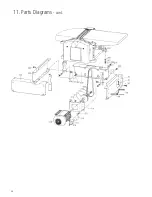
Page 30: ...30 11 Parts Diagrams cont ...
Page 34: ...34 ...
Page 35: ...35 ...


