


Instructions for kit #HB 1900
page 20
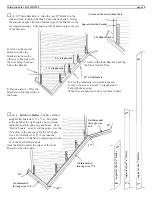
45
o
17
o
14
o
45
o
On this model,
this edge
was 7
3
/
8
□
28. 45
o
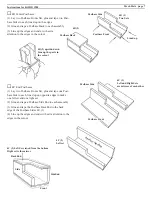
Side Brackets: A. Glue the rear 45
o
Bracket to the
side and roof, touching the Side Trim at the back edge. Notice
the amount of space from the bottom edge of the Bracket to the
next clapboard edge. That spacing will be used to place the rest
of the brackets.
Space below the bracket
A. Glue on the rear bracket
fi
rst
B. Glue on the second
Bracket (notice the
Bracket Cap faces the
other way) lined up with
the fi rst, using the space
below the Bracket
C. Glue on the third Bracket touching
the Front Vertical Trim.
D. Test the remaining two brackets spaced
evenly in between. Count 3
1
/
2
clapboards to
help with the spacing.
When they are spaced evenly, glue them in place
E. Repeat steps A - D for the
Brackets on the other side of
the house
45
o
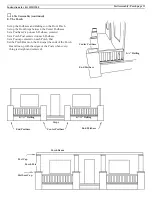
Left Brackets
45
o
Right Bracket
45
o
17
o
17
o
Angles for
the 4
1
/
8
” Rafter
On this model,
this edge
was 2
3
/
8
Angles for
the 2
3
/
8
” Rafter
45
o
45
o
On this model
this edge
was
4
1
/
8
3
1
/
2
Clapboards
3
1
/
2
Clapboards
Angles for
the 7
3
/
8
Rafter
14
o
□
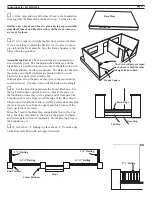
28. F.
Side Eave Rafter
: Cut Eave Rafters
using Rafter Material (
1
/
8
x
3
/
16
). The guide
at the right has the right angles, but you must
mark the length in place on your house. Use a
“Handy Square” as a
45
o
cutting guide. Use the
30
o
guide on the next page for the 30
o
angles.
Use a Porch Rafter for 14
o
. (Fine tune the
length of the 4
1
/
8
” Rafter by comparing it to the
fi t of the Porch Rafters’ ends
Glue the Rafters under the edges of the roofs.
Repeat for the other side.