EC9100i and EC9600i Series Scanner User Guide
Setting up your scanner
©2016 RDM Corporation
Page 20
In this setup, the scanner connects to the network using an Ethernet cable. You need to have an
Ethernet network jack available for the scanner. That means that if you are also connecting your
computer into the Ethernet network jack, you will need two Ethernet network jacks.
This setup allows multiple workstations to access the scanner.
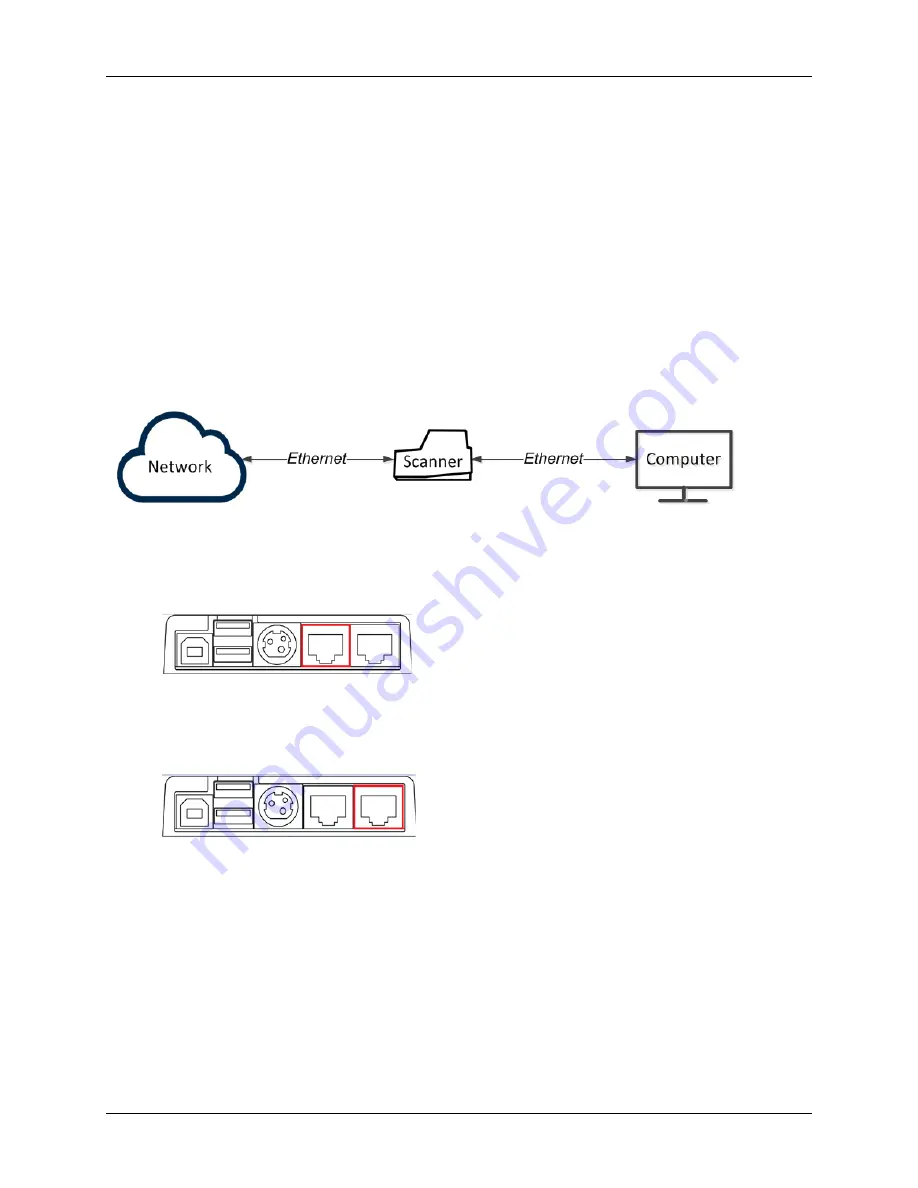
Option 2: Computer is connected to the network through the scanner
Note: This setup option requires two Ethernet ports and so is only supported on EC9603f, EC9604f,
EC9607f, and EC9608f scanners.
In this setup, you connect the scanner to the network. You then connect your computer to the network
through the scanner.
To hook up:
1.
Disconnect the Ethernet cable that is plugged into your computer and connect it to the scanner
in one of the two Ethernet ports (marked in red below).
2.
Using the Ethernet cable that is included in your scanner box, connect one end to the Ethernet
port on the back of your scanner (marked in red below) and the other end into the Ethernet port
on your computer.
Like option 1, this setup allows multiple computers to use the scanner, but it requires only one Ethernet
jack for both the scanner and your computer.
Note: The computer that is connected to the network through the scanner is limited to a 100MB/s
connection.


