OPERATION
To use the display, turn on the MCU by pressing the power button
on the right side of the box. The system will perform a system
boot, lasting approximately 2 minutes, and then start playing the
video “attract loop.” The attract loop continues to play until
someone touches the Start Here button, switching the system to
a Welcome screen (main menu).
The Welcome screen is the starting point for the customer’s
session and also provides access to the Manager Control Panel (see
“System Configuration and Maintenance” on page 7).
BUILDING A SYSTEM
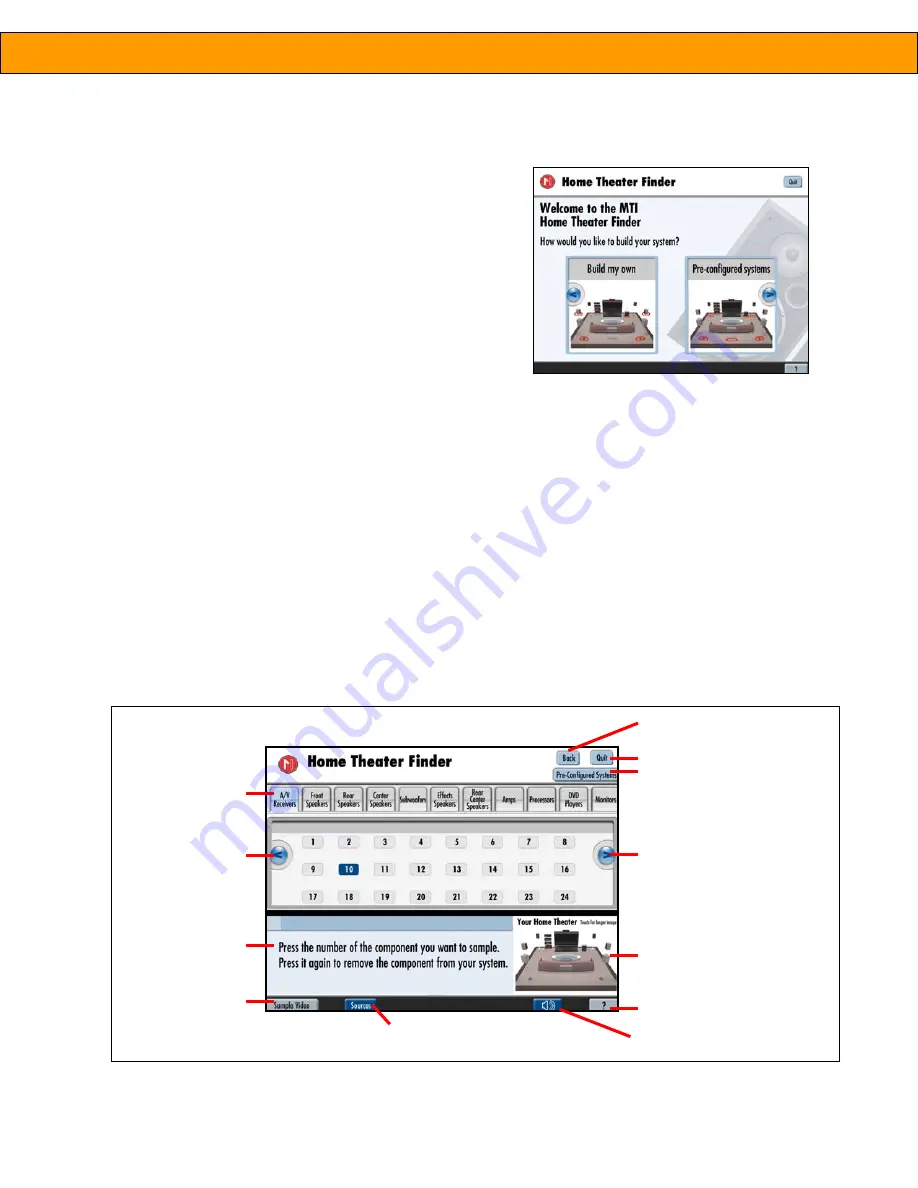
The main Welcome screen offers two choices: build a system
choosing your own components or choose from one of three pre-
configured systems.
To build you own system:
1. On the Welcome screen, select
Build My Own
. (
fig. 4)
2. On the system selector screen, select a product category (e.g., A/V Receivers) from the top. A list of numbers
appears in the middle of the screen. These numbers correspond to the component’s position on the display
fixture. Use the scroll arrows to view all available models. (
fig. 5)
3. Touch the component number to activate the component and add it to
Your Home Theater
(room graphic in
the lower right corner of screen).
Note:
When you add a component to your system, the component’s
Add
button switches to a
Clear Item
button.
Use this button if you want to remove the component from your system.
4. Repeat this process to add or change components to your system.
5
Product Manual –
INTUITION HT
fig. 5 – System selector
product
categories
accesses different a/v
sources to audition your system
mute
returns to welcome screen
return to attract loop
scroll
arrow
basic
instructions
not
available
fig. 4 – Welcome screen
shows three pre-configured
scroll arrow
components you have
added to your system (touch
for larger image)
basic operating
Summary of Contents for Intuition HT
Page 2: ......


