background image


5


razberi™ Technologies 


1. Introduction 

Welcome to razberi™. Use this guide as a reference to assist with common razberi™ hardware and software functions. For 
additional help, contact razberi™ Customer Support. 
 

1.1 Features 


Embedded PoE Switch (4 and 16 port) 


Gigabit Uplink port – RJ45 


Gigabit Uplink port – SFP Combo 


e-SATA port for external storage 


High PoE (802.3at) 


Easy and automated installation 


H.264 Recording at Megapixel resolutions 


Auto camera discovery 


Auto camera configuration 


Embedded Operating System 


3-yr Warranty on hardware & software 


1.2 Package 

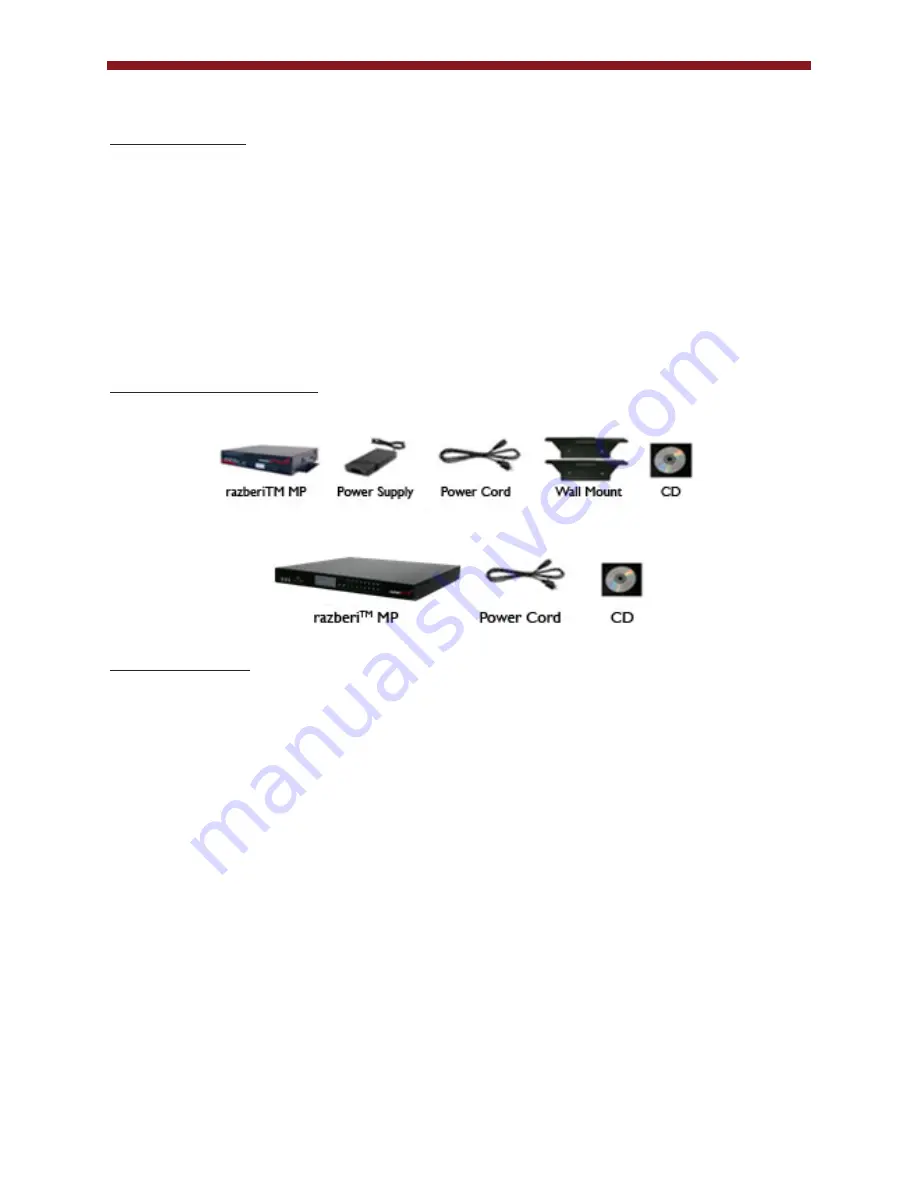
Contents 

Ensure that the package contains the following items listed below, for the 4 channel unit. 


Ensure that the package contains the following items listed below, for the 16 channel unit. 


1.3 Overview 

The razberi™ MP Series dramatically simplifies and reduces the costs of megapixel video deployment. The razberi™ plug-
and-play operation enables installers with minimal network expertise to deploy an IP video system in the same or less time 
required for a traditional DVR and analog camera deployment. 


The razberi™ MP Series combines the functions of a network video recorder, high powered Ethernet switch, and video 
management software with “auto setup” features into a single device. The razberi™ automatically provides power (high 
PoE) and IP addresses, configures cameras for motion detection, and automatically begins recording. For smaller systems, 
there is no need for installers to source switches, routers, software, and servers. 
Installers can use multiple razberi™ units within a network to build large systems over long distances with fiber optics using 
the built-in SFP Combo Uplink Ports. 


The easy-to-use razberi™ software offers digital zoom, camera tours, PTZ control, and intelligent video searches to quickly 
retrieve recorded events through thumbnail and event searches. There is no software licensing. Automatic software updates 
offer new software features over the web. 


Summary of Contents for MP Series

Page 1: ...razberiTM MP Series User Manual ...

Page 2: ...ng the product on a flexible surface The product should not be placed in a built in apparatus unless the apparatus has been designed to accommodate the product proper ventilation is provided for the product and the product instructions have been followed Operate the product only from the type of power source indicated on the product s electrical ratings label If you have questions about the type o...

Page 3: ...3 Groups 16 3 6 4 Camera Tours 17 3 7 LIVE VIDEO DISPLAY 17 3 8 LIVE VIDEO LAYOUT 18 3 9 ZOOM CONTROL 19 3 9 1 Live View Zoom Control 19 3 10 ALARM WINDOW 20 3 11 SEARCHING RECORDED VIDEO 20 3 11 1 Search Main Screen 20 3 11 2 Playback Zoom Control 21 3 12 SLIDER WINDOW 22 3 12 1 Playback Controls 22 3 12 2 Synchronous and Asynchronous Playback 22 3 12 3 The Export Feature 23 3 13 EVENT WINDOW 23 ...

Page 4: ...ers 30 3 14 4 System Preferences 30 3 14 4 1 Global Recording Settings 30 3 14 4 2 Camera Default Login 30 3 14 4 3 Custom Scheduler 31 3 14 5 NVR Logs 32 3 15 HELP 32 3 15 1 About 32 3 15 2 Server Information 32 3 15 3 Online Help 32 3 15 4 Technical Support 32 4 FAQ 33 ...

Page 5: ...beri plug and play operation enables installers with minimal network expertise to deploy an IP video system in the same or less time required for a traditional DVR and analog camera deployment The razberi MP Series combines the functions of a network video recorder high powered Ethernet switch and video management software with auto setup features into a single device The razberi automatically pro...

Page 6: ...ed for mounting the razberi 1 Attach the razberi unit to the wall mounts by using a Phillips Head screwdriver to fasten one mount to each side of the unit with the provided screws Fasten the screws into the available holes in the unit as shown in the following example 2 To mount the razberi unit place the razberi in the desired location and use the available holes in the two attached mounts as tem...

Page 7: ... 5 minutes of start up time prior to connecting a PC or cameras Front Panel Figure 1 Connect the client PC or the network connection to the Uplink port Connect cameras to the LAN ports 1H through 4 on a razberi 4 port unit or LAN ports 1H through 16 on the razberi 16 port unit 16 Ports Back Panel ...

Page 8: ...ts See figure 2 a An existing network allows the razberi and connected cameras to acquire addresses from an existing router DHCP Server automatically 2 Installing the razberi into a network where a DHCP server does not exist See figure 3 a The razberi can either serve as the DHCP Server in a dedicated network or it can just be assigned a static address Figure 2 Figure 3 ...

Page 9: ... into a network where a DHCP server does not exist 1 If there is no network connection or there are no DHCP servers on the dedicated network the razberi will default to a specific IP address after a few minutes a The default IP address that the razberi will use is 192 168 9 1 b This address may be used to make an initial connection i In order to connect to the razberi the client machine must be on...

Page 10: ...e into an available power outlet following the safety guidelines Allow 3 5 minutes 11 Use the razberi Utilities CD included in the razberi package to install the client software To install the client software without the Utilities CD access http 192 168 9 1 razbericlient http ipaddress razbericlient from within a browser web page and follow the installation process See figure 6 Figure 6 ...

Page 11: ... razberi Technologies website at www razberi net Client System Requirements Operating System Windows 7 32 bitand64 bit Minimum Hardware Required 3 x GHz Intel i3 Processor Intel i5 i7 preferred for multiple MP camera displays Memory 4GB RAM Graphics card with full DirectX9 0c hardware acceleration o 1 GB Internal Onboard Memory minimum recommended 100 MB Disk Space for Software Installation Minimu...

Page 12: ...file both primary and secondary sites servers are accessed Apply Click Apply to save the profile Delete Click Delete to delete a selected profile Close Click Close to close the dialog box In order to save the information click Apply prior to closing the dialog box The razberi system saves the profile information for future logins 3 3 Selecting Ports Use these fields to change the ports that the cl...

Page 13: ...it Screen Fits the video to the available monitor screen 6 Full Screen Displays the video in a full screen without the menu bar NOTE Press Escape to return to the previous view 7 Monitor Displays the video full screen without the menu bar or camera tree NOTE Press Escape to return to the previous view 8 Site Administrator Displays the Site Administration window if the user is an administrator 9 Cl...

Page 14: ...o as the primary server and displays under the Sites folder in the Camera Tree After logging into the system with the primary server users can add secondary servers The multi site feature allows access to more than one server within the application The added secondary sites appear under the Sites folder in the Camera Tree NOTE Click the next to the appropriate site IP address to view the cameras a...

Page 15: ...e Click on the Site folder to view the available cameras connected to the site 3 6 1 2 Connecting Sites If a site is disconnected the site address displays in red in the Camera Tree 1 To connect a site access the Camera Tree and right click on the disconnected site A list of options displays 2 Click Connect Site See figure 12 Figure 12 NOTE Sites may be offline due to a network connectivity proble...

Page 16: ... defined view provides video from selected cameras from any site that is visible in the application The predefined views are stored within the Views folder located in the camera tree 1 To add a new view right click on the View folder in the Camera Tree 2 Select Add View from the list of available options See figure 14 Figure 14 3 Multiple monitors are supported A view must be created first Then ri...

Page 17: ...the order of the camera views 4 In the Dwell Time field select the number of seconds for each camera view to last 5 When finished designing the tour click OK The tour displays in the Live View window If a camera is offline then the tour skips that video and goes to the next available online camera in the sequence To edit Camera Tours right click on the Tour folder in the Camera Tree and select Edi...

Page 18: ...current video display frame Refresh Refreshes the video display Information Provides the camera and site information Display Server Name The site name for the camera appears in the video display Display Timestamp The date and time of the video appears in the video display 3 8 Live Video Layout Use the Layout icon to change the viewing layout of the live video display The Layout icon is located in ...

Page 19: ...om boundary box and move to the desired zoom area a Example zoomed image See figure 20 Figure 20 The Zoom Controls are as follows Zoom In Return to Original View Zoom Out Use the Mechanical option to control a PTZ camera 1 To mechanically zoom in or out of live video select a live video stream for a PTZ enabled camera 2 Select the Mechanical option 3 The PTZ controls display in the bottom left cor...

Page 20: ...Recorded Video screen click the Search icon in the Tool Bar Use the Search feature to retrieve recorded videos from the application for corresponding cameras by date and time The Recorded Video screen appears by default with the Tool Bar on the top Search window pinned on the left Recorded Video Display on the right and the Slider window across the bottom of the screen Use the Zoom Controls in the...

Page 21: ...ime d Events Select an event as audio motion contact schedule or all The search is based on the selected events e NVR Time This field displays the NVR time f Event Window with Digital Zoom Select this option to display the Event window with digital zoom 3 11 2 Playback Zoom Control In the Video Playback window the Zoom Control section is in the lower left corner Use the controls to navigate the zo...

Page 22: ...sensor based recording Figure 24 3 12 1 Playback Controls Control the recorded video while it plays in the Recorded Video Display using the playback controls See figure 25 Figure 25 1 Play Video 2 Pause Video 3 Step Backward 4 Rewind 5 Fast Forward 6 Step Forward 7 Jog Speed Playback 8 Export Video 9 Refresh Display 10 Search 3 12 2 Synchronous and Asynchronous Playback Click the icon to the far r...

Page 23: ...on where the files should be placed 3 ZIP can be selected to export to a zip file A name is required for zip files only 4 Click Export 5 The Files will be exported to the selected folder The files will be in asf format and can be played back using any media player 3 13 Event Window Click on the Event window to view the events corresponding to the available cameras Select a camera to view its event...

Page 24: ...st of cameras The table also includes the details and status of each camera See figure 30 Figure 30 Right click on a camera row or click on the corresponding button on the bottom of the window to use the following options Edit Allows the user to change settings of the camera See figure 30 Change Credentials Allows the user to change the credentials used to access the camera Add Camera Allows the u...

Page 25: ...ew the camera s administration details Password Enter the user s password Only the administrator can reset the password Change Credentials Click this option to change password information CamGUID mac ID This field is for the unique camera ID PTZ Select the controls for PTZ enabled cameras only Audio Select this option to enable audio Apply Click this option to apply and save the changes Cancel Cli...

Page 26: ...amera Details section which contains the following fields See figure 31 Name This field is the name of the camera Description The description of the camera is in this field IP Address This field is for the IP address where the camera is configured Brand This field is for the brand name of the camera Video Format Select the video format from the dropdown Model This field is for the camera model Use...

Page 27: ... of video recordings for this camera Select Yes to remove the video from the camera After clicking Yes the video from that camera is no longer accessible 3 14 1 6 Resetting Cameras Use this option to return the camera to default settings To reset a camera 1 Access the Administration window 2 Select the Camera Management tab 3 Right click on a camera row in the Camera List table 4 Select Reset Came...

Page 28: ...ri does not give out IP addresses 3 Click Apply 4 After clicking Apply a prompt window asks to reboot the server Click OK and the client window closes 5 Re log in to the system The section below the Server IP Configuration section provides fields to change the server ports Click Apply to apply the server port changes In the prompt window click OK Figure 33 3 14 2 2 Date and Time Settings After con...

Page 29: ...and permissions To access the tab open the Administration window and select the User Management tab The User Management tab consists of several sections for managing users and user permissions User List View a list of the application s users User Details Select a user in the User List section and view the corresponding user information in the User Details section User details include the user s Fu...

Page 30: ...esponding features See figure 35 Figure 35 3 14 4 1 Global Recording Settings Use the Global Recording Settings tab to customize the Event Pre Buffer Time and Event Record Duration for recording modules To access the tab open the Administration window select the System Preferences tab and view the Global Recording Settings tab 1 The Event Pre Buffer Time field provides the ability to customize the...

Page 31: ...checkmark next to a custom schedule indicates the schedule applies to a camera or cameras 6 Click on the schedule name on the left column to see a list of cameras currently using the selected schedule in the assigned cameras table 7 Click Save Changes to NVR to save changes to this window Editing Schedules Use this feature to edit recording times for existing schedules as well as assign cameras to...

Page 32: ...s about the product version and copyrights The View Log hyperlink opens a text document with all log information listed Use this feature for troubleshooting as directed by Technical Support 3 15 2 Server Information The Server Info dialog box provides details about the application s recording time zone and the number of cameras that the license supports To access the Server Info dialog box click o...

Page 33: ...ith higher MP cameras that have higher resolution settings See the Zoom Control section for more information f How do I operate Live Video and Recorded Video Live video mode is the default display when the client is first launched To select cameras for viewing double click on the cameras within the Camera Tree or select a predefined view tour Access recorded video by selecting the Search icon on t...

Page 34: ...earch and Playback a How do I retrieve video Video is retrieved by selecting the Search icon found at the upper left corner of the Tool Bar within the Live View Screen b How do I download archive and export video Once a user locates a video clip the user can archive the clip by selecting the Export icon found within the Slider window c How do I perform an Event Search Within the Search window the ...

Reviews: