


62
Raymarine H6 - System Installation Manual
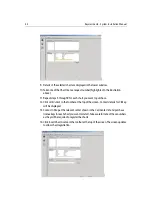
Cleaning the display
CAUTION: Take care when cleaning the displays. Do not wipe a display
screen with a dry cloth - this could scratch the screen coating. Do not
use acid, ammonia based or abrasive products.
1. Ensure the display is switched off.
2. Wipe the display with a clean, damp cloth.
3. If necessary use iso-propyl alcohol (IPA) or a mild detergent solution to remove
grease marks.
Sounder module
Routine checks
The sounder module is a sealed unit. Maintenance procedures are therefore limited to
the following periodic checks:
• Examine the cables for signs of damage, such as chafing, cuts or nicks.
• Check that the cable connectors are firmly attached.
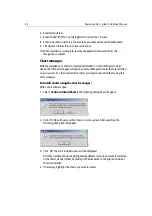
Cleaning the module
The sounder module is a sealed unit and does not require regular cleaning. However, if
it is found to be necessary to clean the unit:
1. Ensure the display is switched off.
2. Wipe the display with a clean, damp cloth.
3. If necessary use iso-propyl alcohol (IPA) or a mild detergent solution to remove
grease marks.
Transducer
CAUTION: Harsh cleaning solvents such as acetone may damage the
transducer.
Sea growth can collect quickly on the bottom of the transducer, this can reduce
performance in just a few weeks. To prevent the build-up of sea growth, coat the
transducer with a thin layer of paint.
Use only water-based antifouling paint, or a water- based paint specifically designed
for transducers. Apply the paint with a brush.
If the transducer becomes fouled or stops working because of sand or sea growth, use
a stiff brush to clean it. The surface can be sanded with a fine-grit wet or dry sandpaper
(#320 grade or finer), but this will affect the performance of the unit when the boat is
moving at higher speeds.
Summary of Contents for H6
Page 1: ...System Installation Manual Document number 87035_1 Date November 2004 D7579_1...
Page 6: ...4 Raymarine H6 System Istalation Manual...
Page 16: ...10 Raymarine H6 System Installation Manual...
Page 17: ...11 This page should be replaced with the A3 sheet System Schematic...
Page 18: ...12 Raymarine H6 Installation Manual...
Page 26: ...20 Raymarine H6 System Installation Manual...
Page 27: ...21 This page should be replaced with the A3 sheets Cables...
Page 28: ...22 Raymarine H6 Installation Manual...
Page 48: ...42 Raymarine H6 System Installation Manual...
Page 62: ...56 Raymarine H6 System Installation Manual...
Page 72: ...66 Raymarine H6 System Installation Manual...
Page 98: ...92 Raymarine H6 System Installation Manual No Check Confirmed...
Page 103: ...Raymarine H6 Connection diagrams Raymarine 2004...
Page 104: ...98 Raymarine H6 System Installation Manual...
Page 110: ...104 Raymarine H6 System Installation Manual...
Page 121: ...115 This page should be replaced with the A3 sheet VGA Connections...
Page 122: ...116 Raymarine H6 Installation Manual...
Page 123: ...Installation templates D7579_1...