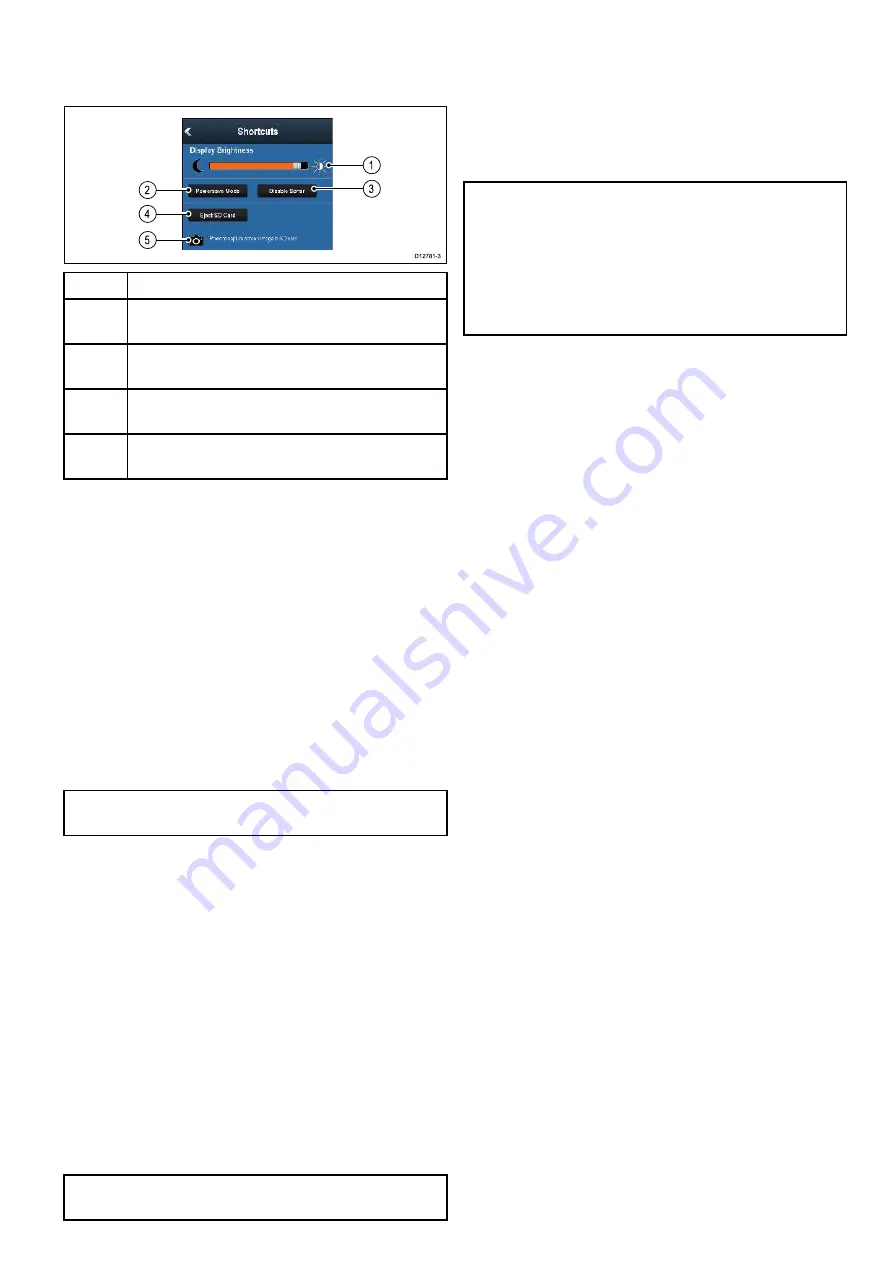
6.7 Shortcuts page
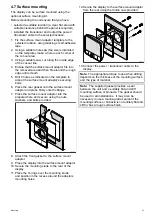
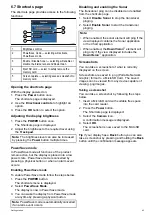
The shortcuts page provides access to the following
functions:
1
Brightness control.
2
PowerSave mode — selecting will activate
PowerSave mode.
3
Enable / Disable Sonar — selecting will enable or
disable the internal sonar and DownVision.
4
Eject SD card — select to safely remove the
memory card.
5
Screen capture — selecting saves a screenshot to
memory card.
Opening the shortcuts page
With the display powered on:
1. Press the
Power
button once.
The shortcuts page is displayed.
2. Use the
Directional controls
to highlight an
option.
3. Press the
OK
button to select the option.
Adjusting the display brightness
1. Press the
POWER
button once.
The Shortcuts page is displayed.
2. Adjust the brightness to the required level using
the
Track pad
.
Note:
The brightness level can also be increased
by pressing the
Power
button multiple times.
PowerSave mode
In PowerSave mode all functions of the product
remain active, but the display is placed into a low
power state. PowerSave mode is cancelled by
pressing a physical button or when an alarm event
occurs.
Enabling PowerSave mode
To enable PowerSave mode follow the steps below.
1. Press the
POWER
button.
The shortcuts menu is displayed.
2. Select
PowerSave Mode
.
The display is now in PowerSave mode.
3. You can wake the display from PowerSave mode
at anytime by pressing a physical button.
Note:
PowerSave mode is automatically cancelled
if an alarm event occurs.
Disabling and enabling the Sonar
The transducer ping can be disabled and enabled
from the shortcuts page.
1. Select
Disable Sonar
to stop the transducer
pinging.
2. Select
Enable Sonar
to start the transducer
pinging.
Note:
• When enabled, the sonar element will ping if the
view displayed contains the Sonar application
or the Chart application
• When enabled, the
DownVision
™
element will
ping only if the view displayed includes the
DownVision
™
application.
Screenshots
You can take a screenshot of what is currently
displayed on the screen.
Screenshots are saved in .png (Portable Network
Graphic) format to a MicroSD Card. The saved
images can be viewed from any device capable of
viewing .png images.
Taking a screenshot
You can take a screenshot by following the steps
below.
1. Insert a MicroSD card with suitable free space
into the card reader.
2. Press the
Power
button.
The Shortcuts page is displayed:
3. Select the
Camera
icon.
A confirmation message is displayed.
4. Select
OK
.
The screenshot is now saved to the MicroSD
card.
Tip
If your display has a
Back
button you can also
take a screenshot by pressing and holding the
Back
button until the confirmation message appears.
Getting started
45
Summary of Contents for Dragonfly 6
Page 2: ......
Page 4: ......
Page 24: ...24 Dragonfly 6 Dragonfly 7...
Page 82: ...82 Dragonfly 6 Dragonfly 7...
Page 96: ...96 Dragonfly 6 Dragonfly 7...
Page 104: ...104 Dragonfly 6 Dragonfly 7...
Page 108: ...108 Dragonfly 6 Dragonfly 7...
Page 112: ...112 Dragonfly 6 Dragonfly 7...
Page 115: ......
Page 116: ......

