background image

Page 4 

Adjusting the Display brightness 

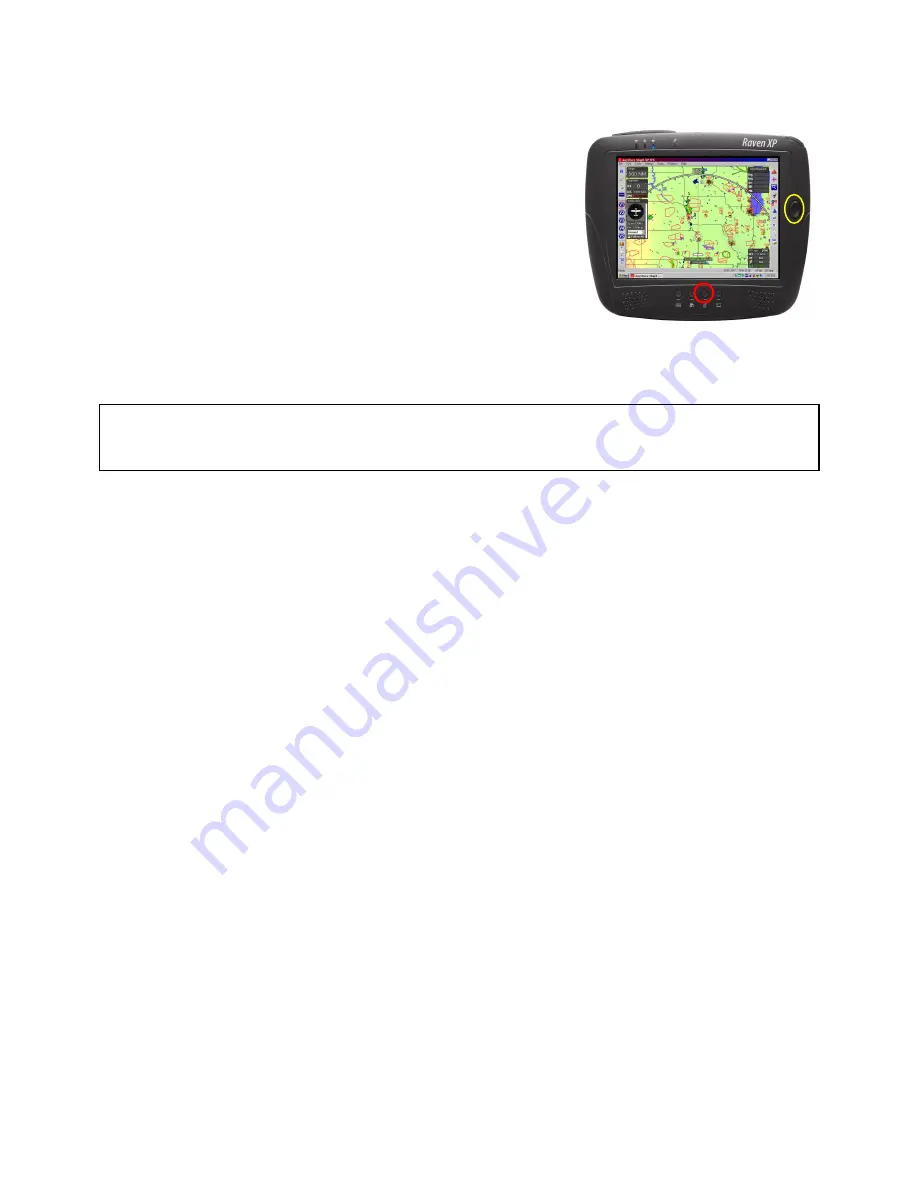
You can adjust the Display brightness of the Raven XP using a 

combination of key presses on the hard buttons.  To adjust the 

brightness, you use a combination of the third button beneath 

the display (see red circle at right) and the oval “hat switch” 

along the right side of the display (yellow oval at right). You 

can adjust the brightness in the following ways: 

• 

Full bright: Hold down on the third button and 

simultaneously press the RIGHT direction on the hat switch.  

• 

Full dark: Hold down the third button and press the LEFT 

direction on the hat switch. 

• 

Increment brightness up: Hold down third button and press UP direction on the switch. 

• 

Increment brightness down: Hold third button and press DOWN direction on the switch. 


IMPORTANT

: if your screen is completely BLACK you should first suspect that you may have 

turned the display brightness down.  Depress the third button and tap RIGHT to turn the 

brightness up fully. 
 

Using the onscreen keyboard 

Pressing the first button shows and hides the on-screen keyboard.  Tap the data entry field of the 

form you are using and type on this keyboard using the stylus.  It is strongly recommended that 

you use the “Microsoft” on screen keyboard.  The Raven also ships with a second “on screen 

keyboard” utility installed that has not proven to be very reliable.  You may also plug in any 

standard USB keyboard to the USB port for more keyboard options. 


Establishing Bluetooth connections 

Each time you start your system you will have to enter the “passkey” to the Bluetooth GPS 

device. Please follow the directions below 

carefully.


Summary of Contents for XP

Page 1: ...Page 1 The Raven XP User s Manual and Set Up Instructions Copyright 2006 Control Vision Corp Raven XP Manual Version 1 ...

Page 2: ...start the Raven XP press and release the power button located along the left edge of the unit Within a few seconds you will see the screen illuminate and you should see the familiar Windows XP boot up screen Once the booting process completes you will hear the windows music theme on the speakers and you should see a Windows Desktop Please read the instructions in this manual before starting the An...

Page 3: ...ing and automatically adapts to provide regulated power to the Raven XP The other fixed wire coming from the Universal charger should be connected to the Raven This wire is labeled TABLET PWR and has a right angle connector on it Plug this wire into the DC input jack on the Raven which is located in the lower right corner of the unit IMPORTANT NEVER plug the right angle plug into the XM radio box ...

Page 4: ...own Hold third button and press DOWN direction on the switch IMPORTANT if your screen is completely BLACK you should first suspect that you may have turned the display brightness down Depress the third button and tap RIGHT to turn the brightness up fully Using the onscreen keyboard Pressing the first button shows and hides the on screen keyboard Tap the data entry field of the form you are using a...

Page 5: ... the bottom that a Bluetooth device is attempting to connect to your system Please tap on the balloon to open it 3 You will see a dialogue window open that has a data entry field for entering the passcode This window MAY have a rectangular white space obscuring part of it If so drag the dialogue window upward by placing your stylus on the blue bar along the top of the dialogue window and sweeping ...

Page 6: ... left corner and then tap Shut Down 3 Tap Shut Down These units start up and shut down very quickly As stated earlier we strongly recommend you shut the tablet down all the way when you flight has completed We have purposely disabled all sleep mode and hibernation We do not recommend their use especially when the AnywhereXp software is left running It is very likely that upon restart the Bluetooth...

Page 7: ...id state storage is that the entire drive has only 1GB of free space on it Most Windows applications Word Excel etc require more space than this and you should not attempt to install them on the solid state drives Instead we recommend installing other windows application software to either a CF card or to an external USB or network hard drive You can buy a 60Gb hard drive conventional spinning dri...

Page 8: ... set up the wireless capability 1 Tap the line that lists the network to which you want to connect This highlights the line 2 Tap the Configure button 3 If you are going to use this connection all the time i e it s at your home then tap the selection Create a Profile If you are only connecting this one time leave the choice at Connect One Time 4 Tap OK 5 Assuming you re setting up your home connec...

Reviews: