


Chapter 5: Using the Web Interface
83
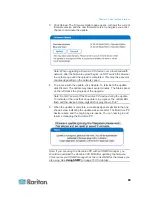
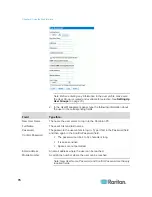
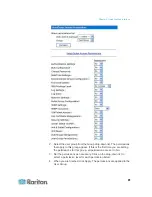
3. Set the permissions as necessary. Click on the drop-down list to
select a permission level for each outlet.
4. When you are finished, click Apply. The permissions are applied to the
user group.
Note: The "User (not in a group)" field on this page is used to set individual
user permissions. If you are setting group permissions, you may ignore
this field.
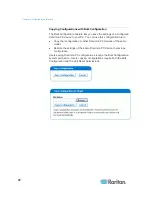
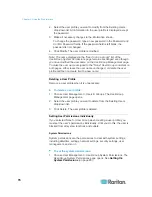
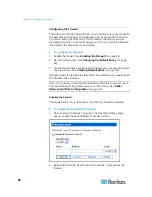
Copying a User Group
You can create a new user group with the same permissions as an
existing user group using the copy function. Then modify the group so that
its permissions differ as necessary from the original. This is a quick and
easy way to create user groups.
Any user group can be copied except for the Admin and <Unknown>
groups.
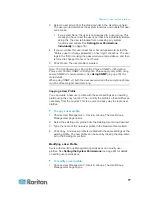
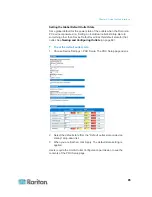
To copy a user group:
1. Choose User Management > Users & Groups. The User/Group
Management page opens.
2. Select the existing user group from the Existing Groups drop-down
list.
3. Type the name of the new user group in the New Group Name field.
4. Click Copy. A new user group is created with the same permissions as
the existing group. The new user group can be seen by clicking the
drop-down list in the Existing Groups field.
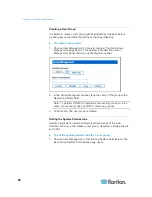
Modifying a User Group
The only attribute of a user group that can be modified is the group name.
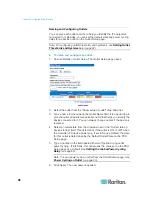
To modify a user group's name:
1. Choose User Management > Users & Groups. The User/Group
Management page opens.
2. Select the user group you want to modify from the Existing Groups
drop-down list. The name appears in the New Group Name field.
3. Make any necessary changes to the name.
Note: To perform SNMP v3 operations successfully, make sure the
name of your user group does NOT contain any spaces.
4. Click Modify. The user group is modified.