background image

Cue Points

Use cue points in Scratch Live to mark 
and trigger different parts of your tracks. 
The cue point markers are saved with the 
file in the track’s ID3 tag. This means they 
will be present each time you load the 
track.

Setting Cue Points

You can set up to five cue points for each 
track. Click on the 

+

 button to place a 

cue point, or use the keyboard shortcuts 
below. A cue point will be set at the 
current playhead position of the track and 
can occupy any of the 5 slots.
  Use the keyboard shortcuts: ctrl-
comma (for left) and ctrl-period (for right) 
to place cue points in chronological order. 
Alternatively, use ctrl-1 through 0 to set a 
specific cue point, i.e., to set a cue point 
on the Left Deck in slot 2, press ctrl-2.
  Notice the stripe on the Virtual Deck 
jumps to the 12 o’clock position and 
changes color when you set a cue point 
– you are at the cue point when the stripe 
is one solid color and at the 12 o’clock 
position. As the track plays on beyond the 
position of the cue point, the colored bar 
shortens by a fifth for each rotation. 
Likewise, as you approach the cue point, 
the color will grow by a fifth each rotation. 
For example, the picture below shows the 
track just before the end of the 5th 
rotation before the cue point.

TIP: Zoom in on the waveform using the 
– and + keys and ‘scrub’ to the desired 
position for greater accuracy when 
setting cue points.

Enable Hot Cues

To turn on hot cues, check 

Enable Hot 

Cues

 in the Playback tab on the Setup 

screen. When Hot Cues are enabled, you 
can set cue points simply by pressing the 
number keys 1 through 0 (no ctrl modifier 
required). Note that you can only add cues 
this way if the cue point slots are empty.


See “Enable Hot Cues” on page 37.

Triggering Cue Points

Click the 

 

arrow to the left of each cue 

point to jump to it (REL and INT modes 
only). You can also jump to cue points 
using shortcuts: 1 through 5 for the cue 
points on the Left Deck, and 6 through 0 
for the Right Deck cue points.

Editing Cue Points

To remove a cue point, use the 

x

 button 

on the right side of the cue point panel. 
You can also overwrite cue points by 
using the shortcut keys ctrl-1 through 0.

Customizing Cue Points

To change the color of a cue point, click 
on the colored square and choose a new 
color from the drop down menu.
  To name your cue point, double click 
on the “time” field. You can now edit and 
name this cue point to whatever you like.
   You can also drag and drop cue points 
to change their order in the list. If you wish 
to have the cue points sorted by time, 
check 

Sort cues chronologically

 in the 

Playback tab on the Setup screen. If you 
load the same track onto both Decks, you 
will be able to add or modify cue points 
from either Deck.
  When you jump to a cue point in INT 
mode while paused, the track will play 
from the cue point for as long as the key 
or mouse button is pressed, after which 
the playhead returns to the cue point. If 
this is done using the keyboard while the 
track is playing in either INT or REL mode, 
the cue point will be repeatedly triggered, 
producing a stuttering effect.
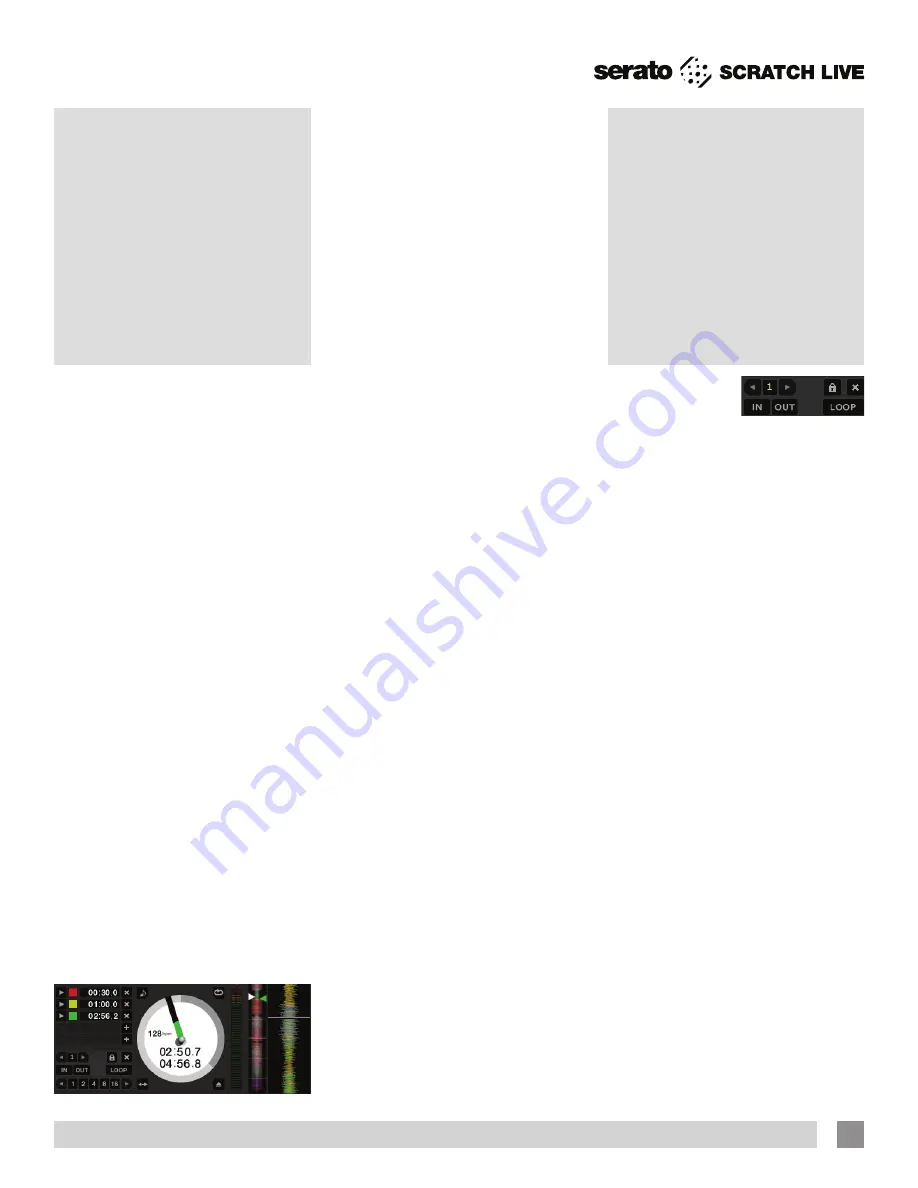
Looping

You can save up to 
9 loops per track. 
These loops are 
saved in the file, and will be present when 
you reload the track. To make a loop, set 
the in-point by clicking the 

IN

 button, and 

the out-point by clicking the 

OUT

 button. 

To turn the loop on or off, click the 

LOOP


button. If you want the playhead to jump 
to the start of the loop when you enable 
the loop, hold the control key and press 
the 

LOOP

 button.

  To adjust the in-point of the loop, click 
the 

IN

 button. You can use the arrow keys: 

left arrow to move the in-point towards 
the start of the track, right arrow to move 
the in-point towards the end of the track. 
Hold down the shift key while pressing the 
arrow key to make coarse adjustments. 
Click the 

IN

 button again to save the in-

point. The same applies to adjusting the 
out-point.
  You can also use the control vinyl (or 
CD) to adjust the in- and out-point. Click 
the 

IN

 button, then move the control vinyl. 

Moving the vinyl will adjust the in-point. 
Once you are happy with the new in-point, 
click the 

IN

 button again to save, and 

release the control vinyl.
  The control vinyl will go back to 
controlling playback once the record 
is back up to normal speed. Using the 
control vinyl to adjust loop end points is 
optional — to turn this feature off, disable 

Adjust loops with vinyl

 under the Vinyl 

Control tab in the Setup screen.
  There are 9 available loop slots per 
track. If a loop is set in a given slot, the 
background (behind the loop number) 

RANE SIXTY-ONE MIXER FOR SERATO SCRATCH LIVE • OPERATOR’S MANUAL 2.4.4

23

Summary of Contents for SIXTY-ONE

Page 1: ...TURNTABLISM IS ALIVE AND MORE CREATIVE THAN EVER RANE SIXTY ONE MIXER FOR SERATO SCRATCH LIVE OPERATOR S MANUAL 2 4 4 ...

Page 2: ...low this apparatus but some equipment like large power amplifiers may cause an unacceptable amount of hum or may generate too much heat and degrade the performance of this apparatus WARNING To reduce the risk of fire or electric shock do not expose this apparatus to rain or moisture Apparatus shall not be exposed to dripping or splashing and no objects filled with liquids such as vases shall be pl...

Page 3: ... included Scratch Live software Keep this manual in a safe place If you ever lose it a new copy may be downloaded at dj rane com To keep up with the latest tips and to check for Scratch Live software updates visit the Official Scratch Live Forum at serato com Copyright Notices 2013 Rane Corporation All rights reserved Scratch Live and the Scratch Live logo are trademarks of Serato Trademarked in t...

Page 4: ...eform Display 18 Beat Matching Display 19 Master Gain 19 33 45 Speeds 19 Tracking Indicator 19 Tap Tempo 19 Eject 19 Key Lock 19 Repeat 19 Censor 19 Autoplay 19 Track Gain 20 USB Dropout Indicator 20 Display Modes 20 Library Views 20 Scratch Live Modes 21 Absolute Mode 21 Relative Mode 21 Internal Mode 22 Temporary Cue 22 More Controls 22 Cue Points 23 Setting Cue Points 23 Enable Hot Cues 23 Trig...

Page 5: ...ency 36 Updating Firmware 36 Control Source 36 Allow MIDI Assign of Mixer Controls 36 Recording Bit Depth 36 Input Select Status 36 Hardware Effects 36 Channel Filters 36 Playback 37 Track End Warning 37 Playback Keys Use Shift 37 Lock Playing Deck 37 Sort Cues Chronologically 37 Enable Hot Cues 37 Use Auto Gain 37 Hi Fi Resampler 37 Play From Start 37 Instant Doubles 37 Play From First Cue Point ...

Page 6: ...tereo pair 7 8 Set any unused inputs to CD Connect your turntable ground wires to the ground posts provided on the rear panel when using PH inputs One stereo Session Input is available on a pair of RCA jacks This input may connect two mixers together or as a general purpose auxiliary input The Mic Input will accept an XLR 3 pin plug a balanced TRS tip ring sleeve plug or an unbalanced TS tip sleev...

Page 7: ...me time ASIO and Core Audio drivers are not available when Scratch Live is running USB Playback Stereo Pair Scratch Live Description Mixer Use 1 1 2 Left Virtual Deck Output Select as PGM 1 or PGM 2 Source 2 3 4 Right Virtual Deck Output Select as PGM 1 pr PGM 2 Source 3 5 6 SP 6 Output Option USB AUX Source 4 7 8 DJ FX Return to the Mixer FlexFX Insert Return USB Record 1 1 2 Record Source PGM 1 ...

Page 8: ... Setup Hardware Control Source PGM 2 and select 4 Left Virtual Deck 1 USB stereo playback 1 2 Right Virtual Deck 2 USB stereo playback 3 4 Level LEVEL controls adjust the input gain from off to 15 dB Unity gain no boost or cut is at 12 o clock Pan Left Right PAN controls adjust the balance of left and right signals Left and right are equal at 12 o clock Program Channels Two Program channels or bus...

Page 9: ...AUX input has it s own LEVEL FlexFx assign and CUE To assign the SP 6 Sample Player to AUX click the SP 6 tab on the main Scratch Live screen and select A as the SP 6 output See Enable SP 6 Sample Player on page 39 Mic Input This Mic input on a XLR TRS combo jack has LEVEL High and Low tone controls FlexFx assign and a meter Select MIC or LINE level using the rear panel switch LINE is usually corr...

Page 10: ...in Scratch Live between the USB send and USB return or Enable Mixer DJ FX send is not checked in Scratch Live the signal will be interrupted when the INSERT button is turned on See Enable DJ FX on page 39 See DJ FX Plugin on page 27 4 The FlexFX CUE is after the analog external insert USB insert and before the Wet Dry control This allows cueing a Wet signal while listening to the Dry signal before...

Page 11: ...e selected on the mixer for each of the four inputs The mode can only be changed on the mixer Phono Sensitivity If Phono input is selected on the mixer the Phono Sensitivity control appears Clicking the down arrow displays a list of 16 sensitivity settings between 2 5 mV and 10 mV in 0 5 mV steps Set the Phono Sensitivity to the same level of your cartridge see your cartridge documentation for the...

Page 12: ...application The Sixty One converts the control signal coming from each deck into digital audio to be sent via USB to the Scratch Live software which decodes that signal into a stream of information based on what the DJ is doing with the control disc A virtual deck replicates the movements of the control disc Audio files loaded onto the Virtual Decks are then played back through the outputs of the ...

Page 13: ...example Scratch Live 2 0 0 When you install the new version the old application will not be overwritten and you can choose which version you want to run by going into the folder and double clicking on the application You can also do this if you have already installed the latest version just rename the application eg to Scratch Live 2 1 1 and then reinstall the earlier version Windows Users before ...

Page 14: ...The Noise Threshold A threshold is a lower limit below which a process will not occur In the case of Scratch Live the noise threshold is the limit below which the input signal will not be interpreted as control signal in other words if it s below the threshold it is considered noise and ignored This setting is necessary because a stylus is very sensitive and will inevitably pick up noise from the ...

Page 15: ...udio files see Whitelabel net on page 16 NOTE Older iTunes Music Store DRM files cannot be played back by Scratch Live iTunes Plus files are DRM free Playing Music Click on the All icon to show all the tracks in your library Use the keyboard shortcut Shift Left Arrow to load the highlighted track on to the Left Deck and Shift Right Arrow to load the highlighted track on to the Right Deck TIP You c...

Page 16: ...ive hardware is connected Without Scratch Live hardware connected or when playing these files through other mp3 software and devices they will play as low quality 32 kbps mono audio Whitelabel audio files are promotional releases from records labels available to Scratch Live DJs for free from Whitelabel net Set Auto BPM If this option is checked while analyzing files Scratch Live will calculate th...

Page 17: ...o contact with the computer necessary To use Vinyl Scroll with turntables lift the needle off the record and drop it into special bonus track section at the end of the record s A side The movement of the control disk now controls the selected track within your library Lift the needle out of the Vinyl Scroll section of the record and into the lead out between the Vinyl Scroll area and the end of th...

Page 18: ...e same tempo but are out of sync Track Overview Display This view provides a complete overview of the track waveform and includes a marker to show the current position within the track This view is useful for finding transitions within the track The waveform is colored according to the sound spectrum red representing low frequency bass sounds green representing mid frequency sounds and blue repres...

Page 19: ... bar activates the tempo tapper press alt space bar a second time to activate the tempo tapper on the Right Virtual Deck Tap the space bar along with the beat After you ve tapped the first beat you can switch to double time tapping half time start of each bar etc The range is set by the first two taps after that you can switch to any steady rhythm you feel comfortable with quarter notes half note ...

Page 20: ...Library Mode Maximizes your library space by minimizing the Virtual Deck information displayed In Library Mode only the track information Virtual Deck mode track overview display and meter are displayed TIP Use the space bar to toggle between Library Mode and your current display mode Classic Vertical Mode Two Decks are displayed on the left and right sides of the screen with vertical waveforms in...

Page 21: ... mode to ABS mode by lifting the needle and placing it in the lead in of the control record Emergency Internal mode will activate after 1 second Use the keyboard shortcut F1 left deck or F6 right deck to switch to ABS mode NOTE Be careful when scratching near the end of the record not to accidentally go past this point and into internal mode or the track will no longer respond to record movement R...

Page 22: ...ere is a temporary cue point that can be used like the cue button on many DJ CD players Press ctrl I to set this temporary cue point on the Left Deck and ctrl K to set it on the Right Deck This temp cue point is shown in the main waveform as a white marker This cue point is not saved with the track and by default is set to the beginning of the track Press I to jump to this temporary cue point on t...

Page 23: ...point click on the colored square and choose a new color from the drop down menu To name your cue point double click on the time field You can now edit and name this cue point to whatever you like You can also drag and drop cue points to change their order in the list If you wish to have the cue points sorted by time check Sort cues chronologically in the Playback tab on the Setup screen If you lo...

Page 24: ... alt 1 triggers a 1 beat loop and alt 5 triggers a 16 beat loop Loop Roll Loop roll performs a standard auto loop but when the loop is turned off the playback position is returned to the position where it would be if it had not entered the loop much like censor The other difference between loop roll and standard auto loop is the roll button is momentary The loop is engaged when the button is press...

Page 25: ...3 v slot 4 b slot 5 n slot 6 to trigger each sample respectively SP 6 Instant Doubles You can instant double from the Virtual Decks down to the SP 6 from the SP 6 up to the Virtual Decks and also between the sample slots themselves This means the position track gain and speed will match when you drag a track to from one location into another This allows you to beat match tracks with your turntable...

Page 26: ...ne the maximum gain volume of the loaded sample The gain adjustment will also be written to the track s ID3 tag meaning that it will be the same everytime you load it SP 6 Output Selector Use the master output selector button to choose where you wish to have the SP 6 output to L to PGM 1 with 1 or 2 selected as the PGM Source A to AUX Rto PGM 2 with 1 or 2 selected as the PGM Source There is also ...

Page 27: ...io from slot 1 passes through slot 2 which is then passed through slot 3 Effects BPM Multiplier The Effects BPM Multiplier is used to adjust the effect time The effect time is set using the track s BPM value but by applying the Effects BPM Multiplier you can increase or decrease the effect time Deck Assign You can select which Deck the FX unit applies to by clicking the Deck buttons Each Deck can ...

Page 28: ...he mouse If you need to change a control using the mouse disable MIDI assign mode MIDI Platters The Scratch Live Virtual Decks are not user assignable to MIDI control MIDI devices with platters on them all send different data so user mapping is not possible To control the platter use a natively supported controller Assigning MIDI to Other Controls Controls which are not normally visible are availa...

Page 29: ...crates you can create and any given track can be placed in multiple crates For example you could organize your files into the following crates where any one track would be filed in more than one crate Hip Hop UK Hip Hop French Hip Hop Inst Hip Hop Old Hip Hop Hip Hop LPs To make a new crate click the Add New Crate button in the bottom left corner of the main screen brown crate icon To rename a cra...

Page 30: ...e of the search box The drop down menu shows which fields are currently being used Press esc or the x button on the right of the search box to clear the search TIP Use the keyboard shortcut ctrl f to jump to the search box This keyboard shortcut will also take you out of any crate or playlist that you might be in and into your main library so you can find any track in your collection If you then c...

Page 31: ...e playlist and track information NOTE We recommend that you turn off any wireless networking devices when using Scratch Live If you export your playlist online whilst playing you may experience USB dropouts If so you may wish to avoid using this function Live Playlists Serato Playlists has the Live Playlists option to allow you to display what you are playing online in realtime on your serato com ...

Page 32: ...s of each track The image to the left shows five tracks with differing statuses Scratch Live has detected some corruption in the MP3 file If possible re encode the MP3 The track has been imported from the iTunes library The track has been imported from the iTunes library and Scratch Live has detected some corruption in the MP3 file Solution If possible re encode the MP3 The track cannot be found M...

Page 33: ...ormation is in the Support Articles at serato com Scratch Live Backup Scratch Live stores your library database and crates information in the Scratch Live folder on your hard disk This folder is created on a drive when files are added to Scratch Live A copy of each Scratch Live folder called ScratchLiveBackup is created next to the folder it is backing up This folder is created when exiting Scratc...

Page 34: ...ut of the Sixty One If possible turn down the level at your audio source before it reaches the Sixty One TIPS The keyboard shortcut ctrl n turns recording on and off Load a recording without saving it using the shortcut keys shift left arrow to the Left Deck or shift right arrow to the Right Deck NOTE Recording files are automatically split when the recording exceeds 3 hours 16 bit or 1 hour 50 mi...

Page 35: ...to the recycle bin Note to iTunes users files in your iTunes library cannot be deleted this way ctrl shift Toggle the input reverse switch Toggle the Flashing Deck indicator between the Primary and Secondary Decks esc Clear search string if searching or exit Scratch Live SAMPLE PLAYER slot 1 slot 2 slot 3 slot 4 slot 5 slot 6 Load to sample slot ctrl alt Z ctrl alt X ctrl alt C ctrl alt V ctrl alt...

Page 36: ...trols to be custom MIDI mapped in Scratch Live See MIDI Mapping on page 46 Recording Bit Depth Choose to record in either 16 Bit CD quality smaller file size or 24 Bit high quality larger file size See Recording on page 34 Input Select Status The input levels currently set by the switches on the Sixty One are displayed for each input To change the input level setting use the switches on the Sixty ...

Page 37: ...more Once you ve made this adjustment load the same track onto the Virtual Deck again You ll notice that the volume knob has automatically adjusted itself Keep making adjustments on the same track until it s just below the clipping point Once this is set you won t need to adjust the target gain level ever again Because the track you used had an average volume level most of the other tracks in your...

Page 38: ...ur iTunes library and playlists in Scratch Live You can collapse your iTunes playlists by clicking on the blue folder icon Uncheck this option to remove iTunes playlists and iTunes songs from your Scratch Live library To add your iTunes music to your Scratch Live library permanently drag and drop tracks from the iTunes playlists onto the All icon on the far left hand side of the Scratch Live scree...

Page 39: ...rary and the Setup screen Audio Cache Use this slider to set the amount of audio that is loaded into memory A small audio cache will place less load on your computer and the tracks will load faster A large audio cache will give you a bigger view of the waveform when the main waveform view is zoomed out The default is 15 seconds Show Album Art On Deck Check this option to show the album art for you...

Page 40: ... takes a while to load Scratch Live has to read the entire file and create a file index overview the first time it is loaded This may take a few seconds for longer files After the first load it should load instantly See Preparing Your Files on page 16 I have a particular MP3 that won t play plays badly takes a long time to load crashes What should I do The file may be damaged and may need to be de...

Page 41: ...n audio file Unsupported file This MP3 contains mul tiple layers While scanning this file Scratch Live found frames belonging to multiple MPEG layers Scratch Live does not support MP3s containing frames from multiple layers some frames may output as silence Unsupported file This file is more than 2 GB in size Self explanatory At the moment Scratch Live does not support files that are 2 GB in size ...

Page 42: ...TION Bass is reaching the stylus Try to isolate the turntable from the speakers CD PLAYER INTO PHONO INPUT The Sixty One is set to receive a phono input Switch to the correct setting on the mixer PHONO INTO LINE INPUT The Sixty One is set to receive line level input Switch to the correct setting on the mixer DUSTY NEEDLE Dust is preventing the stylus from tracking the groove correctly Clean your n...

Page 43: ...d Scratch Live is unable to track Swap sides or get new vinyl ASAP LEFT CHANNEL IS NOISE Left signal has been lost with a noisy loose connection RIGHT CHANNEL IS NOISE Right signal has been lost with a noisy loose connection TONEARM IS SLIGHTLY TOO LIGHT Susceptible to dust and vibration Adjust the tonearm Signals are summing to mono The left and right signals have been combined into one somewhere...

Page 44: ...tereo Record Four Stereo Playback 48 kHz 32 bit floating point FlexFX Return Stereo unbalanced TS tip sleeve phone jack FlexFX Send Stereo unbalanced TS phone jack Mic Input Balanced TRS XLR combination jack Tone Controls 2 band High and Low Mic Line level switch Choose Line to connect wireless receiver Line Outputs Frequency Response 20 Hz to 20 kHz 0 25 dB Line in to Line out THD N 0 01 re 0 dBF...

Page 45: ...emble Plug in the connector before re installing the fader Note the connector only will fit one way Test all the faders before installing the fader panel face plate and fader knobs Fader Cleaning 1 For a light cleaning move the carrier to one side and wipe rails with a lint free cloth Move the carrier to the other side and repeat 2 If a heavier cleaning is required to remove oily lubricants or gre...

Page 46: ... Note on off MIDI controls are associated with mixer functions and restricted to MIDI out only A user is unable to control mixer functions via MIDI and is unable to change the color or intensity of an LED under one of these mixer controls Users are able to use MIDI out messages from these controls to trigger or control software functions Note Hex Function 4 0x04 FlexFx Cue 17 0x11 Channel Swap 24 ...

Page 47: ...0x01 3 14 46 2 0x02 3 5 12 12 3 0x03 4 11 96 4 0x04 4 5 10 94 5 0x05 5 Default 10 02 6 0x06 5 5 9 19 7 0x07 6 8 44 8 0x08 6 5 7 74 9 0x09 7 7 10 10 0x0A 7 5 6 5 11 0x0B 8 5 94 12 0x0C 8 5 5 41 13 0x0D 9 4 92 14 0x0E 9 5 4 45 15 0x0F 10 4 00 22 0x16 PGM 1 Filter Resonance 0 127 0x00 0x7F Low to High Resonance 23 0x17 PGM 1 Input Record Source USB 5 6 1 0x01 Record A1 2 0x02 Record A2 24 0x18 Analog...

Page 48: ...evel 0 127 0x00 0x7F 100 0x64 Mic Level 0 127 0x00 0x7F 101 0x65 PGM 1 High 0 127 0x00 0x7F 102 0x66 PGM 2 High 0 127 0x00 0x7F 105 0x69 Headphone Cue Main Pan 0 127 0x00 0x7F 112 0x70 PH CD 1 Select 0 0x00 Phono 1 0x01 Line 113 0x71 PH CD 2 Select 0 0x00 Phono 1 0x01 Line 114 0x72 PH CD 3 Select 0 0x00 Phono 1 0x01 Line 115 0x73 PH CD 4 Select 0 0x00 Phono 1 0x01 Line 116 0x74 PGM 1 Source Select...

Page 49: ...declaration of conformity is issued under the sole responsibility of Rane Corporation Type of Equipment Professional Audio Signal Processing Brand Rane Model Sixty One Immunity Results THD N 4 dBu 400 Hz BW 20 Hz 20 kHz Test Description Measurement Conditions RF Electromagnetic Fields Immunity 80 MHz 1000 MHz 1 kHz AM 80 depth 3V m 61 dB 1400 MHz 2700 MHz 1 kHz AM 80 depth 3V m 61 dB Conducted RF ...

Page 50: ...HICH IS DESCRIBED TO THE ORIGINAL RETAIL PURCHASER BY THE AUTHORIZED RANE DEALER OR DISTRIBUTOR AT THE TIME OF PURCHASE Rane Corporation does not however warrant its products against any and all defects 1 arising out of materials or workmanship not provided or furnished by Rane or 2 resulting from abnormal use of the product or use in violation of instructions or 3 in products repaired or serviced...

Page 51: ... purchased in the U S AT THE RANE FACTORY IN THE U S If the product is being sent to Rane for repair please call the factory for a Return Authorization number We recommend advance notice be given to the repair facility to avoid possible needless shipment in case the problem can be solved over the phone UNAUTHORIZED SERVICE PERFORMED ON ANY RANE PRODUCT WILL VOID ITS EXISTING FACTORY WARRANTY FACTO...

Page 52: ...RANE SIXTY ONE MIXER FOR SERATO SCRATCH LIVE OPERATOR S MANUAL 2 4 4 PART 21322 ...

Reviews: