background image

Instrument Tour

R&S

®

NRX

20

Getting Started 1424.7070.02 ─ 04

5.2.3


USB Device Interface

See (3) in 

Figure 5-2

.

USB


2.0 (universal serial bus) interface of the type B (receptacle). Used to connect the

R&S NRX to a computer for USB remote control or to perform a firmware update.

5.2.4


USB Host Interface

See (4) in 

Figure 5-2

.

See 

Chapter 5.1.6, "USB Host Interface"

on page 18.

5.2.5


AC Supply and Power Switch

See (5) in 

Figure 5-2

.

When the R&S NRX is connected to the AC supply, it automatically sets itself to the
correct range for the applied voltage. The range is printed on the type label. There is
no need to set the voltage manually.

For more details, see 

Chapter 4.5, "Connecting to the AC Power Supply"

on page 12.

5.2.6


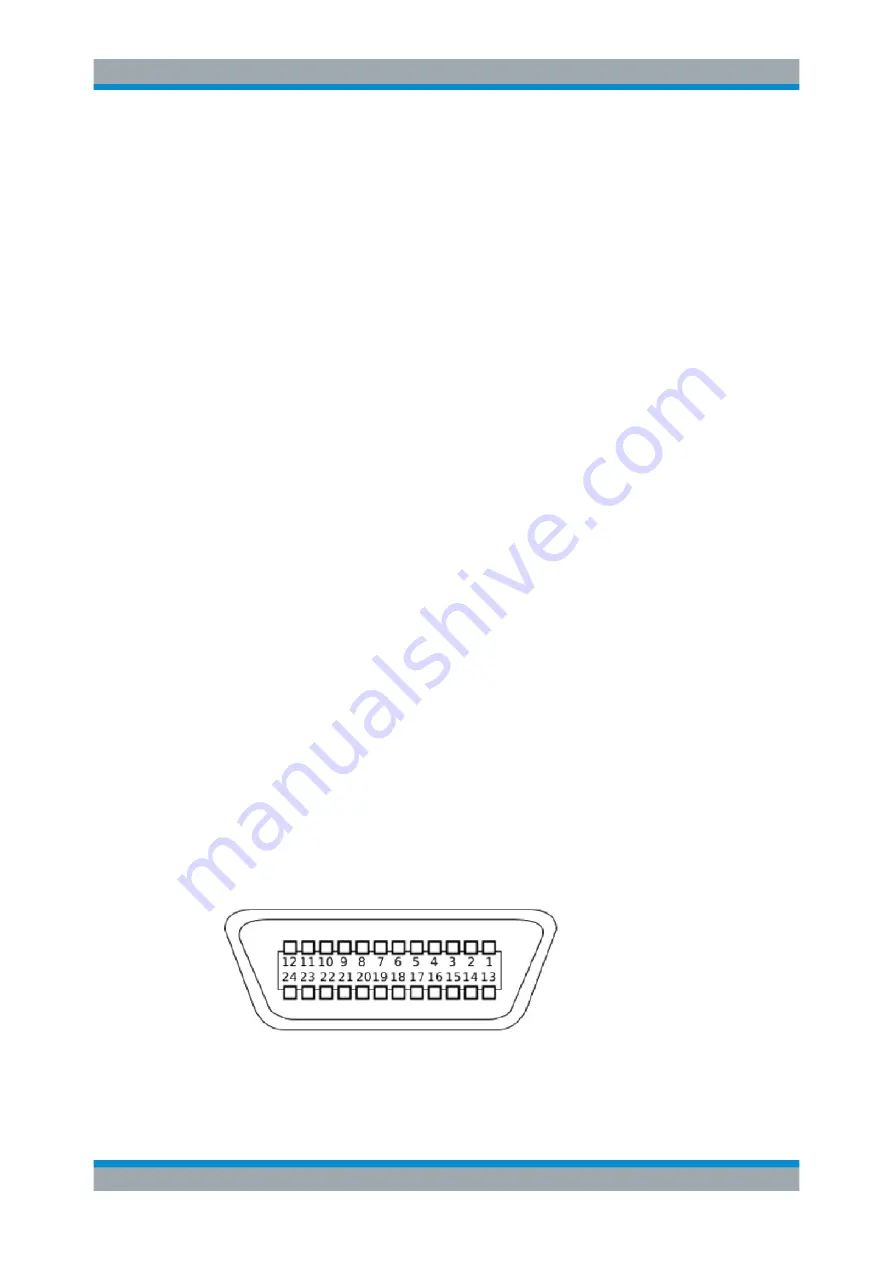
IEC 625/IEEE 488 Interface

See (6) in 

Figure 5-2

.

Requires GPIB/IEEE488 interface (R&S NRX-B8).

IEC bus (IEEE 488) interface for remote control of the R&S NRX. Used to connect a
controller to remote control the R&S NRX. Use a shielded cable for the connection.

Characteristics of the IEC bus (IEEE 488) interface:

8-bit


parallel data transfer

Bidirectional data transfer

Three-wire handshake

High data transfer rate

Maximum length of connecting cables 15


m (single connection 2


m)

Rear Panel Tour

Summary of Contents for NRX

Page 1: ...R S NRX Power Meter Getting Started Getting Started Version 04 1424707002 H 2...

Page 2: ...164 Email info rohde schwarz com Internet www rohde schwarz com Subject to change Data without tolerance limits is not binding R S is a registered trademark of Rohde Schwarz GmbH Co KG Trade names ar...

Page 3: ...ic Safety Instructions and the product documentation in a safe place and pass them on to the subsequent users Riesgo de lesiones y da os en el instrumento El instrumento se debe usar de manera adecuad...

Page 4: ...die Produktdokumentation gut auf und geben Sie diese an weitere Benutzer des Produkts weiter Risque de blessures et d endommagement de l appareil L appareil doit tre utilis conform ment aux prescript...

Page 5: ...y Features 8 4 Preparing for Use 9 4 1 Unpacking and Checking 9 4 1 1 Accessory List 9 4 2 Operating Conditions 9 4 3 Important Aspects for Test Setup 10 4 4 Placing on a Bench Top 10 4 5 Connecting t...

Page 6: ...andby Key 18 5 2 Rear Panel Tour 19 5 2 1 Trig In Out 2 and Out 1 Trig Out Connectors 19 5 2 2 Ethernet Interface 19 5 2 3 USB Device Interface 20 5 2 4 USB Host Interface 20 5 2 5 AC Supply and Power...

Page 7: ...mands with programming examples and information on maintenance instrument interfaces and error messages Includes the contents of the getting started manual 1 3 Tutorials Tutorials offer guided example...

Page 8: ...cribe the firmware installation The open source acknowledgment document provides verbatim license texts of the used open source software See www rohde schwarz com firmware NRX 1 7 Application Notes Ap...

Page 9: ...ion is part of the product documentation It warns you about the poten tial dangers and gives instructions how to prevent personal injury or damage caused by dangerous situations Safety information is...

Page 10: ...es The R S NRX offers the following key features Simple touchscreen operation on a 5 color touchscreen Straightforward numerical and graphical display of measured values Expandable to up to four measu...

Page 11: ...ds to be transported or ship ped later you can use the material to protect the control elements and connectors 4 1 1 Accessory List The R S NRX comes with the following accessories Printed getting sta...

Page 12: ...d to connect yourself to the ground Use a conductive floor mat and heel strap combination EMI impact on measurement results Electromagnetic interference EMI may affect the measurement results To suppr...

Page 13: ...N Risk of injury when stacking instruments A stack of instruments can tilt over and cause injury if not stacked correctly Further more the instruments at the bottom of the stack can be damaged due to...

Page 14: ...operating mode Connect the R S NRX to the AC power supply using the power cable that is sup plied The R S NRX complies with safety class EN61010 1 The power supply of the R S NRX must be connected to...

Page 15: ...es there is almost no limit to the possi ble expansions In the following USB devices that can be useful are listed Memory stick for easy transfer of data to from a computer e g firmware updates Keyboa...

Page 16: ...y 2 8 pin male connector of R S NRP ZK8 a Insert this connector into one of the sensor ports of the R S NRX 3 Connect the RF connector of the R S power sensor to the signal source For details see the...

Page 17: ...to be set and for numeric entries see Chapter 5 1 5 Cursor Block on page 18 6 USB host interface see Chapter 5 1 6 USB Host Interface on page 18 7 On standby key see Chapter 5 1 7 On Standby Key on pa...

Page 18: ...s results in panes Depending on the measurement mode val ues are displayed digitally or graphically False triggers of the touch panel in the presence of static electricity If an object e g a human fin...

Page 19: ...an enter a new value Enter Confirms entries in text fields dialogs and selections in lists Freq Sets the carrier frequency of the applied signal This value is used for frequency response correction of...

Page 20: ...o connect external devices like a keyboard mouse or memory stick See Chapter 4 7 Connect ing USB and External Devices on page 13 5 1 7 On Standby Key See 7 in Figure 5 1 The on standby key toggles the...

Page 21: ...ge 20 7 Sensor connectors C and D optional used to connect R S power sensors see Chapter 5 2 7 Sensor Connectors C and D on page 21 5 2 1 Trig In Out 2 and Out 1 Trig Out Connectors See 1 in Figure 5...

Page 22: ...the correct range for the applied voltage The range is printed on the type label There is no need to set the voltage manually For more details see Chapter 4 5 Connecting to the AC Power Supply on pag...

Page 23: ...Getting Started 1424 7070 02 04 5 2 7 Sensor Connectors C and D See 7 Figure 5 2 Requires 3rd and 4th R S NRP sensor connector R S NRX B4 For more details see Chapter 5 1 1 Sensor Connector A and B o...

Page 24: ...9 External devices 13 F Favorites key 17 Freq key 17 Front panel keys 16 G Getting started 5 H Hardware option 16 Help 5 I IEC 625 IEEE 488 interface 20 Interface Ethernet 19 IEC 625 IEEE 488 20 Modul...

Page 25: ...Index R S NRX 23 Getting Started 1424 7070 02 04 Trig In Out 2 BNC connector 19 Tutorials 5 U Unpacking 9 USB Device interface 20 Host interface 18 20 User manual 5 W White papers 6 Z Zero key 17...

Reviews: