background image

13

6 Amp Reciprocating Saw - Owner's Manual

WARNING:

For safety reasons, the operator must 

read the sections of this Owner’s Manual 

entitled "GENERAL SAFETY WARNINGS", 

"POWER TOOL SAFETY", "SPECIFIC 

SAFETY RULES", "EXTENSION CORD 

SAFETY" and "SYMBOLS" before using 

this reciprocating saw.  

Verify the following every time the 

reciprocating saw is used:  

1.  The correct blade for the material 

being cut is installed in the saw. 

2.  The blade is firmly clamped in the 

blade holder.

3.  The blade is sharp and in good 

condition.

4.  The workpiece is properly secured.

5.  Safety glasses and hearing protection 

are being worn.


Failure to observe these safety rules will 

significantly increase the risk of injury.

GENERAL CUTTING

1. 

Clearly mark the workpiece to locate 

the position of the cut. 

2.  Hold smaller workpieces with a 

vice. Clamp larger workpieces to a 

workbench or table.

DANGER:

 Any workpiece that is not 

adequately clamped in place may come 

loose and cause serious injury. Never hold 

the workpiece with your hand.

3.  Make sure there are no nails, screws, 

clamps or foreign materials in the path 

of the saw blade.

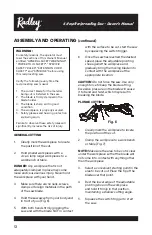
4.  Hold the saw away from your body and 

in front of you (Fig. 6).

5.  With both hands firmly gripping the 

saw, and with the blade NOT in contact 

with the surface to be cut, start the saw 

by squeezing the switch trigger.

6.  Once the saw has reached the desired 

speed, place the adjustable pivoting 

shoe against the workpiece and 

gradually bring the moving blade into 

contact with the workpiece at the 

appropriate location.

CAUTION: 

Do not force the saw. Use only 

enough force to keep the blade cutting. 

Excessive pressure on the blade will cause 

it to bend and twist, which may result in 

breaking the blade.

PLUNGE CUTTING

1. 

Clearly mark the workpiece to locate 

the position of the cut. 

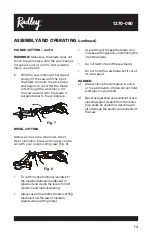
2.  Clamp the workpiece to a workbench 

or table (Fig. 7).

NOTE: 

Make sure the area to be cut is clear 

under the workpiece so that the blade will 

not come into contact with anything other 

than the workpiece.

3.  Select a convenient starting point in the 

area to be cut out. Place the tip of the 

blade over that point.

4.  Rest the lower edge of the adjustable 

pivoting shoe on the workpiece 

and hold it firmly in that position, 

maintaining a shallow cutting angle.

5.  Squeeze the switch trigger to start 

the saw.

ASSEMBLY AND OPERATING 

(continued)

Fig. 6 

Summary of Contents for 1270-080

Page 1: ...1270 080 3042597 JD3507U Owner s Manual...

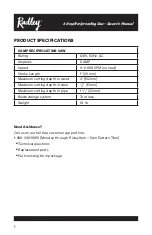
Page 2: ...day 9am 5pm Eastern Time Technical questions Replacement parts Parts missing from package 6 AMP RECIPROCATING SAW Rating 120V 60Hz AC Amperes 6 AMP Speed 0 2 800 SPM no load Stroke Length 1 26 mm Maxi...

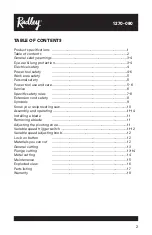
Page 3: ...ic safety rules 7 8 Extension cord safety 8 Symbols 9 Know your reciprocating saw 10 Assembly and operating 11 14 Installing a blade 11 Removing a blade 11 Adjusting the pivoting shoe 11 Variable spee...

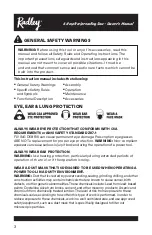
Page 4: ...ION WARNING Use hearing protection particularly during extended periods of operation of the tool or if the operation is noisy WEAR A DUST MASK THAT IS DESIGNED TO BE USED WHEN OPERATING A POWER TOOL I...

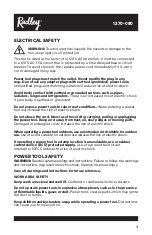
Page 5: ...se the cord for carrying pulling or unplugging the power tool Keep cord away from heat oil sharp edges or moving parts Damaged or entangled cords increase the risk of electric shock When operating a p...

Page 6: ...he power tool may result in personal injury Do not overreach Keep proper footing and balance at all times This enables better control of the power tool in unexpected situations Dress properly Do not w...

Page 7: ...e of parts and any other condition that may affect the power tool s operation If damaged have the power tool repaired before use Many accidents are caused by poorly maintained power tools Keep cutting...

Page 8: ...changing the blade and when making any adjustments Do not wear gloves neckties or loose clothing Hold the tool by its insulated gripping surfaces when performing an operation where the saw blade may...

Page 9: ...amaged extension cord or have it repaired by a qualified electrician before using it Protect your extension cord from sharp objects excessive heat and damp or wet areas Use a separate electrical circu...

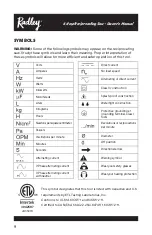
Page 10: ...d to CAN CSA Std C22 2 No 60745 1 60745 2 11 Volts Amperes Hertz Watts Kilowatts Microfarads Liters Kilograms Hours Newtonspersquarecentimeter Pascals Oscillations per minute Minutes Seconds Alternati...

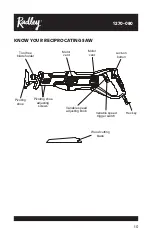
Page 11: ...YOUR RECIPROCATING SAW Wood cutting blade Hex key Motor vent Variable speed trigger switch Motor vent Pivoting shoe adjusting screws Pivoting shoe Tool free blade holder Variable speed adjusting knob...

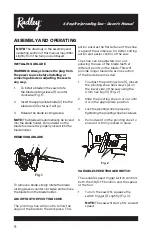
Page 12: ...is against the workpiece for better cutting action and easier control of the saw The shoe can be adjusted in or out allowing the use of the blade teeth at different points on the blade This will prov...

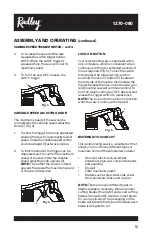
Page 13: ...periods of time is required Fig 5 To lock the switch ON depress the trigger switch push in and hold the lock on button 5 located at the left side of the handle then release the trigger Release the loc...

Page 14: ...terials in the path of the saw blade 4 Hold the saw away from your body and in front of you Fig 6 5 With both hands firmly gripping the saw and with the blade NOT in contact with the surface to be cut...

Page 15: ...o cut thin sheet material sandwich the material between hardboard or plywood and clamp the layers to limit vibration and material tearing Always use a fine toothed metal cutting blade and run the saw...

Page 16: ...ools are subjected to accelerated wear and possible premature failure when they are used on fiberglass boats and sports cars wallboard spackling compounds or plaster The chips and grindings from these...

Page 17: ...16 1270 080 EXPLODED VIEW 1 2 3 4 5 6 7 8 9 10 11 12 13 14 15 16 17 18 19 20 21 22 23 24 25 26 27 28 29 30 31 32 33 34 35 36 37 38 39 40 41 42 43...

Page 18: ...2 11 1230010122 Carbon brush 2 12 4010010053 Bearing 607 2RS 1 13 1010110015 Rotor 1 14 1020110013 Stator 1 15 3150010029 Fan 1 16 2030030260 Fixed plate 1 17 4010010054 Bearing 6000 2RS 1 18 4030010...

Page 19: ...ll of sale for exchange This warranty does not include expendable parts including but not limited to blades brushes belts light bulbs and or batteries This warranty covers defects in material or workm...

Page 20: ...right blade can cut through literally anything wood steel and pipes it makes a hard day s work not hard at all Here s one saw that doesn t just cut through drywall but with the right blade can cut thr...

Reviews: