background image

Parental Lock Manager

17

Main Menu Guide

16

8. Main Menu Guide

8.1 General Settings

Refer to Section 5.2 on General Settings for

details.

8.2 Favourite List Manager

Refer to Section 7.2 on Favourite List Manager for

details.

8.3 Channel Manager

Refer to Section 7.1 on Channel Search for details

on Auto Search, and Manual Search.

We will take a look at other functions.

Reinstallation

Use this to restore all settings to their default values.

Press the MENU button on the remote control.

Select 

Channel Manager

.

Select 

Reinstallation

.

When the 

Input Password

message appears, enter the password.

The settings (such as channel information and language) on the Receiver will be restored to their

defaults. However, the Receiver cannot revert to its default state if the password has been changed.

When you perform  Reinstallation of the Receiver, the Receiver will be initialized in one of two ways. The

difference is determined by the Receiver model type .

• Settings will be restored to their factory default settings and channel information programmed at the

factory will remain unchanged.

• Settings will be restored to their factory default settings and channel information programmed at the

factory will also be deleted.

Delete All Channels

Use this if necessary to delete all your  channels . If you use this, channels only will be deleted without

affecting your  existing settings .

Press the MENU button on the remote control.

Select 

Channel Manager

.

Select 

Delete All Channels

.

When the 

Input Password

message appears, enter the password.

When the message asking you to confirm the delete operation appears, press the OK button.

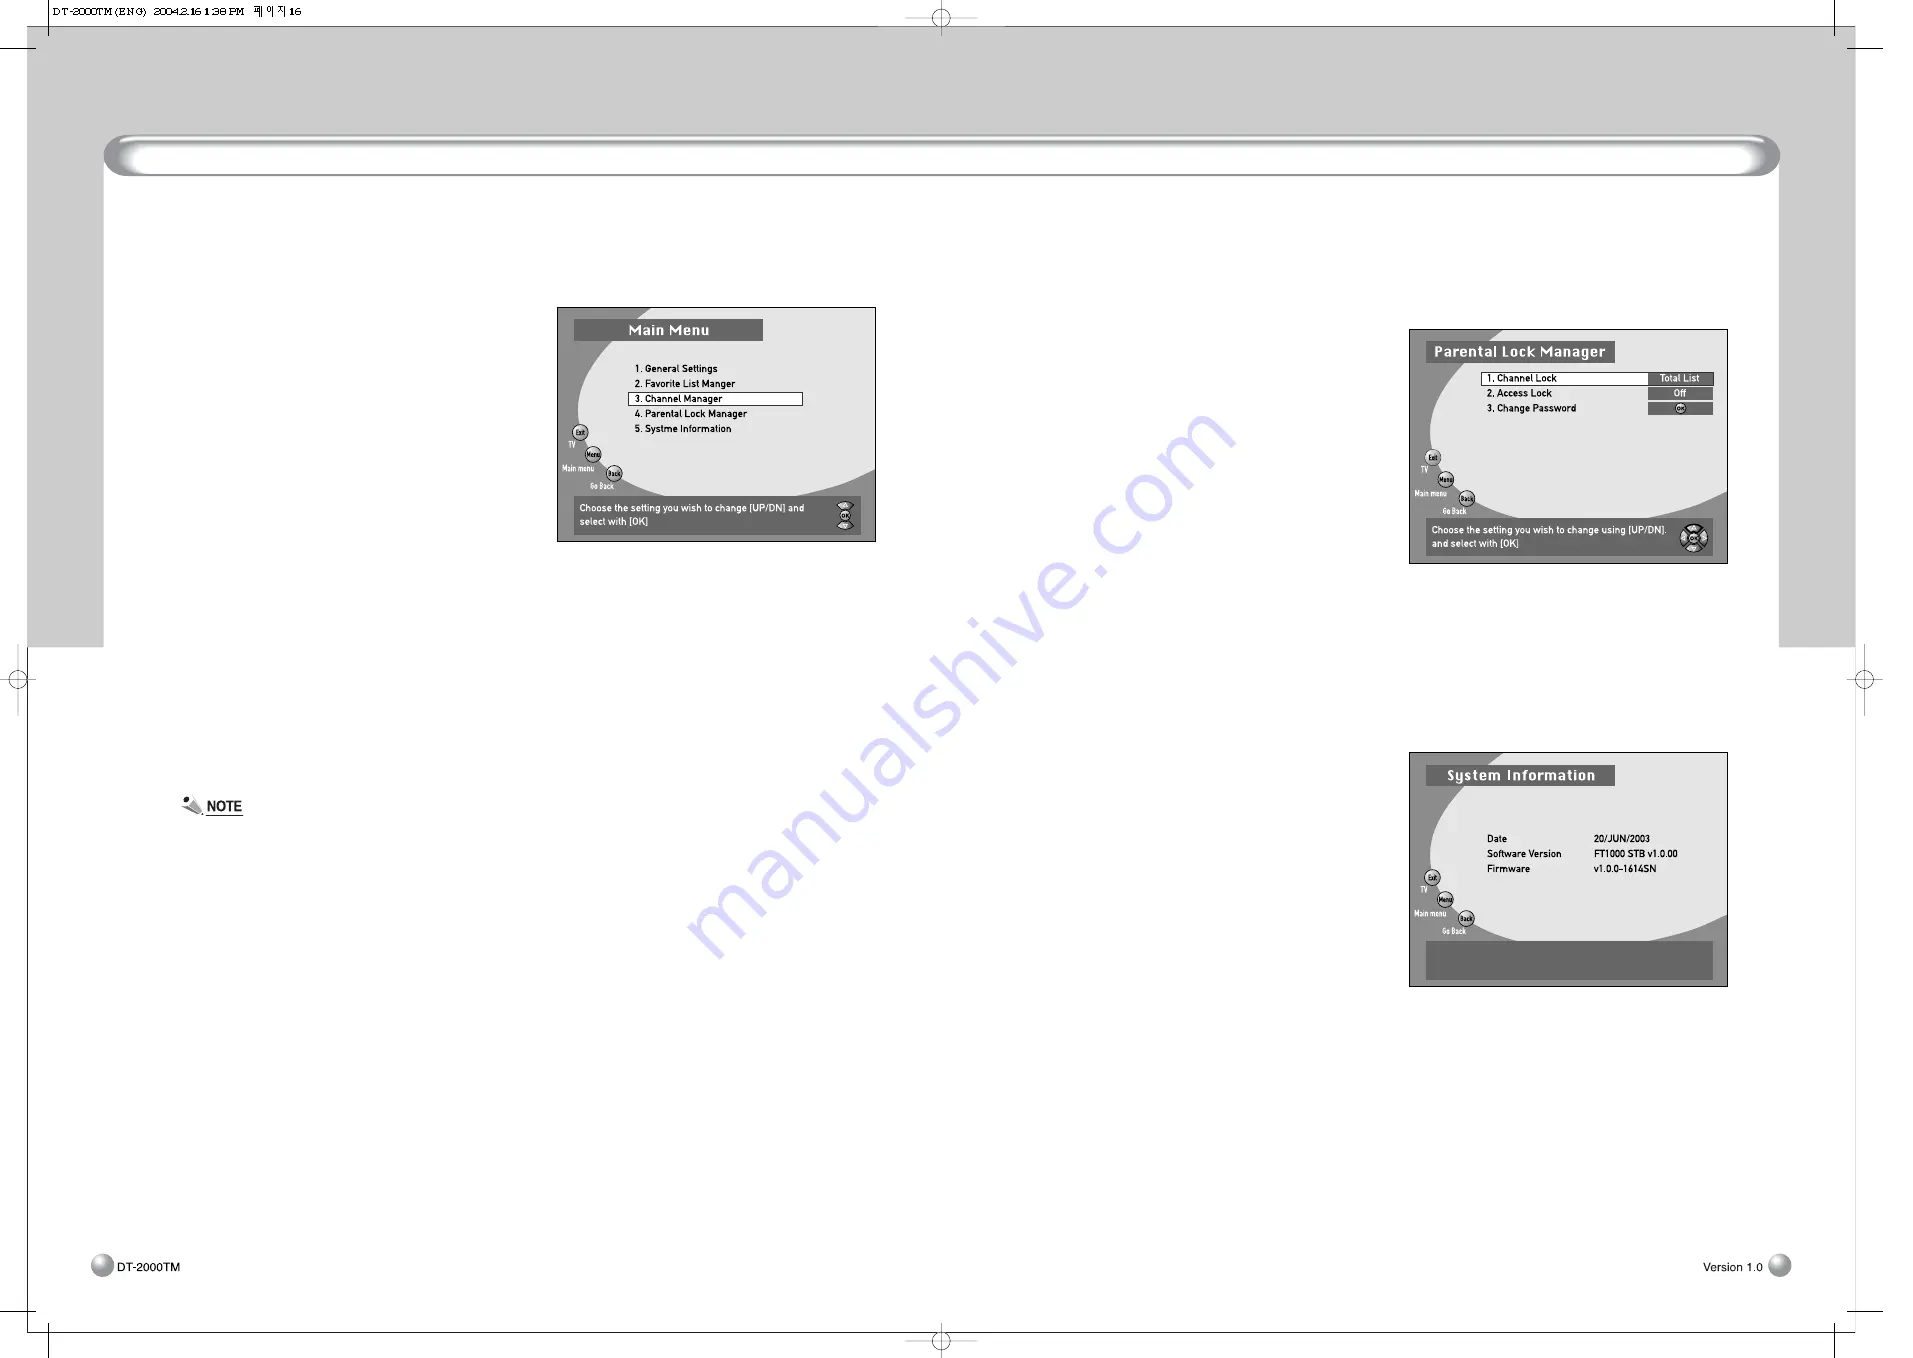
8.4 Parental Lock Manager

This allows you to lock particular channels or the Receiver itself. For example, you can prevent your children

from accessing adult programme using this function.

Press the MENU button on the remote control.

Select 

Parental Lock Manager

.

When the 

Input Password

message appears,

enter the password. The factory default user

password is 

0000

.

When the Parental Lock Manager screen appears,

set the following items.

• Channel Lock

Select the channel you want to lock. When

someone switches to the locked channel, the

password screen will appear.

Access Lock

Enable or disable whether to ask for the password when the Receiver is powered on. This may be set to

On or Off.

• Change Password

Select this to change the password. When someone switches to the locked channel, the password

screen will appear.

8.5 System Information

This displays brief information on the Receiver’s

software. 

Use this to check the software version or release

date of the current software before upgrading 

System information is as follows: 

• Date 

• Software Version

• Firmware

Summary of Contents for DT-2000TM

Page 1: ...DT 2000TM ...

Page 2: ...0 6 6 Selecting the Audio Mode 10 6 7 Programme Lists and Sort Manager 11 6 8 Channel Information 11 6 8 1 EPG Button 11 6 8 2 INFO Button 12 6 9 Subtitles and Teletext 12 7 Advanced Operation 13 7 1 Channel Search 13 7 1 1 Auto Search 13 7 1 2 Manual Search 13 7 2 Favourite List 14 8 Main Menu Guide 16 8 1 General Settings 16 8 2 Favourite List Manager 16 8 3 Channel Manager 16 8 4 Parental Lock ...

Page 3: ... receiver please send it together with all accessories and in its original packaging Include a copy of your invoice or receipt as well as a detailed description of the problem Please ensure that you affix adequate postage to the parcel and refer all repairs to an authorised retailer We hope you enjoy using this product 2 Features Basic Features Simple Operation through On Screen Display 1 SCART fo...

Page 4: ...scribed in this guide It must not be used for any other purpose Keep the appliance out of reach of children To avoid injury or demage to your receiver please note the following WARNING Never remove the cover or any part of it Do not allow liquids or objects to get into the receiver DANGER Do not cover ventilation holes there is a risk of fire if receiver over heats DANGER Use only original or prof...

Page 5: ...tch the Receiver between Standby Mode and Operation Mode CH UP and CH DOWN Use to navigate through menu item in Menu Mode use to switch buttons between channels in Viewing Mode Name Function CH UP and CH DOWN Use to navigate through menu items in Menu Mode use to switch buttons between channels in Viewing Mode PAGE UP and Use to scroll through pages of channel list PAGE DOWN buttons LEFT RIGHT but...

Page 6: ...ose ON OFF of 5V power supply to Antenna 6 Quick Start This chapter provides you with instructions on the basic operations of the Receiver As mentioned previously the general settings and channels will already have been set for your area That is you should be able to operate the Receiver without referring to the instructions in Section 5 6 1 Switching Your Receiver On Press the POWER button on the...

Page 7: ...rom the left speaker Mono R Sound comes only from the right speaker AC 3 Dolby Digital To listen to Dolby Digital connect an amplifier with Dolby Digital decoding to the SPDIF output To return to Viewing Mode press the AUDIO button again or press the EXIT button 6 7 Programme List and Sort Manager Digital TV offers hundreds of channels Therefore all the available channels are managed as a list In ...

Page 8: ...ubpage will appear at the lower left hand side of the screen Close Teletext using the Exit button The three coloured button functions are as follows Green Move to default page 100 Yellow Move to most recently watched page Blue Change from display screen from teletext to translucent 7 Advanced Operation This chapter provides instructions on using some of the most frequently used features of the Rec...

Page 9: ...elect Edit Channel Name Use the LEFT RIGHT buttons to select the list containing the channel for which you want to change the name Select the channel and then press the OK button When the screen changes to allow you to change the channel name follow the on screen instructions to change the name Press the OK button Rearrange Channels Use this to change the order of the channels Select the name of t...

Page 10: ...e this if necessary to delete all your channels If you use this channels only will be deleted without affecting your existing settings Press the MENU button on the remote control Select Channel Manager Select Delete All Channels When the Input Password message appears enter the password When the message asking you to confirm the delete operation appears press the OK button 8 4 Parental Lock Manage...

Page 11: ...general password you will need to use to access the Receiver if you have forgotten your User Password The following 4 digit number is the Master Password It is recommended that you record your User Password in the space provided below The User Password is set to 0000 by default Master Password User Password 9 8 1 5 10 Trouble Shooting Note Digital communications involve the simultaneous transfer a...

Page 12: ...F Input Frequency 174MHz 230MHz 470MHz 862MHz RF Loop though output 47 862MHz Input Impedance 75ohms Input Signal Level 80dBm 20dBm Channel Bandwidth 7MHz 8MHz Demodulation According DVB T Type COFDM 2K 8K Mode QPSK 16QAM 64QAM Viterbi Decoding Rate 1 2 2 3 3 4 5 6 7 8 Guard Interval Modes 1 32 1 16 1 8 1 4 active symbol duration Reed Solomon Decoding FEC 204 188 t 8 Transport Demultiplexer Demult...

Page 13: ...annel data transfer Delete all Channels Alphabet Free Scramble Normal Locked Reinstallation 4 Parental Lock Manager Input Password Channel Lock Access Lock Change Password 5 System Information Antenna Booster Power Audio Key Menu Key Subtitle Key OK Key Red Key Green Key Yellow Key Info Key Last Key Info Key EPG Key Radio Key Favorite Video Now Next EPG Change List Add to List I Plate Menu Info Ke...

Reviews: