20
R1K 24 /B - RAD - ING - Manuale - 1507.1 - R2 G
1 C
ollegamenti
ele
ttr
ici
opzionali
_
SE
_T
A
_CR
_
MI
A
H
4 - R2
K
_
E
N
1. INSTALLATION
INST
ALLER
1.1.16. OPTIONAL ELECTRICAL
CONNECTIONS
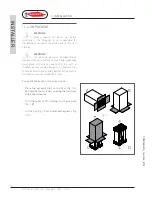
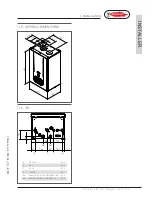
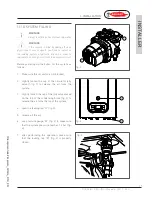
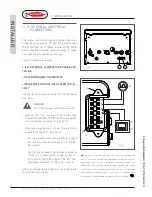
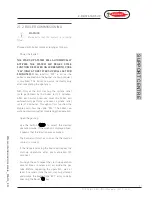
The cables should be inserted inside the boiler
using the cable glands ‘P1’ and ‘P2’ placed under
the board (see fig. 1). Make a hole on the cable
gland, smaller than the cable diameter, to make
sure that the air cannot pass through.
To wire the optionals below:
(SE) EXTERNAL TEMPERATURE PROBE COD.
73518LA
(TA) ENVIRONMENT THERMOSTAT
(CR) REMOTE CONTROL OPEN THERM COD. 40-
00017
use the terminal placed inside the control panel
as follows:
DANGER
Cut off the voltage from the main switch.
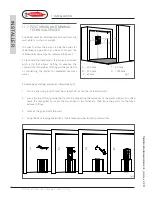
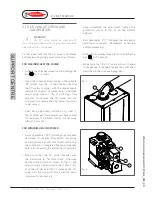
› remove the front casing of the boiler (see
chapter ACCESSING THE BOILER); unscrew the
screws and remove plate “A” (see fig. 1).
› After removing the plate, connect the electrical
cables to terminal “B” (see fig. 2):
· For the external temperature Probe connect
the two non-polarized conductors to the Se-
Se contacts.
· For the environment Thermostat or Remote
control, first remove the bridge on the Ta-
Ta contacts and then connect the two non-
polarized conductors to the Ta-Ta contacts.
After performing these operations, remount plate
“A” and the front casing.
NB:
In case of simultaneous presence of external probe and
remote control, the modulation board only sends the external
temperature value to the remote device without using it for
modulation. The communication between board and remote
control takes place independently from the boiler's operating
mode and after establishing the connection, the used interface
on the board is disabled and the display shows the symbol ‘
’.
P1
P2
L
N
Se
Se
A
Ta
Ta
B
SE
TA
CR
fig. 2
fig. 1


