————————————————————
DO NOT TURN THE POWER ON TO YOUR
SYSTEM UNTIL YOU HAVE READ THROUGH
THE COMMISSIONING STAGES IN THE NEXT
SECTION. POWERING UP IS PART OF THE
COMMISSIONING SEQUENCES. DAMAGE
MAY OCCUR IF YOU FAIL TO FOLLOW IT
CAREFULLY.
————————————————————
————————————————————
Q
UATREAU TOUCH
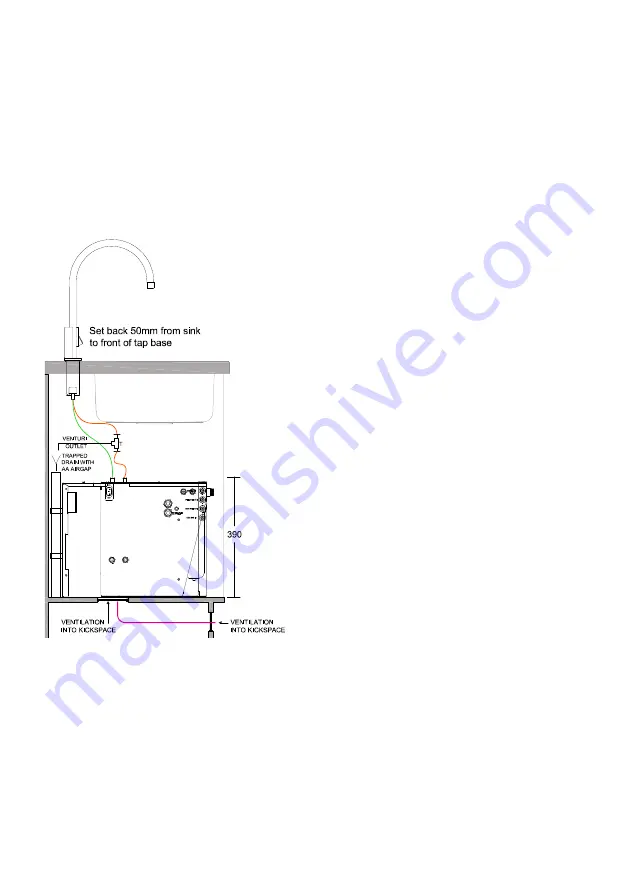
INSTALLING THE QT553-B
————————————————————
STEP 1
A thermostatic mixing valve should be
connected to the mains hot and cold
supply and adjusted to feed a regualted
40C supply. Included in the fitting kit is
a 1/2”x 3/8” reducer. If your valve has a
different outlet find a suitable reducer to
adapt to 3/8”
Using the 3/8” blue pipe enclosed cut a
length to feed the hot mains water inlet
on the left side of the QT553-B module.
As part of this installation you will also
install a separate cold water supply
Included in the fitting kit is a 1/2” x 3/8”
reducer to adapt to the correct pipe size.
The 3/8” isolators also included can be
fitted to make it simpler to adjust flow for
mains hot and cold if the thermostatic
valve is out of reach. This will control the
cold water mains feed that is fitted to
the left rear low level fitting (labeled cold
mains inlet). It will also feed the Pure inlet
on the front top right hand side of the
boiler control unit. (Alternatively an RO
Water supply can be used for this - see
notes for more details) to the left and the
smaller 1/4” cold feed into the front right
hand side of the QT553-B.
Connect a John Guest 1/2” -3/8” reducer
to this cold isolation valve and run a
length of blue 3/8” PE pipe ready for
connection to the cold mains water inlet
alongside the hot water inlet.
To create the secondary cold inlet feed
connect the 3/8” reducing T into the same
3/8” pipe at the closest point to isolator
and run a length of 1/4” pipe to the pure
inlet on the right hand side of the QT553-B.
Also connect the 1/4” isolation valve just
before the inlet. This will be for control
purposes.
STEP 2
With the QT553-B module on the right
hand side of the cupboard connect the
thermostatic hot and the mains cold
INSTALL ATION


