DX3000 and DX5000 Quick Start Guide
7
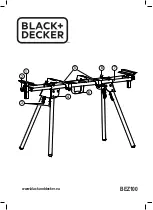
Figure 9 Installing the Disk
Drives in the DX3000 Chassis
N
OTE
:
The hard drives must be installed in the
proper sequence since RAID sets have already
been established at the factory. Refer to the
label on the bottom of the drive sled for the
drive number. The hard drive numbering
starts in the lower left-hand drive bay and
then moves to the right.
DX3000
DX5000
Drive 0
Drive 1
Drive 2
Drive 3
Drive 4
Drive 5
Drive 6
Drive 7
Drive 0
Drive 1
Drive 2
Drive 3
Drive 4
Drive 5
Drive 6
Drive 7
Drive 8
Drive 9
Drive 10
Drive 11
Drive 0
Drive 1
Drive 2
Drive 3
Drive 4
Drive 5
Drive 6
Drive 7
Drive 8
Drive 9
Drive 10
Drive 11
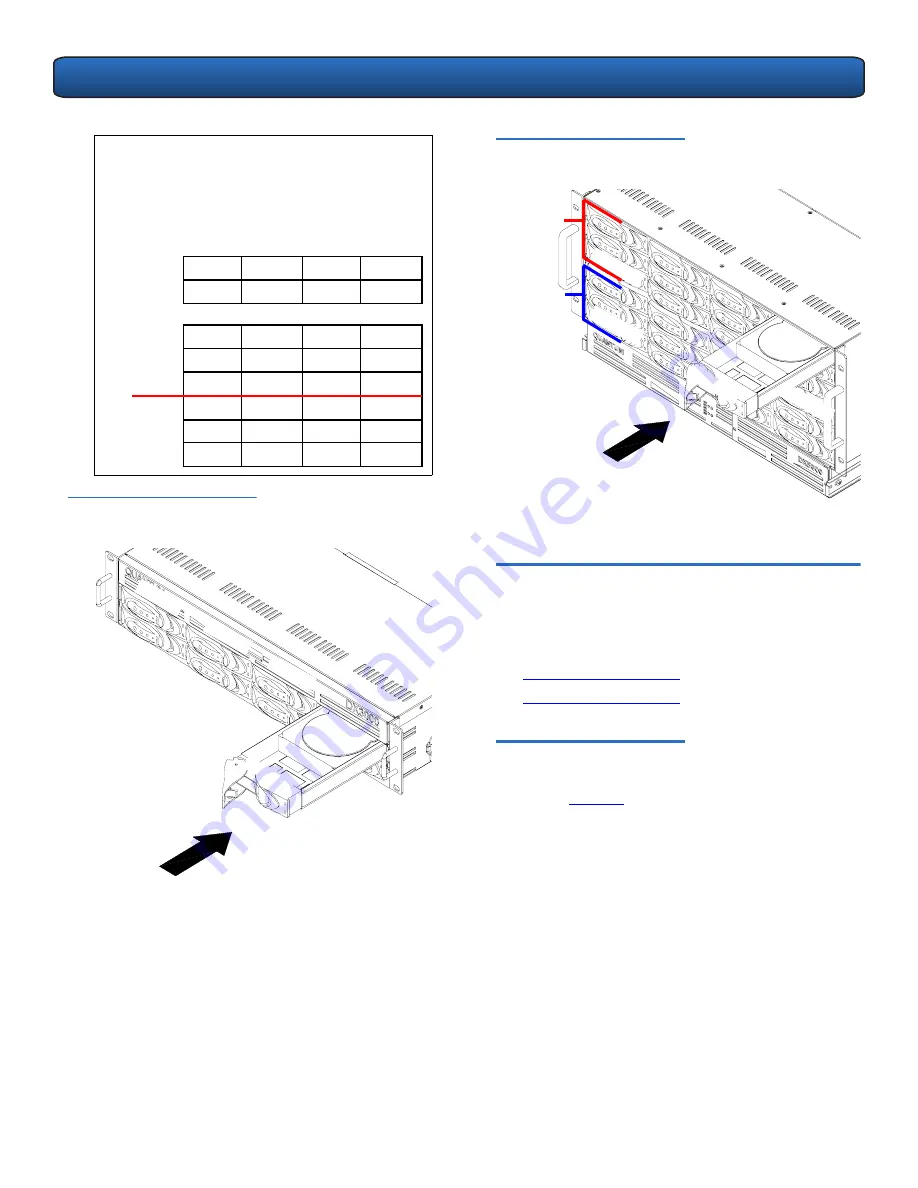
Array
controller 2
Array
controller 1
Driv
e 0
Driv
e 1
Driv
e 4
Driv
e 6
Driv
e 7
Driv
e 5
Figure 10 Installing the Disk
Drives in the DX5000 Chassis
The DX3000/DX5000 chassis is now installed in the rack.
Cabling the DX3000/DX5000
0
The cabling instructions differ depending on the system
installed. Refer to the following sections for either the
DX3000 or DX5000 system:
•
Cabling a DX3000 System
•
Cabling a DX5000 System
Cabling a DX3000 System
0
Connect the following cables to the back of the DX3000
system (see
figure 11
):
•
Connect a power cable to each power supply
•
Connect an Ethernet cable to port ETH1
•
Fibre Channel cable (optional)
Driv
e 11
Driv
e 0
Driv
e 0
Driv
e 11
Array
controller 2
Array
controller 1