background image

11

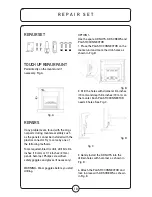
fig. E

OPTION 2: 
Use the SMALL L-BRACKETS and 
SCREWS.

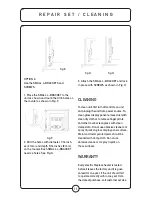
1. Place the SMALL L-BRACKET to the 
unit as shown and mark the drill-holes on 
the mantel as shown in Fig. F.

fig. F

2. Drill the holes with diameter 1/16 inch-
es (2 mm) and depth 5/16 inches (8 mm) 
on the mantel. Each SMALL L-BRACKET 
needs 4 holes. See Fig. G.


fig. G

fig. H

3. Attach the SMALL L-BRACKET and lock 
in place with SCREWS as shown in Fig. H.

CLEANING

To clean unit first turn off controls on unit 
and unplug the unit from power source. To-
clean glass display panel; remove dust with 
clean dry cloth or to remove finger prints 
and other marks clean glass with clean 
damp cloth. Do not use abrasive cleaners or 
spray liquids on glass display panel surface. 
Metal and metal painted parts should be 
cleaned with damp cloth. Do not use 
abrasive cleaners or spray liquids on 
these surfaces. 

WARRANTY

Every electric fireplace heater is tested 
before it leaves the factory and it is guar-
anteed for one year. If the unit should fail 
to operate correctly within one year from 
the date of purchase, call customer service 

R E P A I R   S E T   /   C L E A N I N G

Summary of Contents for M850P-26FDC

Page 1: ...I N S T R U C T I O N M A N U A L M850P 26FDC NDF 62N ATTENTION 1 Find a location for the fireplace heater that is protected from direct sunlight 2 Do not plug the unit into the power outlet before y...

Page 2: ...ccur again 1 Read all instructions before using this electric fireplace heater 2 This electric fireplace heater is hot when in use To avoid burns do not let bare skin touch hot surfaces The grill dire...

Page 3: ...overheat and cause a risk of fire However if you have to use an extension cord the cord shall be S A F E T Y I N S T R U C T I O N S No 14 AWG minimum size and rated not less than 1875 watts 16 When s...

Page 4: ...P circuit is required to operate this heater If the breaker trips when the heater is used then you may need to move the heater to another location or un plug other appliances that are on the same circ...

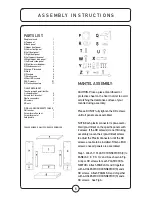
Page 5: ...REQUIRED PHILLIPS HEAD SCREWDRIVER MANTEL ASSEMBLY CAUTION Place a piece of cardboard or protective sheet on the floor in order to avoid scratching the decorative surface of your mantle during assembl...

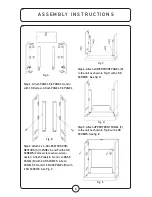
Page 6: ...REWS 2 screws for each wood con nector Attach Panels E G and J to BASE PANEL B with 2 KD SCREWS Attach PANELS F H and K to BASE PANEL B with 2 KD SCREWS See Fig C Fig C Step 4 Attach LOWER FRONT PANEL...

Page 7: ...OT plugged in Step 1 Attach 2 Large L brackets Q to each side of the fireplace insert with wash ers S and secured with small screws T and nuts R See Fig G Fig G Step 2 Attach fireplace insert into the...

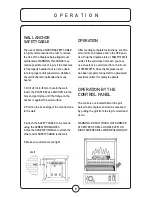
Page 8: ...ttach the SAFETY CABLE to the mantle using the SCREW FOR MANTEL 4 Use the SCREW FOR WALL to attach the other end of SAFETY CABLE to the wall 5 Make sure all screws are tight Wall OPERATION After readi...

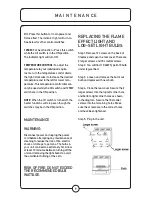
Page 9: ...the power cord before attempting any maintenance or cleaning to reduce the risk of fire electric shock or damage to persons The bulbs in your unit can become extremely hot Allow at least 10 minutes b...

Page 10: ...Fig D 4 Attach the PLASTIC CONNECTOR and lock in place with KD SCREWS as shown in Fig E REPAIR SET TOUCH UP REPAIR PAINT Paint directly on the mantel unit if necessary Fig A fig A REPAIRS If any probl...

Page 11: ...it and unplug the unit from power source To clean glass display panel remove dust with clean dry cloth or to remove finger prints and other marks clean glass with clean damp cloth Do not use abrasive...

Page 12: ...repair or replace the unit This warranty is void if in the opinion of Quality Craft the unit has been tampered with altered misused damaged abused or used with the wrong power source Light bulbs are n...

Page 13: ...13...

Reviews: