10
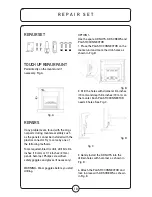
OPTION 1:
Use the spare KD NUTS, KD SCREWS and
PLASTIC CONNECTOR.
1. Place the PLASTIC CONNECTOR on the
mantel unit and mark the drill-holes as
shown in Fig. B.
fig. B
2. Drill the holes with diameter 3/4 inches
(10 mm) and depth 3/4 inches (10 mm) on
the mantel. Each PLASTIC CONNECTOR
needs 3 holes. See Fig. C.
fig. C
fig. D
3. Gently install the KD NUTS into the
drilled-holes with hammer as shown in
Fig. D.
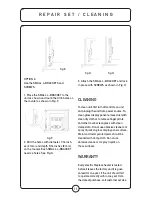
4. Attach the PLASTIC CONNECTOR and
lock in place with KD SCREWS as shown
in Fig. E.
REPAIR SET
TOUCH UP REPAIR PAINT
Paint directly on the mantel unit if
necessary. Fig. A.
fig. A
REPAIRS
If any problems are found with the origi-
nal parts during mantel assembly such
as the panels cannot be installed with the
plastic connector. Try to solve by one of
the following methods.
Tools required: Electric drill, drill bits 3/4
inches (10 mm) or 1/16 inches (2 mm),
pencil, hammer, Philips screwdriver,
safety goggles and gloves (if necessary).
WARNING: Wear goggles before you start
drilling.
R E P A I R S E T
Summary of Contents for M850P-26FDC
Page 13: ...13...


