


Winding the toroids
[ ] Wind each of the L2 and L3 toroids using 12” of the supplied magnet wire. Use the tables above
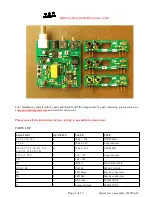
and wind them in the direction shown in the graphic below and they will align with the pcb holes.
When you are certain of the turn count, trim the leads ~1/2” and
tin them
before installing the toroids
flat on the top of the board, centered on the silkscreen outline. Secure each toroid to the pcb using two
of the supplied plastic zip ties, as shown below.
Be sure to tin the wire ends before installing. The transceiver will not work if you do
not tin the magnet wire. This is the leading cause of failure.
Test and set up:
[ ] Apply 12V to 13.8V to the board. The GREEN LED should light.
[ ] Verify 9V (+/- 0.25) between pins 8 and 4 of U2. (Optional)
[ ] Remove power
[ ] Install SA602 IC into U1 socket. Observe orientation, notch on chip matches notch on IC socket.
[ ] Install LM358 IC into U2 socket. Observe orientation, notch on chip matches notch on IC socket.
[ ] Connect your DMM in series with the positive power supply lead and set the meter to measure
current. To be safe, use the 10A scale.
[ ] Set the V1 (BIAS) trimmer to fully
CLOCKWISE
.
[ ] Apply power to the board again.
[ ] Insert the shorting plug into the [BAL] SIP pins. This will force the board into transmit mode. The
RED LED should now be on and the GREEN LED off.
[ ] Note the amount of current the board is drawing.
[ ] Slowly adjust the V1 trimmer
COUNTERCLOCKWISE
while watching the current meter. Adjust
until the current goes up by about 15 ma. This is just enough to put the PA into linear mode.
[ ] Remove power.
[ ] Remove the shorting plug for the BAL pins.
If the current does not rise on counterclockwise rotation, check the connections of T2.
Operating or testing into a bad SWR or no antenna will permanently damage the
three power amplifier BS170's. Be careful...
You are now ready for on-air testing.
[ ] Start the WSJT-X program on your PC or Laptop.
[ ] Set up your computer to look for inputs and outputs at the auxiliary sound connections if needed.
[ ] Make the required MIC and Headphone connections between the PC and DSB board. MIC to MIC
and PHONES to PHONES. (I found nice stereo jumper cables at the Dollar Store).
[ ] Plug in the desired band module. The toroid side of the module faces you, the end with the LEDs.
[ ] Connect up your antenna.
[ ] Power up the board.
Page 8 of 13
digital_txcvr_assembly_030720.pdf


