


• TR-002
• TR-004
• TR-004U
• TL-D800C
• TL-R1200C-RP
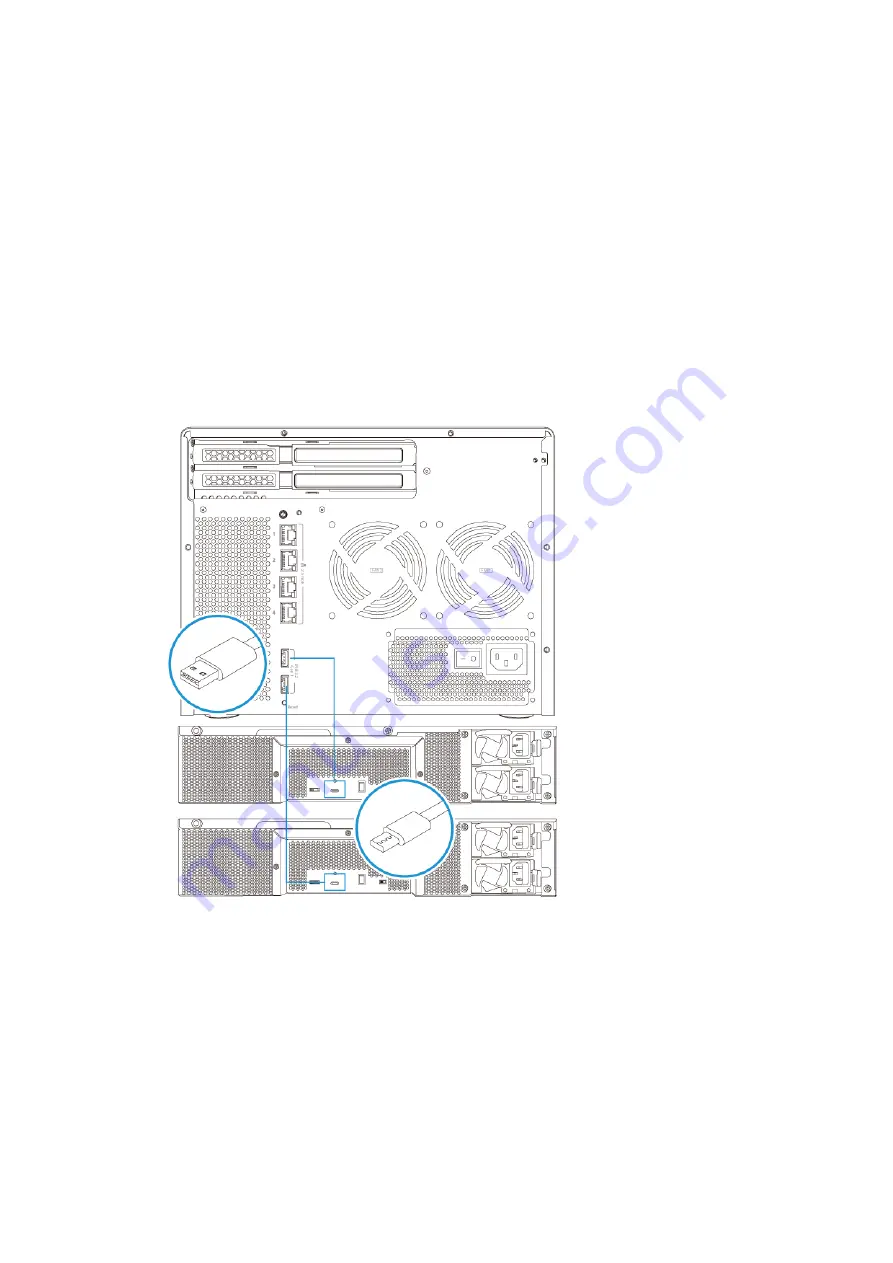
1.
Connect the expansion unit to the NAS.
a.
Connect the USB cable to the USB Type-C port on the expansion unit.
b.
Connect the USB cable to a USB 3.2 Gen 1 Type-A port on the NAS.
2.
Power on the expansion units.
3.
Verify that the expansion units are recognized by the NAS.
a.
Log on to QuTS hero as administrator.
b.
Go to
Main Menu
>
Storage & Snapshots
>
Overview
>
System
.
c.
Verify that the expansion units are listed.
TS-hx86 User Guide
Installation and Configuration
41