4 – Installation
Installing a Switch
4-6
59096-04 A
S
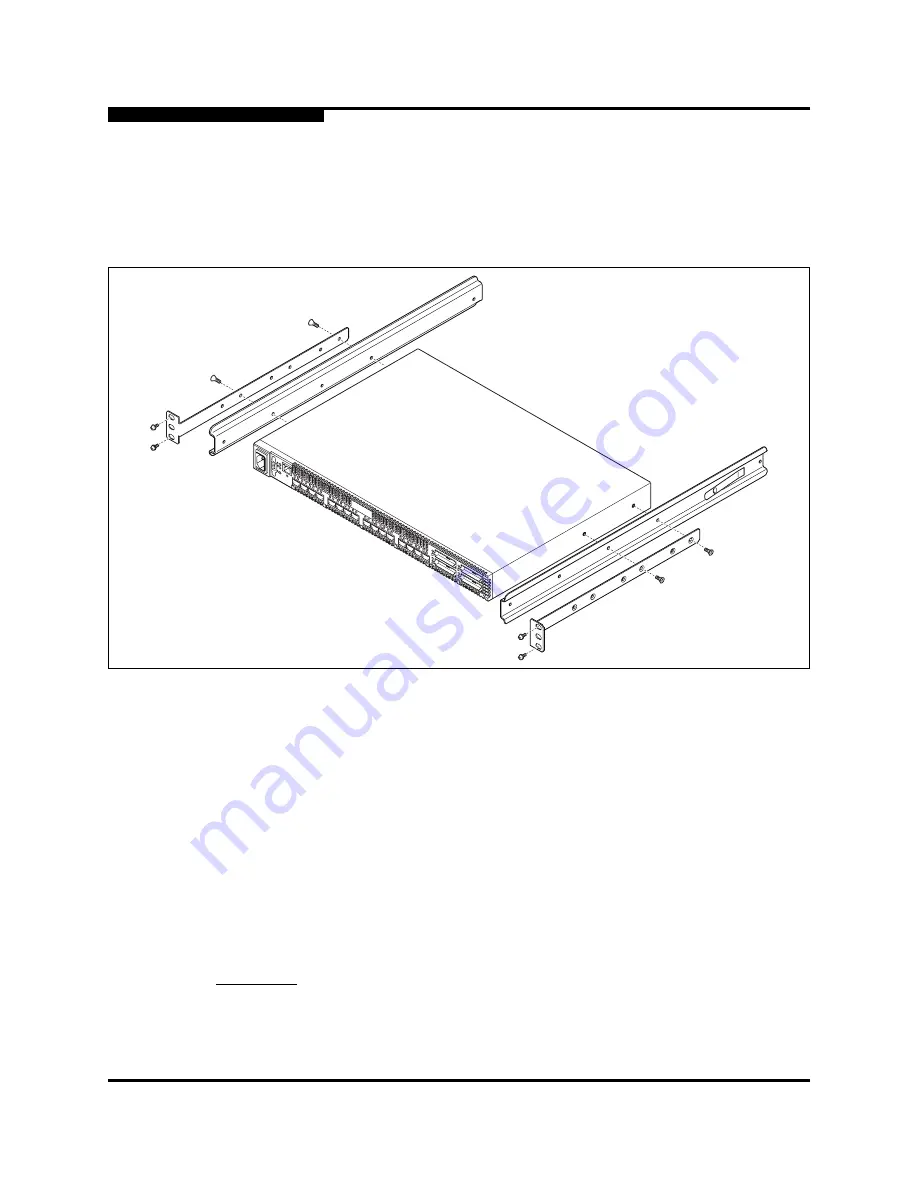
To mount a model 5200/5600 switch in a rack using the General Devices C-874
rail kit, you must fasten the switch brackets and inner rails to the switch as shown
in
Figure 4-3
. Use the screws that come with the rail kit. Refer to the rail kit
instructions for complete information.
Figure 4-3. Mounting the Model 5200/5600 Switch in a Rack with a Rail Kit
4.2.2
Install Transceivers
The switch supports a variety of SFP and XPAK transceivers. To install a
transceiver, insert the transceiver into the port and gently press until it snaps in
place. To remove a transceiver, gently press the transceiver into the port to
release the tension, then pull on the release tab or lever and remove the
transceiver. Different transceiver manufacturers have different release
mechanisms. Consult the documentation for your transceiver.
NOTE:
The transceiver will fit only one way. If the transceiver does not install
under gentle pressure, flip it over and try again.
CAUTION!
To maintain proper air flow and prevent the switch from
overheating, keep covers installed in unused 10-Gbps ports.
L
A
L
A
L
A
L
A
L
A
L
A
L
A
L
A
0
1
2
3
4
5
6
7
L
A
L
A
L
A
L
A
L
A
L
A
L
A
L
A
16
L
A
17
L
A
18
L
A
19
L
A
Summary of Contents for SANbox 5000 Series
Page 8: ...Page viii 59096 04 A SANbox 5000 Series Fibre Channel Switch Installation Guide S Notes...
Page 40: ...2 General Description Switch Management 2 14 59096 04 A S Notes...
Page 70: ...3 Planning Fabric Management 3 30 59096 04 A S Notes...
Page 92: ...4 Installation Installing Feature License Keys 4 22 59096 04 A S Notes...
Page 112: ...6 Removal Replacement Power Supply Removal and Replacement 6 4 59096 04 A S Notes...
Page 124: ...SANbox 5000 Series Fibre Channel Switch Installation Guide Glossary 6 59096 04 A S Notes...
Page 130: ...SANbox 5000 Series Fibre Channel Switch Installation Guide Index 6 59096 04 A S Notes...


