


48
2.2 Factory recovery
The factory recovery consists in recovering the OS and data like it was at the factory. Consequently, the different APK installed by the user and the
TAB10b device configuration data will be lost. So, it is highly recommended to save all the required settings to be able to reconfigure your TAB10b
device afterwards.
Before proceeding to the recovery, if it is still possible, save the safe partition: user data and APK.
Micro SD card removal
Procedure:
In case the device is hung on the wall on a mounting bracket:
with a screw driver, untighten the two screws at the bottom of the TAB10b,
remove the device from the mounting bracket.
In case the device is powered by the USB-C connector:
unplug the USB-C power supply,
with a screw driver, untighten the two screws at the bottom of the TAB10b,
remove the mounting bracket from the product.
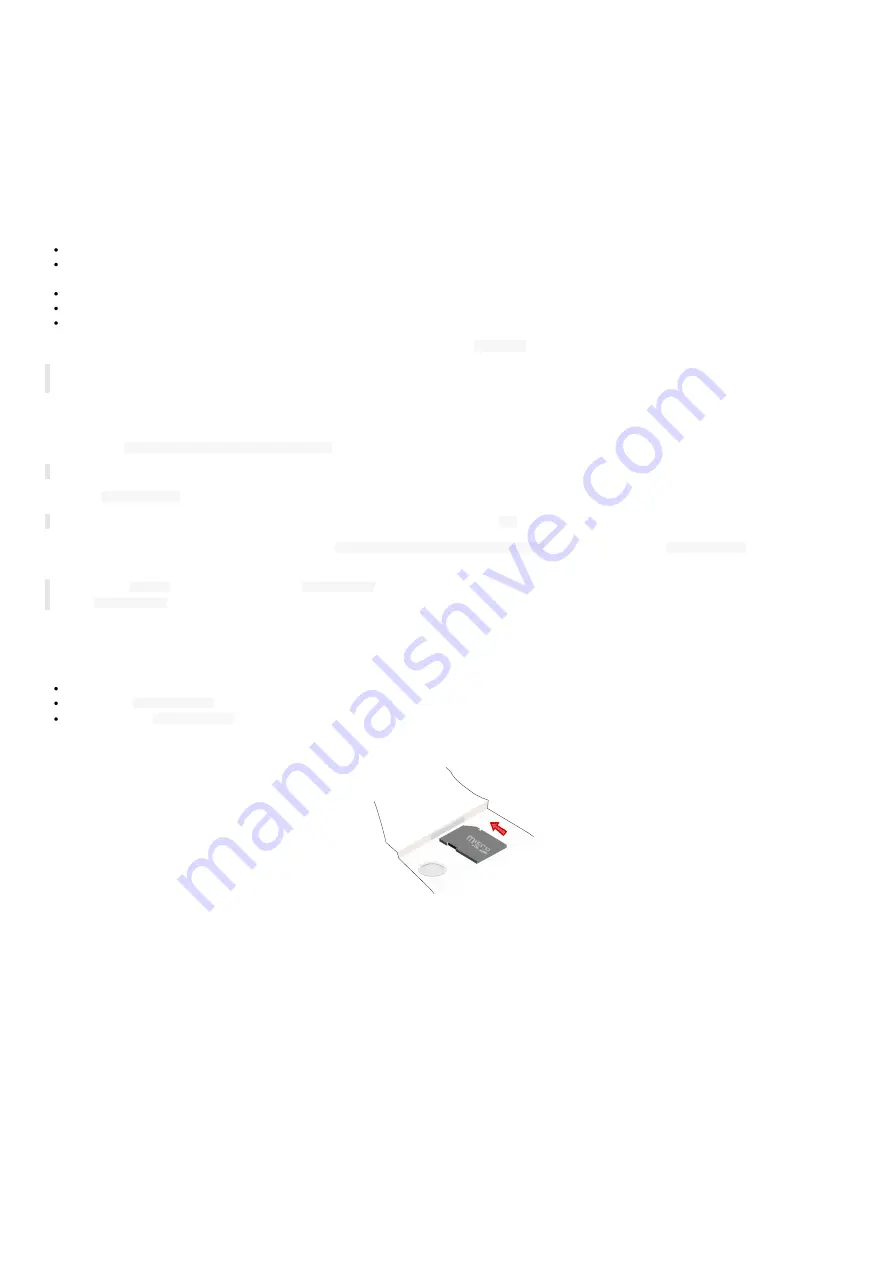
With a little pen, push on the micro SD card and let the spring eject it from the
micro SD
connector.
☛
The micro SD has to eject itself totally from its connector as soon as your pen is removed. If not, start again by pushing again the micro SD
card with you pen, and when the spring is responding sufficiently, remove you pen rapidly.
Micro SD card burning
Download the
aosp_qeedji-tab10-setup-xx.yy.zz.iso
file for the factory recovery from the
(~ 16 GB).
☛
The download time will depending on the network connection quality.
Insert the
micro SD card
in a plastic SD card adapter (31 x 24 x 2.1 mm) and insert it in the approriate SD card slot, supported by any recent computer.
☛
In case Windows is showing a message inviting to format the SD card, choose
No
.
The ISO version suitable for your device, for example
aosp_qeedji-tab10-setup-xx.yy.zz.iso
, can be burnt on your
micro SD card
by any ISO image
burning software.
☛
However
Qeedji
recommends to use the
BalenaEtcher
software (version V1.5.102, for example). For further information about the procedure
with
BalenaEtcher
software, refer to the chapter §
ISO image burning with BalenaEtcher
.
Micro SD card installation
Once the micro SD card content has been updated:
remove the SD card adapter from your computer,
remove the
micro SD card
from the SD card adapter,
insert back the
micro SD card
inside the micro SD connector of the TAB10b device, in the right sense, and push it until hearing a clic. For further
installation, refer to the chapter §
.
When the micro SD card is installed properly, the SD card should be not visible.
Summary of Contents for TAB10b
Page 1: ...User manual TAB10b 9 10 18 001A TAB10b 8 30...
Page 5: ...5 Part I Description and installation...
Page 10: ...10 1 3 1 Device dimensions...
Page 13: ...13...
Page 26: ...26 Part II System con guration...
Page 42: ...42 This message is then displayed until the device is rebooting automatically once...
Page 50: ...50 Part III Applicative user interface...
Page 52: ...52 Part IV Administration console user interface...
Page 63: ...63...
Page 95: ...95 Part V Technical information...
Page 99: ...99 5 3 Antenna return loss This is the return loss diagram for the WIFI Bluetooth antenna...
Page 101: ...101 Part VI Contacts...
Page 103: ...103 Part VII Appendix...


