


4 – How to use Start
4.1 – Switch on/off
To switch on the device, keep the ON/OFF button pressed until the Start logo appears on the display. To switch off, keep the ON/OFF button pressed
until the device switches off.
Start also has an automatic shut down feature which switches the device off after 20 minutes of inactivity.
4.2 – Registering sessions
Start will begin to register a new session every time the three following conditions are met:
- the GPS signal has picked up the satellite signal
- the chronometer has been activated (we remind you that the chronometer starts when the internal accelerometer retrieves the departure of the vehicle)
- registration mode must be activated (see Chap. Section 5 Recording)
The size of the files stored by the Start Basic device are reduced as the files contain only the time per lap and the maximum values referring to those laps;
the size of the files stored by Start Next on the other hand depends on the duration of the recording; bear in mind that the files stored are 50MB/h, in
other words every hour of recording creates a file which is 50MB.
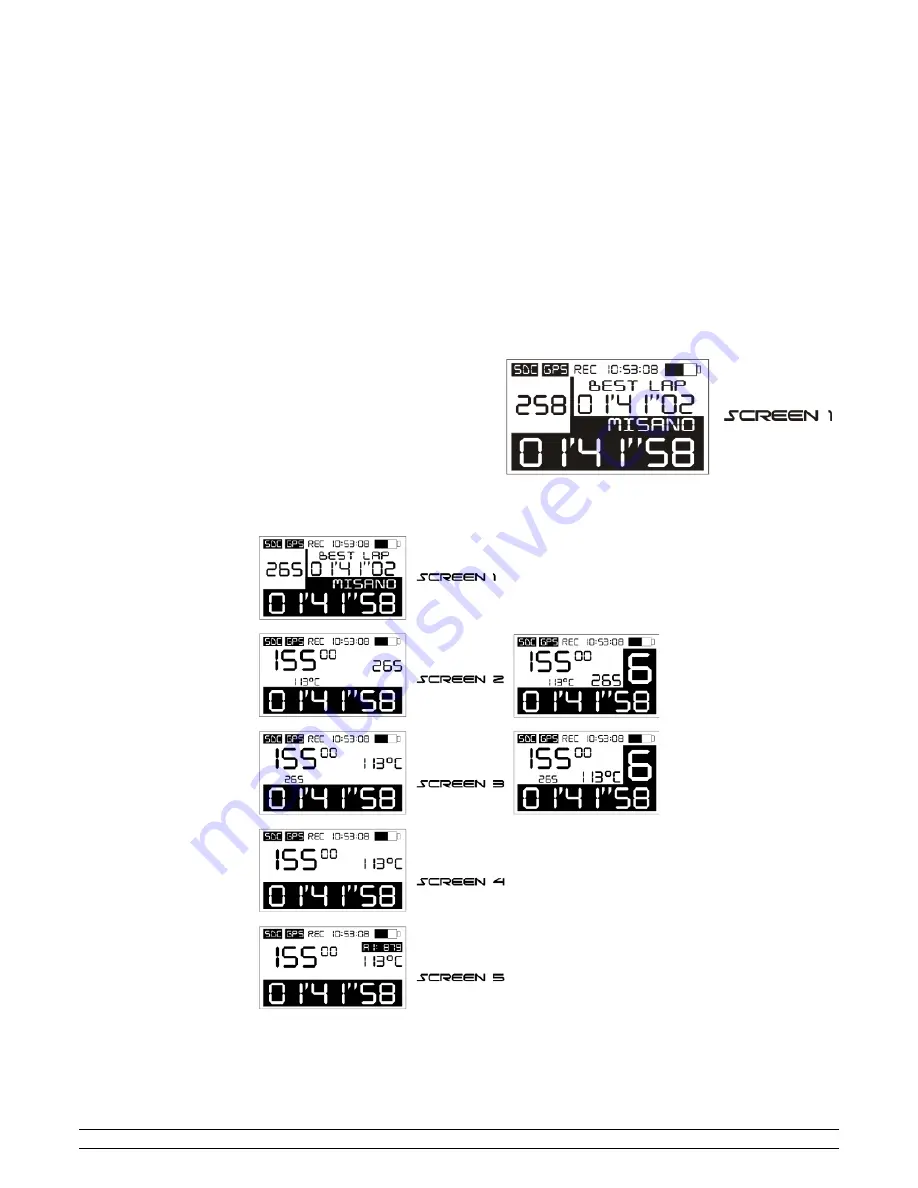
4.3 – Screens
The following information is always displayed on the top line of the main screen: SDC (memory card inserted), GPS (GPS receiver connected to
satellites), REC (recording ongoing); time, battery level; the bottom line always display the time per lap.
The remaining area of the screen displays the following information: time per lap
(
01'41”58
), best lap (
01'41”02
), speed (
265
) and the circuit/acceleration type
(
MISANO
):
By inserting at least one Box Expander, you activate new visualisation screens which can be selected by pressing the lateral "switch on" button for one
second; the screens available are the following and it will also be possible to view RPMs (
15500
), temperature (
113
), analogue entry 1 (
879
), inserted
gear (
6
), best lap (
01'41”02
) and the circuit/acceleration type (
MISANO
):
On screens 2 and 3, visualisation of the gear can be deactivated (image on the left) or activated (image on the right); follow the instructions in Chap. 11
for gear settings.
PZRacing Via de Gasperi 5 – 61032 Fano (PU) Italy - Tel: +39 0721 820434 – Email: [email protected]


