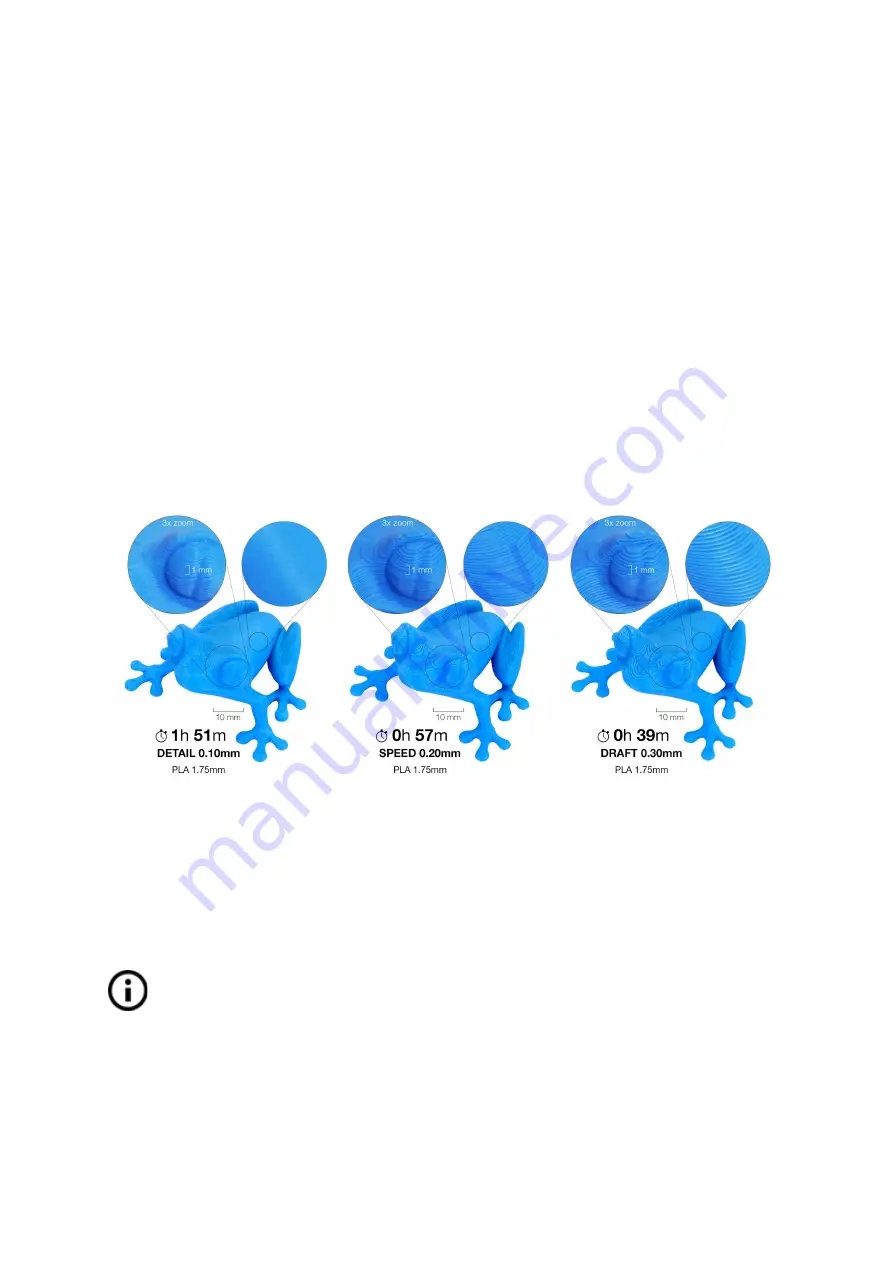
7.2.10 Print speed versus print quality
Printing a small object takes a few minutes, but larger models are more time-consuming.
There are prints that take dozens of hours to complete. The overall printing time can be
changed using various methods. The first way is to change the layer height in PrusaSlicer
using the
Print settings
option in the upper right corner. The default setting is
0.15 mm
(QUALITY). By choosing taller layer heights you can significantly shorten the print time (0.20
mm or 0.30 mm) at the cost of more visible layers. On the other hand, choosing
0.10 mm
(DETAIL) will result in extra detail at the cost of longer print times.
Generally, we
do not suggest going lower than 0.10 mm
as the improvement in print quality with 0.07 or
0.05 mm layers is relatively minor with significantly longer print times.
Our most used profiles
0.15 mm
and
0.20 mm
come in two different versions.
● Quality
- slower perimeters and infill, gives you better surface quality
● Speed
- faster perimeters and infill without much sacrifice of surface quality
Pict. 19 - Print quality vs print time
The speed can also be changed while printing. The LCD shows the FR 100 % item - it’s
actual print speed (feed rate). By turning the LCD-knob clockwise you can increase the print
speed up to 999 %. However, we do not advise increasing the speed over 200 %. Watch the
results of increased speed on the printed model and adjust the speed accordingly.
When increasing the speed always check that the model is cooled properly -
especially when printing a small object from ABS, increased speed causes distortion
(sometimes called “warping”) of the model. You can prevent this issue by printing
more similar objects together - layer printing interval is long enough to prevent this
issue.
37


