


Lynx.GX Installation and Management
Uploading Software
You can upload the most recent version of the application software. To upload a file:
1. Download the most recent software from
http://www.proxim.com/support/
.
2. Connect the PC with the new software to the radio terminal through the NMS.
3. At your browser’s address field, enter
http://<IP address>/upload.htm
, or select
File Upload
from the
Admin tab. (For factory default, use 10.0.0.1 for the IP address.)
4. If not already logged in, enter the default “managers”
username
and the appropriate
password
; the
following Web page is displayed.
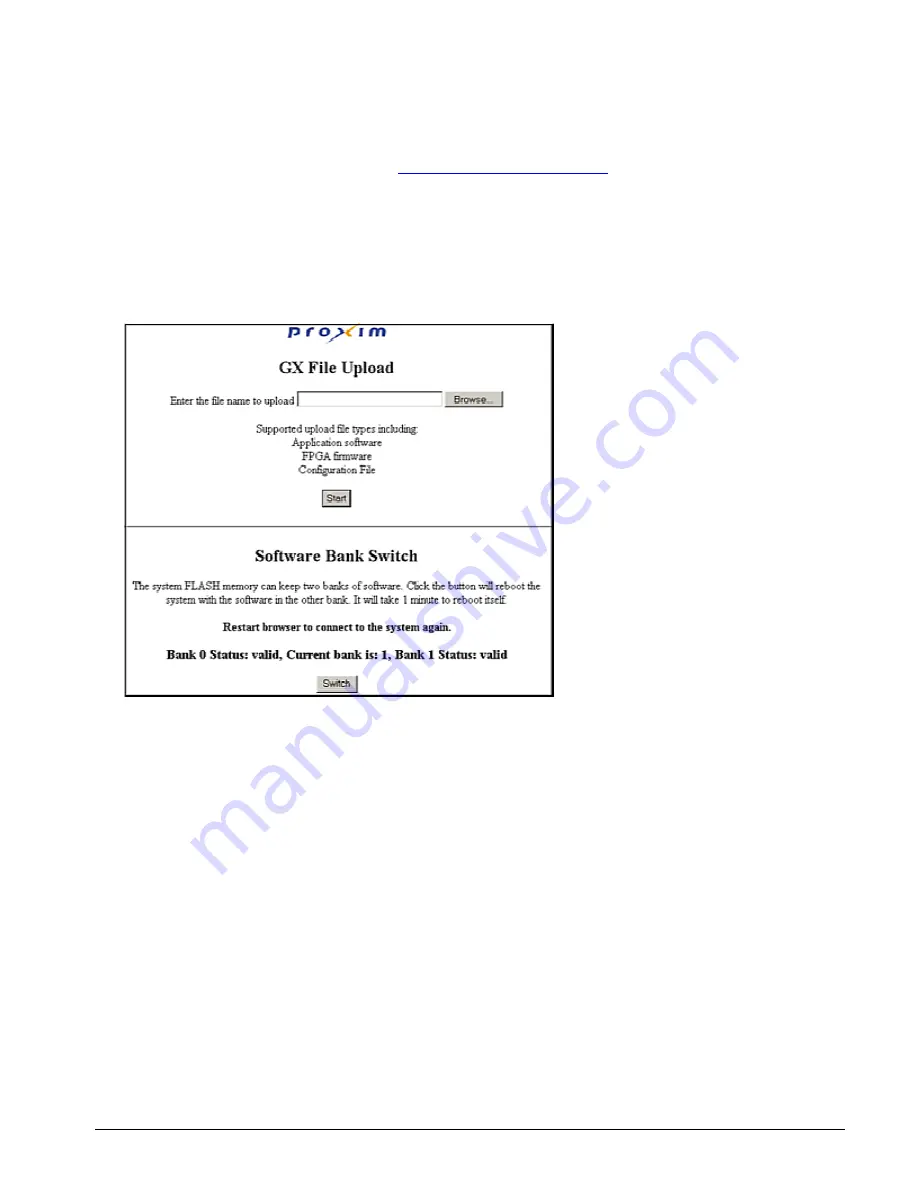
5. Enter the name and location of the file you want to upload, or click
Browse
and select the file location.
6. Click
Start
. For software or firmware, the file is uploaded to the unused Bank. Make note of the Current
bank number for reference. (The radio has two banks of flash memory available:
Bank 0
and
Bank 1
. Only
one bank is in use at a time. After uploading, the radio automatically switches to the bank holding the newly
uploaded software. )
Once software upload is complete, the following message is displayed:
File upload finished and system will reboot! Restart browser to logon again
.
You will need to wait one minute for the radio to restart. Close both browser windows and restart your browser.
You may complete steps 1 through 3 to ensure the newly uploaded Bank is valid and is the current Bank in use.
To use the previous software version, you can manually switch between banks by clicking the
Switch
button;
after switching between Banks, you must close and restart the browser after waiting for the radio to reboot. If a
Bank is marked invalid, you cannot switch to that Bank and should upload the latest software to that bank. A
Bank may become invalid if a software upload was interrupted.
Chapter 3. Managing the Lynx.GX
43


