


USB and eSATA to SATA II RAID Subsystem
Installation and Configuration Manual
28
8 .
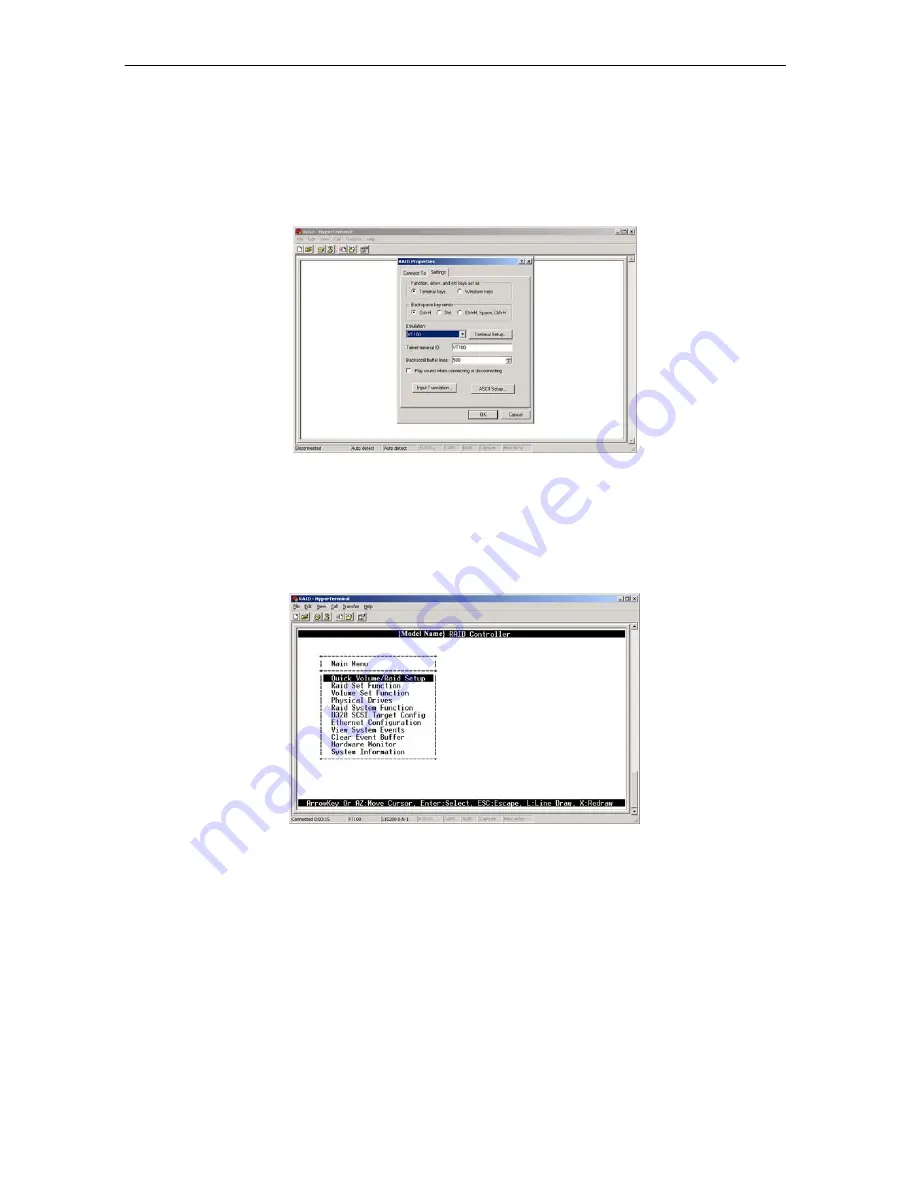
Configure the settings are follows:
“ Function, arrow and ctrl keys act as”: Terminal Keys
“Backspace key sends”: Crtl + H
“Emulation”: VT100
“Telnet terminal ID”: VT100
“Back scroll buffer lines”: 500
Click OK.
9. Now, the VT100 is ready to use. After you have finished the VT100 Terminal setup, you may
press t he “X” key (in your Terminal) to link the RAID subsystem and Terminal together. Press
“X” key to display the disk array Monitor Utility screen on your VT100 Terminal.
10. The Main Menu will appear.
Keyboard Function Key Definitions
“A” key - to move to the line above
“Z” key - to move to the next line
“Enter” key - Submit selection function
“ESC” key - Return to previous screen
“L” key - Line draw
“X” key – Redraw
Summary of Contents for SB-1413-UA
Page 33: ...USB and eSATA to SATA II RAID Subsystem 33 Installation and Configuration Manual...
Page 34: ...USB and eSATA to SATA II RAID Subsystem Installation and Configuration Manual 34...
Page 35: ...USB and eSATA to SATA II RAID Subsystem 35 Installation and Configuration Manual...
Page 36: ...USB and eSATA to SATA II RAID Subsystem Installation and Configuration Manual 36...


