Page 9
Tools Needed:
Tape Measure
Power Drill
Adjustable wrench
Hacksaw or Heavy Duty Bolt Cutters
Small (flat head) screwdriver
Small (Pozi Drive) Phillips screwdriver
Wire Strippers
You may also need these items before you begin the installation
(Some of these items can be found on GateMotors website):
Low voltage wire
This will need to be run from the control board to the photocells (transmitter and receiver) and for the key
switch (
optional to fit
).
1.5mm 3 Core 230v Armoured Cable
This will be used to transport 230v power form the house to the gate control board.
0.75mm SWA Alarm Cable / CAT 5 Cable (low voltage cable)
This will be used to transport power and switching signals from the photocell units to the control board.
PVC Conduit
To encase power cables / low voltage cables that are running between the house and the control board and
any cables that are to be laid across your driveway.
Surge Protection
A form of circuit breaker should be fitted between the house and the main gate to protect both the gate
control board and the house main fuse box from any power surges that may be experienced.
Fence Post Re-enforcement
If your fence post / pillars are less than 6” in diameter or 6” square should be made of metal instead of wood
so that it can remain stable while the opener is moving the gate – if this is not viable, the post may need to be
re-enforced to sustain the torque force produced by the gate opener. The curved design of the post bracket
works well for installations on round and square posts. Because the post bracket carries the entire thrust of
the active opener, firm sturdy anchored bolts should be used in conjunction.
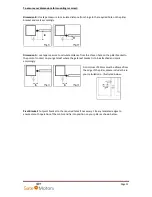
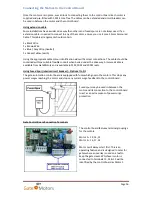
Re-enforced Gate - Wooden
To automate wooden gate, the thickness of the
gate should be no less than 70mm and/or have a
box boarder supporting frame – illustrated left.
This distributes the torque force produced by
the motor and protects the gate from potential
damage.


