


TDR-X
Operator’s Manual
38
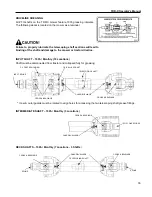
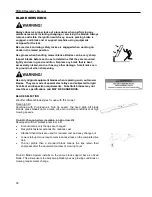
BLADE SERVICING
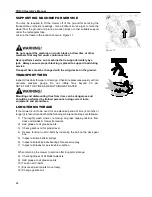
Always observe proper lock-out procedures when performing any
maintenance work including changing or servicing the blades. Always
remove and retain the ignition switch key, ensure parking brake is
engaged, and block and or support machine using equipment
designed for the task.
Be sure deck and wing safety locks are engaged when working on
decks in the raised position.
Use gloves when handling mower blades. Blades can be very sharp.
Inspect blades before each use to determine that they are mounted
tightly and are in good condition. Replace any blade that is bent,
excessively nicked, worn or has any other damage. Small nicks can
be ground out when sharpening.
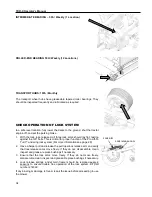
Use only original equipment blades when replacing worn out mower
blades. They are made of special steel alloys and subjected to rigid
heat-treat and inspection requirements. Substitute blades may not
meet these specifications and MAY BE DANGEROUS.
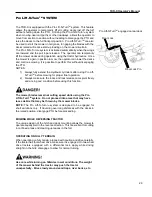
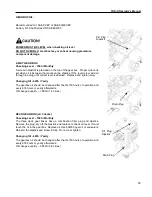
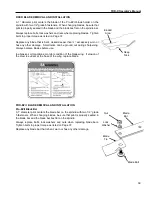
BLADE SELECTION
We offer different blade styles for use with this mower:
Fixed high lift
Combined with Progressiv
e’s high tip speed, the fixed High-Lift blade
‘stands’ grass blades up for a clean cut, even in damp conditions or at high
mowing speeds.
Pro-EZII Change System (Available in high or low lift)
Developed with turf professionals in mind:
•
Economical as only the tips are changed
•
Flat profile fastener extends life, reduces cost
•
Standard hand-tools are used for reduced cost and easy change out
•
Lower start-up torque requirement reduces stress on the complete drive
train
•
Thinner profile than a standard blade means the tips retain their
sharpness after the equivalent number of mowing hours
Pro-EzII Blade System installs on the same blade support bar as a fixed
blade. This allows users to easily swap blade types as growing conditions or
mowing requirements change.
Summary of Contents for TDR-X
Page 2: ......
Page 48: ...TDR X Operator s Manual 46 ...
Page 54: ...TDR X Parts Manual 2 1 DECK ASSEMBLY 1 1 Blade Spindle Assembly ...
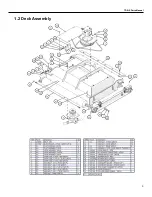
Page 55: ...TDR X Parts Manual 3 1 2 Deck Assembly ...
Page 56: ...TDR X Parts Manual 4 1 3 Deck Side Channel Assembly ...
Page 57: ...TDR X Parts Manual 5 1 4 Gearbox Assembly ...
Page 58: ...TDR X Parts Manual 6 2 FRAME ASSEMBLY 2 1 Frame Assembly ...
Page 59: ...TDR X Parts Manual 7 2 2 Hitch Assembly ...
Page 60: ...TDR X Parts Manual 8 2 3 Right Wing Assembly ...
Page 61: ...TDR X Parts Manual 9 2 4 Left Wing Assembly ...
Page 62: ...TDR X Parts Manual 10 2 5 Rear Lift Assembly ...
Page 63: ...TDR X Parts Manual 11 2 6 Lock Release Assembly ...
Page 64: ...TDR X Parts Manual 12 2 7 Wheel Assembly ...
Page 65: ...TDR X Parts Manual 13 3 HYDRAULICS ...
Page 66: ...TDR X Parts Manual 14 4 DRIVELINE 4 1 Driveline Layout ...
Page 67: ...TDR X Parts Manual 15 4 2 Input PTO Shaft ...
Page 68: ...TDR X Parts Manual 16 4 3 Intermediate PTO Shaft ...
Page 69: ...TDR X Parts Manual 17 4 4 Wing Deck PTO Shaft ...
Page 70: ...TDR X Parts Manual 18 4 5 Rear Deck PTO Shaft ...
Page 71: ...TDR X Parts Manual 19 4 6 4 Way Gearbox ...


