Section 3:
Using the Optical Disc
Printer with Windows
A.
CONNECTING THE PRINTER TO YOUR COMPUTER
The Optical Disc Printer is designed to be used with nearly any
PC running Windows 95/98/Me or Windows XP.
The printer is equipped with a standard 8-bit Centronics-type
parallel port
. This port is the means through which it receives
data from your computer. To connect the printer to your
computer, simply obtain a
parallel cable
, preferably IEEE
1284-compliant, and refer to the following steps.
NOTE:
For faster printing, your computer's parallel port mode should be set
to
ECP.
If you experience problems with this setting or if your
computer's parallel port is not ECP compatible, set your computer's
parallel port to the standard "Printer Port" setting. Refer to your
computer's system documentation for instructions on checking
and/or changing the parallel port mode. When printing from
Windows 2000 a USB-Parallel converter should be used for best
results.
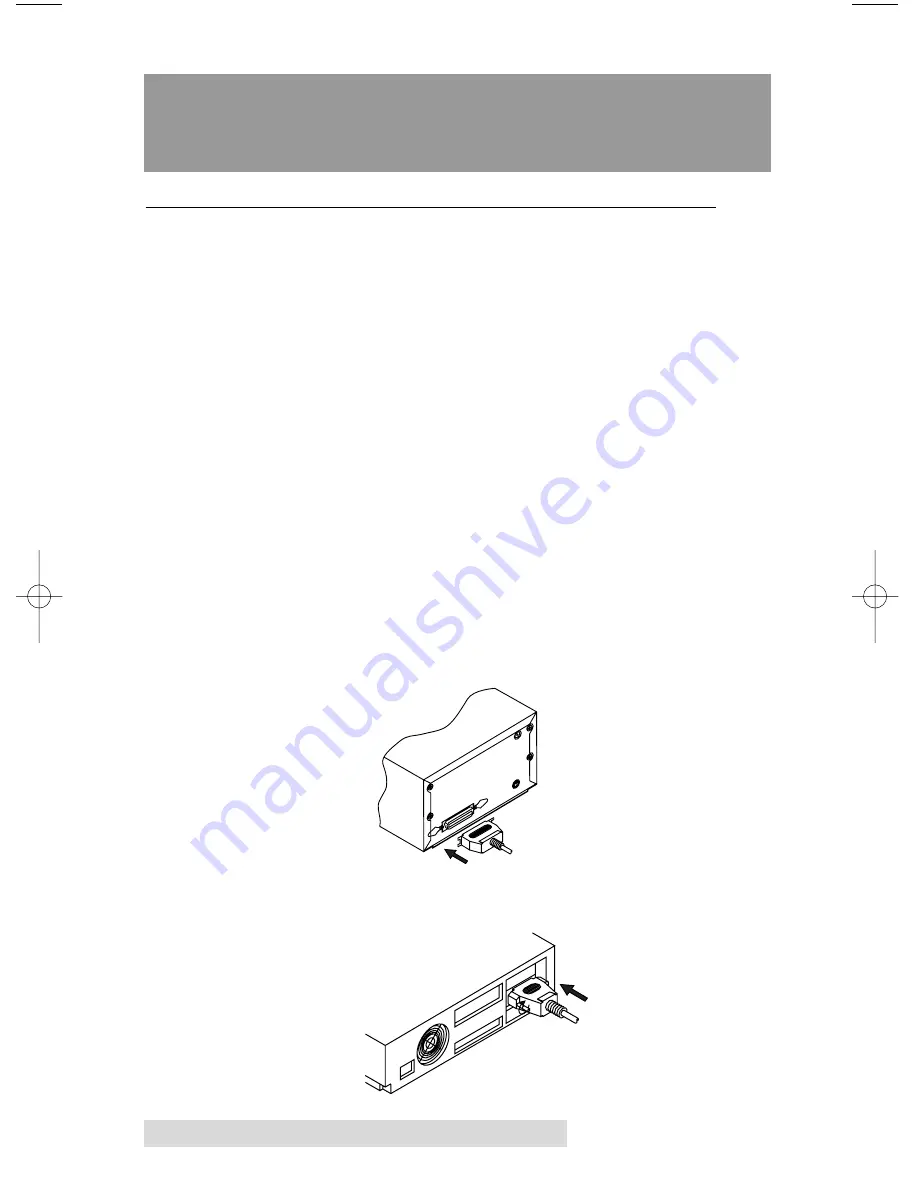
1. Connect the Centronics-type parallel side of the cable to
the printer. Snap the fastening clips into place.
2. Connect the other side to the back of your computer at
LPT1, LPT2, or the PARALLEL connector.
12 Using the Optical Disc Printer with Windows
510152.qxd 11/16/01 10:33 AM Page 12
Summary of Contents for 510152
Page 1: ...111501 510152 03 User s Manual 2001 All rights reserved Optical Disc Printer...
Page 10: ...x...
Page 45: ......
Page 46: ......
Page 47: ......
Page 48: ...Printed in the United States of America P N 510152...


