background image

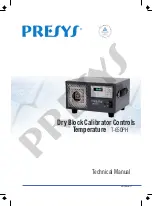
Dry Block Calibrator Controls

Temperature

T-650PH

EM0340-00

®

Technical Manual

Q

Y

U

T

A L I

ENT

M

 S

E

Y

G

S

A

T

N

E

A

M

M

presys

Summary of Contents for T-650PH

Page 1: ...Dry Block Calibrator Controls Temperature T 650PH EM0340 00 Technical Manual Q Y U T A L I ENT M S E Y G S A T N E A M M p r e s y s ...

Page 2: ... function if the unit is not earthed properly WARNING High temperatures are achieved in this equipment Risk of fire and explosion are present in case safety measures are not taken Sign by means of warnings the hazardous areas at high temperatures Do not place the dry block on inflammable surfaces or even on materials that can be deformed due to high temperatures Do not obstruct any air vent to avo...

Page 3: ...ertain voltage limits EN 61010 1 2011 Safety requirements for electrical equipment for measurement control and laboratory use EN 61010 2 010 Safety requirements for electrical equipment for measurement control and laboratory use Part 2 010 Particular requirements for laboratory equipment for the heating of Materials EMC directive 2004 108 EC of the European Parliament and of the Council of 15 Dece...

Page 4: ...e 13 2 4 Programmable Operating Mode 13 2 5 Automatic Operating Mode 14 3 Recommendations as regards Accuracy of Measurements 16 3 1 Getting a Better Accuracy from the Dry Block 16 3 2 Recommendations to Other types of Insert 17 4 Safety Instructions 18 5 Calibrator Warning Messages 18 6 PID Control Parameters 19 7 Calibration 20 7 1 Input Calibration 20 7 2 Probe Calibration 21 8 Maintenance 23 8...

Page 5: ...ies out completely automatic calibrations with or without the use of a computer Accuracy to 0 1ºC 0 1 of reading stability of 0 05ºC and resolution of 0 01ºC Documenting capabilities communication with computer and ISOPLAN Calibration Software Portable compact provide interchangeable inserts and carrying case It presents a wide variety of programming resources allowing the performance of automatic...

Page 6: ...ry and battery charger included in the electric signal calibrator Independent circuitry for over temperature protection and safety Insert to choose carrying case strap and test leads included 1 1 Technical Specifications Operating Range from room temperature to 650 C 1202 F Power Supply 110Vac or 220Vac 50 60Hz according to order code Well Depth 124 mm Resolution 0 01 C 0 01 F Accuracy Internal re...

Page 7: ...03 F 75 to 400 C 103 to 752 F 0 1 C 0 1 F 0 1 C 0 1 F 0 1 C 0 1 F 0 6 C 1 2 F 0 4 C 0 8 F 0 2 C 0 4 F IEC 60584 TC E 270 to 150 C 454 to 238 F 150 to 1000 C 238 to 1832 F 0 1 C 0 1 F 0 1 C 0 1 F 0 3 C 0 6 F 0 1 C 0 2 F IEC 60584 TC N 260 to 200 C 436 to 328 F 200 to 20 C 328 to 4 F 20 to 1300 C 4 to 2372 F 0 1 C 0 1 F 0 1 C 0 1 F 0 1 C 0 1 F 1 0 C 2 0 F 0 4 C 0 8 F 0 2 C 0 4 F IEC 60584 TC L 200 t...

Page 8: ...Interface Description Order Code RS 232 9 way D type Connector COM1 06 02 1002 00 RS 232 25 way D type Connector COM2 06 02 1004 00 RS 485 06 02 1006 00 Soft Carrying Case Order Code 06 01 1020 00 ISOPLAN Software Calibration Certificate p r e s y s ...

Page 9: ...s are stored in the calibrator memory When powered on ON OFF key the calibrator goes through a self test routine and shows the last calibration date and the value of the battery voltage The battery voltage is constantly monitored and the low battery warning is provided After the self test is completed the display shows the starting menu IN EXEC CONF CAL COM The initial set point is 25 00 C By mean...

Page 10: ... If the internal compensation is selected the cold junction temperature value is displayed by the calibrator If the MANUAL option is selected the cold junction must be supplied by the operator After confirming the value by pressing ENTER the calibrator goes back to the operating mode RTD Selects the type of thermoresistance used Choose from PT100 NI100 CU10 and PT1000 types Choose also if the wiri...

Page 11: ...PRESYS Instruments T 650PH Page 7 2 1 1 Input Connections Diagrams p r e s y s ...

Page 12: ...r into the insert and plug the mini DIN connector to the external probe input EXT PROBE located on the calibrator front panel as illustrated in the figure below The temperature control with the external probe must be enabled by the PRBe option of the PRG menu More details in item 2 2 Menu CONF p r e s y s ...

Page 13: ...V low LOW BATTERY DT Updates the date and time of the calibrator Thus when the calibrator performs a calibration in the automatic mode via ISOPLAN all data are registered together with date and time of occurrence Every time the calibrator is powered off the internal clock does not continue to be updated However the ISOPLAN software can automatically update the calibrator date and time with the com...

Page 14: ...bles the calibrator Programmable Operating Mode and allows the configuration of programmed values The selected program is indicated by the selection arrow Choose one of the 6 temperature programs or NO to disable this Programmable Mode Select any of the 6 programs and confirm with the key ENTER Following it is shown the menu of temperature setpoint configuration 10 20 25 VARIABLE Change the config...

Page 15: ... split into a mantissa and an exponent as it is used in scientific notation For a C coefficient equal to 3 151052 10 2 for example type its mantissa an integer and a fractional part with six digits in the C mnemonic and its exponent as an absolute value in the E_C mnemonic In this way C 3 151052 and E_C 2 Note that the signal can be inverted by pressing the key ZERO when the number on the display ...

Page 16: ...IGH 100 0 SCALE LOW 0 0 MEM The T 650PH calibrators allow many special programs and functions that can be of frequent use In situations like this it would be useful to store the current configuration in memory in order to save time Up to 8 configurations can be stored in memory Selecting the option MEM it is possible to store the current configuration WRITE restore a previous stored configuration ...

Page 17: ... increased or decreased The key does not have function in the manual operating mode of the T 650PH calibrators 2 4 Programmable Operating Mode Pre configured programs can be loaded from the calibrator memory enabling the programmable operating mode The temperature programmed values of the block are used directly with no need to enter the setpoint The display shows STEPn beside the block temperatur...

Page 18: ... block temperature reference values for the calibration calibration points TOL the maximum tolerance for the thermo element operation STB the stabilization time in seconds so that the thermo element temperature indicates correctly This timer starts just after the block reaches and stabilizes at the setpoint temperature STR the calibration strategy of the programmed reference values The available s...

Page 19: ...e automatic calibration starts by the option EXEC from menu COM and the calibration data can be verified in option VERIF To calibrate automatically not using the ISOPLAN there is a reserved place for one manual tag The selection of the manual tag is performed by confirming the option TAGMAN with the key ENTER The option ADDRESS selects the communication address of the T 650PH calibrator The commun...

Page 20: ...another sensor with high accuracy probe connected to a superthermometer as described in item 7 2 Probe Calibration So at factory the accuracy of the superthermometer is transferred to the dry block calibrator The transference will be well performed only when there is perfect temperature equilibrium between the internal control sensor and the superthermometer probe Therefore it should not have any ...

Page 21: ...at insert However another control sensor adjustment can be performed to the new insert Do that using an external probe with high accuracy placed in the new insert and follow the steps described in item 7 2 Probe Calibration This new readjustment of the calibrator indication overwrites the factory calibration and it remains even after turning off the dry block Should you want the factory calibratio...

Page 22: ...ogeneous cooling of the parts does not jam each other If by chance a jamming situation happens refer to item 8 2 Instructions for Insert Jamming to proceed properly 5 Calibrator Warning Messages Warning Meaning Procedure RAM ERROR READ MANUAL Problem in RAM memory Turn the calibrator off and on If the error persists contact the Presys technical support dept EEPROM ERROR READ MANUAL Problem in EEPR...

Page 23: ...n out of control The I parameter integral gain is responsible for the integral action and it is the most important part in the setpoint control While an error persists between the setpoint and the block temperature the integral action will actuate on the output signal until the error is brought to zero The D parameter derivative gain is responsible for the derivative action that provides a quick r...

Page 24: ... the date on which the calibration was performed and once it has been filled in it will be displayed every time the calibrator is turned on Options for IN calibration are mV mA OHM CJC PROBE 7 1 Input Calibration Select the corresponding mnemonic and apply the signals presented in the tables below When calibrating inputs the display shows on the 2nd line the value measured by the calibrator and on...

Page 25: ...ernal temperature sensor internal Probe RESTORE Restores the internal temperature sensor calibration parameters to the factory values To readjust the internal Probe it is necessary to compare the value indicated by the calibrator Probe and the temperature value from an external probe placed in the dry block insert The temperature of the external probe should have high accuracy and should be measur...

Page 26: ... value to record New indication of the ST key 50 50 00 49 971 49 97 49 995 key 1 150 150 00 149 964 149 96 149 995 key 2 250 250 00 249 943 249 94 249 990 key 3 350 350 00 349 906 349 91 350 009 key 4 450 450 00 449 847 449 85 450 000 key 5 550 550 00 549 815 549 82 549 995 key 6 650 650 00 649 782 649 78 650 005 key 7 p r e s y s ...

Page 27: ... for repair 8 2 Instructions for Insert Jamming If by chance it happens that an insert jams inside the block proceed as follows 1 apply a lubricant oil between the parts 2 apply cooling liquid inside the insert wells in order to contract the insert 3 try again to withdraw the insert After taking the insert out sand both the surfaces with thin sandpaper polish them with a suitable paste and finally...

Page 28: ...www presyscorp com p r e s y s ...

Reviews: