background image

5

English

Deutsch

Español

Fr

ançais

Quick Start Guide

Introduction

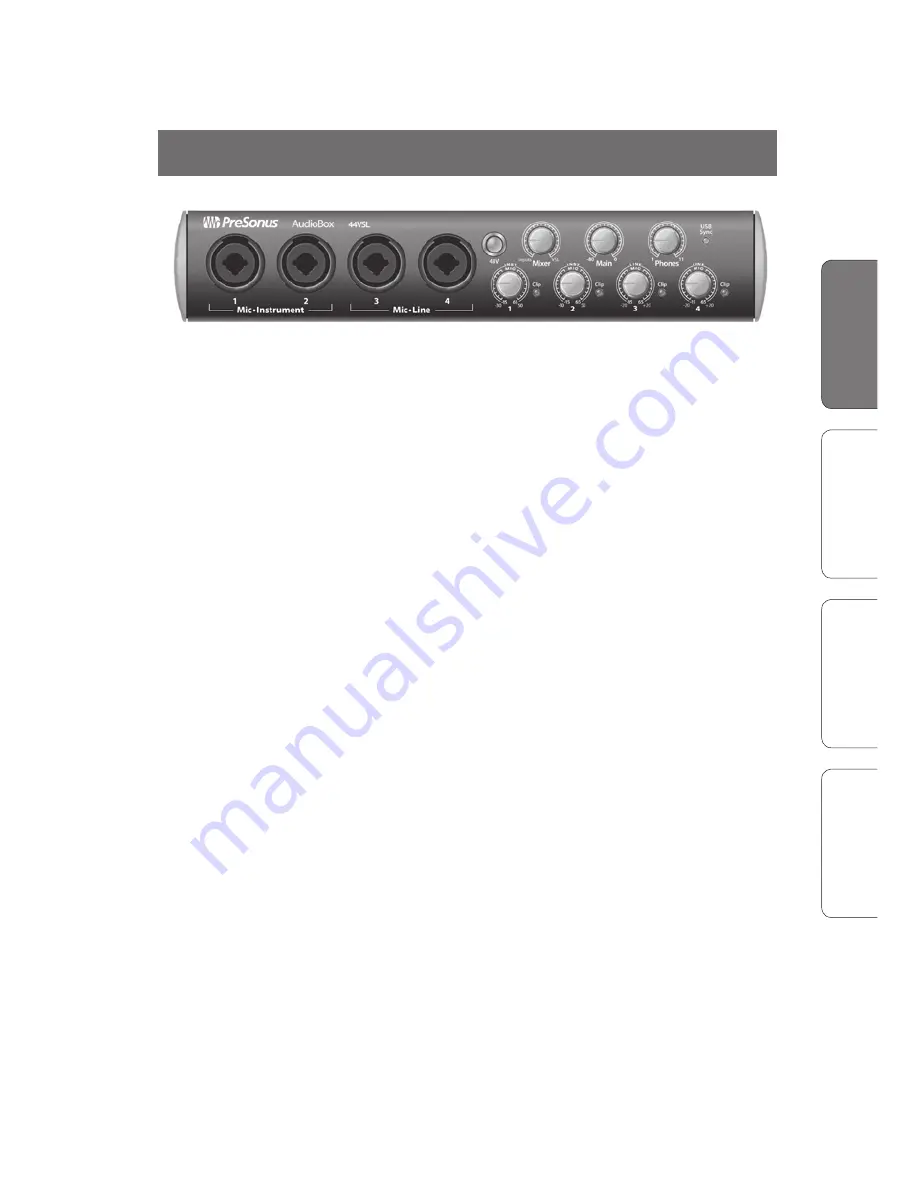
Thank you for purchasing the PreSonus AudioBox™ 44VSL. 
PreSonus Audio Electronics, Inc., has designed the AudioBox 
44VSL utilizing high-grade components to ensure optimum 
performance that will last a lifetime. Loaded with 4 high-
headroom, XMAX™ microphone preamplifiers; a built-in, 4x4 
USB 2.0 recording and playback interface; MIDI I/O; Fat Channel 
processing with compressors, limiters, downward expanders, 
and 3-band EQs; DSP effects; and more, AudioBox 44VSL 
breaks new ground for music-production tools. All you need 
is a computer with a USB 2.0 connection, a few microphones 
and cables, powered speakers, and your instruments, and you 
are ready to record in the studio or in front of an audience!

We encourage you to contact us at 225-216-7887 (9 a.m. to 
5 p.m. Central Time) with any questions or comments you 
may have regarding your PreSonus AudioBox. PreSonus 
Audio Electronics is committed to constant product 
improvement, and we value your suggestions highly. 
We believe the best way to achieve our goal of constant 
product improvement is by listening to the real experts: 
our valued customers. We appreciate the support you 
have shown us through the purchase of this product. We 
are confident that you will enjoy your AudioBox 44VSL!

A Quick Note About This Quick Start Guide: 

This Quick Start Guide is written 

to help you get acquainted with your AudioBox 44VSL. Complete information is 
in the User Manual located on your AudioBox Driver disc. We suggest that you 
use the User Manual to familiarize yourself with the features, applications, and 
correct connection procedures for your AudioBox before trying to connect it to 
your computer. This will help you avoid problems during installation and setup. 

Throughout the User Manual you will find Power User tips. These tips 
provide tricks to help you become a seasoned pro with your AudioBox. 
In addition to the Power User tips, you will find an assortment of audio 
tutorials at the back of the User Manual. These tutorials cover everything 
from microphone placement to equalizer and compression suggestions 
and are included to help you get the most from your AudioBox 44VSL. 

Summary of Contents for AudioBox 44VSL

Page 1: ...AudioBox 44VSL Quick Start Guide English Deutsch Espa ol Fran ais www presonus com...

Page 2: ...ing type plug A polarized plug has two blades with one wider than the other A grounding type plug has two blades and a third grounding prong The wide blade and the third prong are provided for your sa...

Page 3: ...REACh regulation WEEE This symbol on the product or its packaging indicates that this product must not be disposed of with other waste Instead it is your responsibility to dispose of your waste equip...

Page 4: ...9 3 Install and Authorize Studio One Artist 10 Your AudioBox 44VSL comes complete with a professional and easy to use DAW Studio One Artist that will turn your computer into a music studio and get yo...

Page 5: ...lue your suggestions highly We believe the best way to achieve our goal of constant product improvement is by listening to the real experts our valued customers We appreciate the support you have show...

Page 6: ...ut level for the Phones headphone output on the back of the unit USB Sync LED This LED indicates power and proper USB sync It will illuminate red when the AudioBox 44VSL is properly powered and blue w...

Page 7: ...and Out Ports The MIDI input and output allow connection and communication with external MIDI controllers and other MIDI equipment USB 2 0 Connection This is where you connect the USB cable from your...

Page 8: ...iagram 1 3 Basic Hookup Diagram Consult your Owner s Manual on disc for many more hookup diagrams Clip Clip Clip Clip AudioBox44VSL Mic Instrument 1 2 Mic Line 3 4 USB Sync 48V IN OUT L R 1 2 3 4 MAIN...

Page 9: ...Mac For complete information on using VSL see Section 4 1 in your AudioBox 22 44VSL User Manual After inserting the Installation CD into your disc drive run the AudioBox installer It will take you th...

Page 10: ...d mix a great performance As a valued PreSonus customer you are also eligible for a discount upgrade to Studio One Producer or Studio One Professional For more details on the Studio One upgrade progra...

Page 11: ...that your computer is connected to the Internet For instructions on authorizing Studio One without an Internet connection please consult Section 4 2 of the AudioBox 22 44VSL manual 2 Launch the Studio...

Page 12: ...r all your PreSonus products as well as to log into the PreSonus forum USERNAME _______________________ PASSWORD _______________________ 6 An email from PreSonus Registration will be automatically sen...

Page 13: ...dio One 2 0 menu and selecting Studio One Installation in Studio One Artist 1 By default each package will be selected for installation Make sure your Studio One DVD is inserted in your computer and s...

Page 14: ...uipment should be powered on in the following order A Sound sources keyboards direct boxes microphones etc connected to the AudioBox inputs B AudioBox 44VSL and Computer C Power amplifiers or powered...

Page 15: ...owered monitors using balanced cables 5 If you re using passive speakers connect them to your power amplifier using speaker cable 6 If your microphone requires phantom power press the 48V button on th...

Page 16: ...e to the VSL position While using Virtual StudioLive you will be monitoring the playback through VSL so you ll remove any analog monitoring from the mix Configuring Studio One Artist 11 Launch Studio...

Page 17: ...Click on the MIX button to open the Console in Studio One 17 Speak into the microphone while watching the meter on Channel 1 in Studio One and slowly turning the AudioBox Input 1 Trim knob clockwise C...

Page 18: ...r click on the Fat Channel tab You will see an assortment of presets 21 Drag a vocal preset from the Browser and drop it onto Channel 1 22 Put on your headphones and speak into the microphone If you w...

Page 19: ...eaking into the microphone adjust the FXA Send level up until you are happy with the amount of reverb 26 If you would like to record with the Fat Channel effects enable the Post button at the top of t...

Page 20: ...Mixing Tutorial Troubleshooting Guide Studio One Artist Information The Studio One Artist Advanced Quick Start Guide can be found in your AudioBox 44VSL User Manual Complete information about Studio O...

Page 21: ...fails In the USA Call PreSonus Technical Support at 1 225 216 7887 Monday through Friday between 9 a m and 5 p m Central Time Outside the USA Contact your PreSonus distributor Anywhere in the world Co...

Page 22: ...art 15 of the FCC rules Operation is subject to the following two conditions 1 This device may not cause harmful interference and 2 This device must accept any interference received including interfer...

Page 23: ...eppers green or red 1 batch green onions 3 lbs rice Tony Chachere s Cajun Seasoning 1 bottle chicken stock concentrate or 3 cubes chicken bullion 1 can Rotel tomotoes with chilies diced regular hot Ta...

Page 24: ...he separation between the equipment and the receiver Connect the equipment into an outlet on a circuit different from that to which the receiver is connected Consult the dealer or an experienced radio...

Page 25: ...r s Manual Overview Hookup Connecting to a Computer Tutorials Technical Information Troubleshooting and Warranty Software Virtual StudioLive SL Remote and Studio One Artist English Fran ais Espa ol De...

Page 26: ...l Directives and Standards relating to electromagnetic compatibility EMC Directive 2006 95 EC and the LowVoltage Directive 2004 108 EC Important Safety Instructions The exclamation point within an equ...

Page 27: ...tual StudioLive Setup 17 4 1 2 Virtual StudioLive Browser 19 4 1 3 Virtual StudioLive Overview and Fat Channel Zoom 20 4 1 4 VSL Controls Definitions and Uses 21 4 1 5 Loading Scenes and Presets from...

Page 28: ...nd Warranty 5 4 Aux Bus Mixing 67 5 4 1 Monitor Mixing 67 5 4 2 Effects Processing 67 5 5 Digital Effects 68 5 5 1 Reverb 68 5 5 2 Delay 69 5 5 3 Modulation Effects 69 6 0 Technical Information 70 6 1...

Page 29: ...ve audience We encourage you to contact us at 1 225 216 7887 between 9 a m and 5 p m Central Time GMT 06 00 CST with questions or comments regarding your PreSonus AudioBox 22 44VSL PreSonus Audio Elec...

Page 30: ...ll PreSonus audio interfaces include PreSonus Studio One Artist recording software which comes with over 4 GB of plug ins loops and samples giving you everything you need for music recording and produ...

Page 31: ...drag and drop workflow Drag presets directly to channels Drag parts of presets directly to components in the Fat Channel StudioLive 16 0 2 Fat Channel with High pass Filter Downward Expander Compress...

Page 32: ...What is in the Box 1 5 What is in the Box In addition to this manual your AudioBox 22 44VSL package contains the following PreSonus AudioBox 22VSL or 44VSL USB 2 0 recording interface 6 1 8m 6 pin to...

Page 33: ...and the AudioBox 22 44VSL becomes an instrument preamplifier Line level Inputs AudioBox 44VSL Only Channels 3 and 4 of the AudioBox 44VSL have a inch balanced TRS connection for line level input When...

Page 34: ...ital distortion digital clipping which sounds terrible The XMAX preamps in your AudioBox 22 44VSL provide plenty of headroom take advantage of it Mixer The Mixer knob allows you to blend your input si...

Page 35: ...u connect headphones to your AudioBox 22 44VSL Main Out These are the main outputs for the AudioBox 22 44VSL The output level of the Main Outs is controlled by the Main volume knob on the front of the...

Page 36: ...frequently used to trigger or control an audio source such as a plug in or synthesizer It s important to ensure that your MIDI data is correctly sent and received by the appropriate hardware or softwa...

Page 37: ...tual StudioLive SL Remote and Studio One Artist Hookup 2 Hookup Basic Hookup Diagram 2 3 2 3 Basic Hookup Diagram Clip Clip Clip Clip AudioBox44VSL Mic Instrument 1 2 Mic Line 3 4 USB Sync 48V IN OUT...

Page 38: ...rtist Tutorials Technical Information Troubleshooting and Warranty 2 Hookup Hookup 2 4 MIDI Hookup Diagram 2 4 MIDI Hookup Diagram Clip Clip Clip Clip AudioBox44VSL Mic Instrument 1 2 Mic Line 3 4 USB...

Page 39: ...rtual StudioLive software Macintosh Operating Systems Mac OS X 10 6 or higher Hardware Minimum Intel Core Duo Processor 2 GB RAM Recommended Intel Core 2 Duo or Intel iCore processor or better 2 GB or...

Page 40: ...ve The AudioBox installer will auto launch and take you through each step of the installation process Please read each message carefully It is recommended that you quit all applications before you sta...

Page 41: ...scanned your computer you will be prompted to begin the installation If your AudioBox is not detected by the installer you will prompted to connect it Click Install Driver 4 Once the driver has been i...

Page 42: ...ul that you do not connect your AudioBox too soon 1 You will be directed to the Welcome screen Click Continue and follow the onscreen instructions 2 You will be directed to choose the hard drive onto...

Page 43: ...ular audio applications Apple Logic Pro Express 7 1 Launch Logic Pro Express 2 Go to Logic Preferences Audio 3 Click on the Devices Tab 4 On the Core Audio tab check Enabled 5 Select PreSonus AudioBox...

Page 44: ...ivers beginning with PreSonus AudioBox 22 44 VSL 8 Go to Options Audio and click on the General tab 9 Set the PlaybackTiming Master to PreSonus AudioBox DAW Out 1 10 Set the RecordingTiming Master to...

Page 45: ...o easily manage your presets and mix Scenes Controlling VSL is as easy as drag and drop Load Fat Channel presets and scenes by simply dragging them onto the channel or mixer overview You can load Fat...

Page 46: ...dragging VSL to your dock then by right clicking it and selecting Options Open at Login Please Note VSL is disabled when it is not launched and all audio routing must be made either in your DAW or in...

Page 47: ...r in Studio One From the Browser you can see all of your Scenes Fat Channel presets and FX presets that are saved on your computer You can also create new settings from this window Simply drag and dro...

Page 48: ...h a complete graphical representation of your Virtual StudioLive mix environment The vast majority of the work you will do in VSL will be done on the Overview tab From here you can Adjust levels for b...

Page 49: ...fader in VSL will not lower the signal in your host application so it is possible to clip the recording without clipping the monitor mix You must set the level for the recording using the trim knobs o...

Page 50: ...e buttons serves exactly the same purpose to access the Fat Channel parameters for its channel or bus Solo Button Turns Soloing On and Off This button will solo its channel to the outputs so that only...

Page 51: ...verse button can be used to correct audio signals that are out of phase and cancelling reinforcing each other Phase Reverse is accessible from the Main VSL Page as well as the Gate Zoom Phase Reverse...

Page 52: ...button engages and disengages the gate for the selected channel It will illuminate to indicate that the gate has been enabled The gate is available for all input and output buses GateThreshold Sets th...

Page 53: ...compressed whereas a fast attack time fully counterclockwise triggers compression immediately when a signal exceeds the threshold You can set the attack from 0 2 to 150 milliseconds Compressor Release...

Page 54: ...e of the passband the mean between the lower and upper cutoff frequencies that define the limits of the band You can adjust the center frequency from 36 to 465 Hz Low EQ Gain Control Sets the Gain Att...

Page 55: ...band s center frequency to its bandwidth With a constant center frequency higher Q values indicate a narrower bandwidth so Q is often equated with bandwidth By default the Q is set to a value of 0 55...

Page 56: ...ated in the previous section the Browser window in VSL functions much in the same way as the Browser in Studio One This means that to load a Scene or preset from the Browser window you simply select i...

Page 57: ...s and frustration STEP 1 Creating a Mix for the Main and Headphone Outputs Using VSL to create a mix for your Main and Headphone outputs is like using a mixer Raise the fader for each channel to raise...

Page 58: ...r and Limiter To make changes to one of these processors double click on its Microview This will open the Fat Channel tab and focus on the chosen dynamics processor From the Fat Channel window you wil...

Page 59: ...when the first reflections become audible Reverb Room size This allows you to adjust the size of your virtual room Reverb Width The width control increases the stereo width of the reverb bus Delay Del...

Page 60: ...ucer or Studio One Professional For more details on the Studio One upgrade program for PreSonus customers please visit http studioone presonus com 4 2 1 Installation and Authorization Once you have in...

Page 61: ...ou already have a PreSonus user account you can skip to Activating Studio One Artist On Line 3 Fill out the user registration form You will be asked to create a username and password This information...

Page 62: ...product key you received with the Studio One Artist installation disc Your Studio One Product Key is located on the Studio One Artist disc wallet Click on the Activate button to finish the activation...

Page 63: ...on which you want to run Studio One Artist 6 Launch Studio One Artist From the Activate Studio One Menu click on the Activate Offline link 7 Drag the Studio One 2 Artist license file onto the Offline...

Page 64: ...Click the check box next to each item you wish to install then click on the Install Packets button at the bottom left of the menu to install the selected content When finished installing content clic...

Page 65: ...e Studio One Artist installation disc The information in this tutorial covers only the basic aspects of Studio One Artist and is intended to get you set up and recording as quickly as possible Start P...

Page 66: ...Keyboard Controller from the Start Page A MIDI keyboard controller is a hardware device that is generally used for playing and controlling other MIDI devices virtual instruments and software parameter...

Page 67: ...io One Artist will receive MIDI data In this case the AudioBox 22 44VSL In the Send To drop down menu select the MIDI interface output AudioBox 22 44VSL from which Studio One Artist will send MIDI dat...

Page 68: ...o a MIDI instrument such as a keyboard synthesizer Studio One Artist refers to all tone generators as Instruments Once you have set up your MIDI keyboard controller take a moment to configure your sou...

Page 69: ...a New Song Now that you ve configured your MIDI devices let s create a new Song We ll start by setting up your default audio I O 1 From the Start page select Create a new Song 2 In the browser window...

Page 70: ...open the Song Setup window then click on the Audio I O Setup icon 8 Go to Song Song Setup menu and click on Audio I O Setup 9 We recommend that you create a mono input for each of the inputs on your...

Page 71: ...pper left corner of the Arrange window you will notice several buttons The third button from the left is the Add Tracks button Click this button to bring up the Add Tracks window 2 In the Add Tracks w...

Page 72: ...ecord For complete instructions please consult the Studio One Reference Manual which is located on your Studio One Artist installation DVD Anatomy of an Audio Track 4 2 6 Creating MIDITracks 1 Click o...

Page 73: ...rack 4 2 7 Adding Virtual Instruments and Plug in Effects toYour Song You can add plug ins and instruments to your Song by dragging and dropping from the browser You can also drag an effect or group o...

Page 74: ...track click the Effects button and select the plug in or one of its presets in the effects browser then drag the selection over the track to which you would like to add the effect Drag and Drop Audio...

Page 75: ...ensive resistant to physical damage and typically handle high sound pressure levels SPL very well Unlike condenser microphones most dynamic microphones do not require a power source Dynamic microphone...

Page 76: ...ookstore as there are many books and magazines about recording techniques The Internet is also a great source of recording information as are instructional videos Some of these microphone placement su...

Page 77: ...lacement with two small diaphragm condenser microphones See drum overheads photo on the next page Bass Guitar Direct and Speaker Plug the electric bass guitar into a passive direct box Connect the ins...

Page 78: ...ch one is at a 45 degree angle pointed down at the drum kit approximately 7 or 8 feet above the floor or drum riser Experiment with height This technique can be used in live applications as well Snare...

Page 79: ...s mixing the various signals of a rock performance together a much more tedious task Why do we need compression Consider the previous discussion You are mixing a rock performance with an average dynam...

Page 80: ...hereby enhancing the ability of a live sound system or recording device to handle the signal without distortion or noise and aiding in placing the signal in the overall mix 5 2 2 Types of Dynamic Proc...

Page 81: ...e continuously and dramatically it is extremely difficult to ride the level with a console fader A compressor limiter automatically controls gain without altering the subtleties of the performance A s...

Page 82: ...lts in an overall reduction of level The gain control allows you to restore the loss in level due to compression like readjusting the volume Compressor Sidechain The sidechain jack interrupts the sign...

Page 83: ...are reduced in level by the amount set by the range control If the threshold is set fully counterclockwise the gate is turned off always open allowing all signals to pass through unaffected Attack Th...

Page 84: ...y set gate will only allow the intended sound to pass through the volume of everything else is lowered Not only will this strip away unwanted artifacts like hiss it will add definition and clarity to...

Page 85: ...eping the acoustic guitar from disappearing in the track Thresholdhold RatRatioio AttAttackack Release 6 3 dB 3 4 1 188 ms 400 ms Electric Guitar This is a setting for crunch electric rhythm guitar A...

Page 86: ...Attackack Release 5 5 dB 7 1 1 0 001 ms 98 ms Contour This setting fattens up the main mix Thresholdhold RatRatioio AttAttackack Release 13 4 dB 1 2 1 0 002 ms 182 ms Effects Squeeze This is dynamic c...

Page 87: ...h is divided into several bands of frequencies most commonly three to seven bands A fully parametric EQ like those in the StudioLive 24 4 2 offers control over the bandwidth basically the range of fre...

Page 88: ...quency band It gets its name from the positions of the sliders which graphically display the resulting frequency response curve The center frequency and bandwidth are fixed the level amplitude for eac...

Page 89: ...It is not uncommon to hear an annoying ringing or a twang mixed in with your amazing sounding low end and perfect attack so your next task will be to find that offending frequency and notch it out On...

Page 90: ...Hz Clarity 80 Hz and below Muddy 125 Hz Bottom end Acoustic Guitar 2 3 kHz Tinny 5 kHz and above Sparkle 200 Hz Boomy 125 Hz Full Electric Bass 1 kHz Thin 600 Hz Growl 125 Hz Boomy 80 Hz and below Bot...

Page 91: ...anual Overview Hookup Connecting to a Computer Tutorials Technical Information Troubleshooting and Warranty Software Virtual StudioLive SL Remote and Studio One Artist Tutorials 5 Tutorials Equalizers...

Page 92: ...EQ Hz LOW MID GAIN ON PEAK 130 2 ON LOW 465 2 HI MID ON OFF HI MID LO HI HI MID FREQ kHz HI MID GAIN HI ON OFF HI PEAK SHELF HI FREQ kHz HI GAIN ON LO 2 4 2 ON PEAK 6 0 8 Rock FemaleVocals LOW ON OFF...

Page 93: ...N HI ON OFF HI PEAK SHELF HI FREQ kHz HI GAIN ON LO 2 9 2 ON SHELF 8 4 Kick Drum LOW ON OFF LOW PEAK SHELF LOW FREQ Hz LOW GAIN LOW MID ON OFF LOW MID HI LOW Q LOW MID FREQ Hz LOW MID GAIN ON PEAK 108...

Page 94: ...W GAIN LOW MID ON OFF LOW MID HI LOW Q LOW MID FREQ Hz LOW MID GAIN ON PEAK 320 6 ON LOW 960 0 HI MID ON OFF HI MID LO HI HI MID FREQ kHz HI MID GAIN HI ON OFF HI PEAK SHELF HI FREQ kHz HI GAIN ON HI...

Page 95: ...The sliders on each channel control the channel send level to Aux 1 Use these sliders the same way that you use the faders to set the output level to your main mix Ask your musicians what they would l...

Page 96: ...usually be adjusted in a reverb effect Decay Decay is the time required for the reflections reverberation to die away In most modern music production reverb decay times of between one and three second...

Page 97: ...ression that there is more than instrument playing voice singing etc This ensemble effect is created using a series of short continuously varying delays that produce slight pitch shifts and add fullne...

Page 98: ...NRatio 94dB 0dBu 1kHz unitygain 20kHzBW unwtd GainControlRange 15dBto 65dB InputMaxHeadroom 10dBu 0 5 THD InputImpedance 1 7k PhantomPower 48VDC 10mAtotal Instrument Input channels 1 and 2 only Connec...

Page 99: ...ectorType TRS female impedancebalanced FrequencyResponse 20Hz 20kHz 0 2dB THD N 0 002 1kHz 20kHzBW A wtd S NRatio 107dB 1kHz maxgain 20kHzBW unwtd OutputLevel 10dBu OutputImpedance 51 Power Power AB22...

Page 100: ...unitygain 22kHzBW A wtd GainControlRange 15dBto 65dB InputMaxHeadroom 16dBu 0 5 THD InputImpedance 1 7k PhantomPower 48VDC 32mAtotalunit Instrument Input channels 1 and 2 only ConnectorType Combo TS f...

Page 101: ...A wtd S NRatio 96dB 1kHz maxgain 20kHzBW A wtd Analog Output ConnectorType TRS female impedancebalanced FrequencyResponse 20Hz 22kHz 0 25dB THD N 0 003 1kHz 22kHzBW A wtd S NRatio 109dB 1kHz 22kHzBW A...

Page 102: ...hours of 9 a m and 5 p m Central Time GMT 06 00 CST PreSonus technical support is available via email during the same hours at support presonus com AudioBoxWill Not Connect to Computer Verify that the...

Page 103: ...ned for repair PreSonus reserves the right to change or improve the design of the product at any time without prior notice This warranty does not cover claims for damage due to abuse neglect alteratio...

Page 104: ...Shelving 60 VSL 26 Expansion Definition 54 F Fader 22 Fader Locate See Recalling Faders Fat Channel 20 Frequency Tables 62 63 G Gate 24 52 H Hard knee 54 High Pass Filter 24 I Import Audio Studio One...

Page 105: ...CC rules Operation is subject to the following two conditions 1 This device may not cause harmful interference and 2 This device must accept any interference received including interference that may c...

Page 106: ...b Section 0 Current Section PreSonus AudioBox 22 44VSL Overview Hookup Connecting to a Computer Software Virtual StudioLive SL Remote and Studio One Artist Tutorials Technical Information Troubleshoot...

Page 107: ...r red 1 batch green onions 3 lbs rice Tony Chachere s Cajun Seasoning 1 bottle chicken stock concentrate or 3 cubes chicken bullion 1 can Rotel tomotoes with chilies diced regular hot Tabasco sauce Co...

Page 108: ...he separation between the equipment and the receiver Connect the equipment into an outlet on a circuit different from that to which the receiver is connected Consult the dealer or an experienced radio...

Reviews: