background image

C762, C764, C764i Stairclimber

Page 63

Replacing a Magnet Assembly

Do not tighten the bolts more than finger tight when you perform the next step.

5.

Position the magnet assembly against the frame upright (see Diagram 7.9). Install the 
fasteners that secure the magnet assembly to the frame upright.

6.

If you are replacing only one magnet assembly

...

THEN...

OTHERWISE...

Continue with the next step.

Repeat Step 5 for the second magnet
assembly; then continue with the next
step.

7.

Inspect the gaps between the disk and the magnet assemblies as described in Procedure 
5.1.

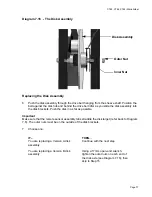
Diagram 7.9  -  The Magnet Assembly

Summary of Contents for Cardio Theater Integrated Bracket C764i

Page 1: ...intain this product This document contains general product information software diagnostic procedures when available preventative maintenance procedures inspection and adjustment procedures troubleshooting procedures replacement procedures and electrical block and wiring diagrams To move directly to a procedure click the appropriate procedure in the bookmark section to the left of this page You ma...

Page 2: ... that should be performed to keep the C760 Series Climbers in peak condition Section Four Checking Unit Operation This procedure provides you with a quick way of checking the climber operation Check the climber operation at the end of a maintenance procedure and when it is necessary to ensure that the climber is operating properly Section Five Inspection and Adjustment Procedures Perform inspectio...

Page 3: ...it can damage static sensitive devices you are servicing Use anti static handling procedures and wear an anti static device such as a wrist strap when you perform this procedure Anti static kits can be ordered from Precor Customer Service Precor part number 20024 101 Wrist straps are made for static control They will neither reduce or increase the risk of electrical shock when using or working on ...

Page 4: ... Version B disk assembly shaft has shoulders the Version A disk assembly shaft does not The Version A and Version B disk assemblies are interchangeable The part number for the Version A disk assembly is 36020 101 36020 102 is the part number for the Version B disk assembly Diagram 1 2 Version A B Disk Assembly Shafts Version A Version B Shoulder ...

Page 5: ...low the magnet to cool by removing power from the climber and waiting four hours with the covers off before you perform maintenance operations or operate the climber If the user s heart rate has reached or exceeded the maximum heart rate The user MUST consult a physician before operating the C760 Series Climber Caution statements are intended to prevent damage to the C760 Series Climber as a resul...

Page 6: ...4 C764i Stairclimber Page 6 Be aware that the weight limit for the C760 Series Climber is 350 pounds Keep all electrical components such as the power cord and the ON OFF switch away from water and other liquids ...

Page 7: ...available when you service C760 Series Climbers TOOLS EQUIPMENT 2 phillips screwdriver anti static wrist strap 2 flat head screwdriver ohmmeter voltmeter 1 8 5 32 and 3 16 allen wrenches blue loctite 3 8 7 16 1 2 2 3 4 and 17mm 2 cable ties open end wrenches damp cloth mild detergent 1 2 drive socket wrench set tape chip puller feeler gauge 0 030 feeler gauge 0 050 needle nose pliers pliers snap r...

Page 8: ... disk cuts more lines of force in the magnetic field and a greater voltage is induced on the disk Because current is proportional to voltage the eddy current increases as well When the eddy current increases the magnetic field produced by the eddy current increases and opposes the magnetic field produced by the magnet with more strength Because the two fields are repelling more strongly the resist...

Page 9: ...ROGRAMS prompt press the WORK LEVEL and WORK LEVEL keys simultaneously The C762 display is shown in Diagram 2 1 and the C764 display is shown in Diagram 2 2 3 On units manufactured after May 28 2000 press keys RESET 6 5 sequentially The C762 display is shown in Diagram 2 1 and the C764 display is shown in Diagram 2 2 4 The version number of the PROM is displayed in the upper right alpha numeric di...

Page 10: ...C762 C764 C764i Stairclimber Page 10 Diagram 2 1 C762 Stairclimber Display Diagram 2 2 C764 Stairclimber Display Key 3 Key 2 Key 1 Key 5 Key 6 Key 7 Key 1 Key 2 Key 3 Key 5 Key 6 Key 7 ...

Page 11: ...s test is programmed to display the following LED illumination sequences a A vertical line and then a horizontal line scrolls across the left LED matrix b The display segments on each right side alpha numeric illuminate simultaneously for each digit c The LEDs to the left of the first column of functions illuminate followed by the LEDs to the second and third column 4 If the appropriate sections o...

Page 12: ...R WORK LEVEL LEVEL DOWN WORK LEVEL LEVEL UP QUICK START QUICK START Key to the left of RESET hidden HIDDEN KEY NEXT TO RESET Key on the far left of the console hidden LEFT MOST HIDDEN KEY Key on the far right of the console hidden RIGHT MOST HIDDEN KEY 9 Press two or more keys on the left keypad Verify that the MULTIPLE KEYS ON LEFT KEYPAD message is displayed on the electronic console 10 Press tw...

Page 13: ...ct U S Standard units Press the WORK LEVEL key to select the Metric measurement system 6 When the MAX WORKOUT prompt is displayed use the or keys to designate a workout time limit between 10 and 240 minutes Press ENTER when the desired time appears The MODIFY CUSTOM prompt displays 7 If you plan to modify the custom course currently selected THEN OTHERWISE Press the WORK LEVEL key then Press the W...

Page 14: ... a problem occurs record the following information Model and serial number Software version number Note Determine the version number of the PROM mounted on the upper PCA as described in Procedure 2 1 or by looking at the label on the PROM User and program number running when the problem occurred A description of a What happened or failed to happen b The action taken by the user just before the pro...

Page 15: ...llowing preventive maintenance schedule be followed At the End of Each Day Wipe down the stair arms and frame with a damp cloth Every Week Wipe the surface of the electronic console with a barely damp sponge or soft cloth Dry with a clean towel Vacuum underneath the climber following these steps a Turn off the climber with the circuit breaker then unplug the power cord from the wall outlet b Place...

Page 16: ... and check connectors and wire connections Secure connections and replace wiring as necessary When the covers are removed visually inspect the lower ribbon cable and the part of the upper ribbon cable that is not inside the column If either ribbon cable is torn or damaged replace it as described in Procedure 7 10 Inspect the stair arm and drive belts If the belts show signs of wear or damage remov...

Page 17: ... alert for unusual rubbing hitting grinding or squeaking noises b Press the Change keys Verify that information such as Horizontal Distance and Steps Per Minute changes as the workout progresses c Make sure that the stair arm belts do not rub on the cover and that the cover bracket does not rub on the sheave 5 If you feel no resistance as you step if the climber makes unusual noises or the electro...

Page 18: ...nt compared with Work Levels 1 and 5 THEN OTHERWISE Refer to Section 6 Continue with the next step 10 Check the LEDs mounted on the upper PCA and the function keys displayed on the electronic console by performing Procedure 2 2 11 Turn off the climber with the circuit breaker then unplug the power cord from the wall outlet ...

Page 19: ...arning and Caution statements listed in Section One Things You Should Know 2 Press down the stairarm with one hand With your other hand grasp and pull the end of the stairarm belt connected to the return spring Release the stairarm Remove the belt from the pulley and belt idler see Diagram 5 1 Diagram 5 1 Removing a Stairarm Belt 3 Place the 050 feeler gauge between the disk and the top coil on th...

Page 20: ...xt step Skip to Step 7 5 Barely loosen the bolts lock washers and flat washers that secure the right magnet assembly to the climber frame see Diagram 5 2 Diagram 5 2 Magnet Assemblies Note Do not loosen the bolts too much Although you must be able to move the magnet assembly Disk Assembly Magnet Assemblies Cable Clamp ...

Page 21: ...embly The 050 feeler gauge does fit snugly and Skip to Step 11 you have not loosened the magnet assembly 8 Slide the lower part of the magnet assembly along its adjustment slot until the 050 feeler gauge fits snugly between the disk and the lower coil on the assembly 9 Tighten the bolts lock washers and flat washers that secure the right magnet assembly to the climber frame 10 Repeat Steps 3 throu...

Page 22: ...meter to a range that will conveniently read 125 ohms Note The resistance of the coils will be higher than optimum 85 105 ohms when the coils are warm Take resistance measurements when the magnet assemblies are at room temperature 4 Remove the wires from the two terminals on one of the coils Measure the resistance between the two bare coil terminals 5 If the resistance measures less than 85 ohms o...

Page 23: ...C762 C764 C764i Stairclimber Page 23 Diagram 5 3 Magnet Wiring ...

Page 24: ...the upper ribbon cable see Diagram 6 1 6 Connect the spare ribbon cable between the lower PCA and the upper ribbon cable 7 Check the operation of the climber as described in Section Four 8 Disconnect the spare ribbon cable from the lower PCA and the upper ribbon cable 9 If the climber operated correctly when the spare ribbon cable was installed THEN OTHERWISE The original lower ribbon cable is The...

Page 25: ...on cable between the upper PCA and the lower ribbon cable connector 14 Connect the original lower ribbon cable to the lower PCA 15 Check the operation of the climber as described in Section Four 16 Disconnect the spare ribbon cable from the Upper PCA and the lower ribbon cable 17 If the climber operated correctly when the spare ribbon cable was installed ...

Page 26: ...th the tab holes on the display base plate 21 Gently press the display housing onto the display base plate until the tabs are pushed into the holes on the base plate 22 Replace the screws that secure the display housing to the display base plate Note Gently push any excess cable into the column 23 Slide the enclosure collar down the column and over the column mounting screws Press down to ensure a...

Page 27: ...readmill Service Manual 2 Remove the screws that secure the upper display assembly to the upper handrail Carefully pull some excess interconnect cable out from the targa upright Rotate the display housing so that the rear of the upper PCA is facing upward and set the display housing on the upper handrail 3 Attach the wrist strap to your arm then connect the ground lead of the wrist strap to the tr...

Page 28: ...Points Function Keys Pressed PLACE THE POSITIVE LEAD AT THE ELECTRONIC THE VOLTMETER OF THE VOLTMETER ON CONSOLE PRESS SHOULD READ BETWEEN Pin 1 of J4 Left CHANGE key 0 Vdc and 350 mVdc Pin 2 of J4 STOP key 0 Vdc and 350 mVdc Pin 3 of J4 WORK LEVEL key 0 Vdc and 350 mVdc Pin 4 of J4 WORK LEVEL key 0 Vdc and 350 mVdc Pin 6 of J4 QUICK START key 0 Vdc and 350 mVdc Pin 7 of J4 ENTER key 0 Vdc and 350...

Page 29: ... 6 1 are correct and one or more voltage readings in Table 6 2 are incorrect replace the display housing keypad 10 Set the circuit breaker in the off position 11 If necessary carefully re connect the keypad cable to the keypad connector 12 Remove the ground lead of the wrist strap from the treadmill frame then remove the wrist strap from your arm 13 Position the display enclosure on the display pl...

Page 30: ...er The AC voltage should read as in step 1 If the AC voltage is missing or incorrect replace the circuit breaker or the wiring between the circuit breaker and line filter as appropriate 4 Using an AC voltmeter check between the AC input terminals of the lower PCA terminals 1 2 of P4 The AC voltage should read as in step 1 If the AC voltage is missing or incorrect replace the line filter or the wir...

Page 31: ...continue with the next step 10 Set the circuit breaker in the off position Remove the ribbon cable from the upper PCA Set the treadmill s circuit breaker in the on position Check the 6 Vdc voltage as in step 5 on the ribbon cable connector If the voltage is correct replace the upper PCA If the voltage is missing or incorrect continue with step 7 11 Set the circuit breaker in the off position Remov...

Page 32: ...sing a voltmeter check the voltage across any of the four magnet coils The voltage across the magnet coil at work level 1 should be approximately 60 Vac Check each of the four magnet coils in this manner a If all four magnet coils have the correct voltage repeat step 3 If you have performed all of the previous procedures and have been unable to locate the problem contact Precor Customer Support b ...

Page 33: ...t emitting diodes on the lower PCA are lit If the display is illuminated and one of the three LED s is not lit replace the lower PCA 5 If the display is not illuminated go to procedure 6 3 6 If you have performed all of the previous procedures and are unable to locate the problem contact Precor Customer Support ...

Page 34: ...ing and connections between connector P2 of the lower board and the speed sensor If the wiring and connections are good go to step 5 b If the voltage in step 2 is 0 Vdc or very low disconnect the P2 connector and recheck the voltage on terminals 1 and 4 of P2 on the lower board If the voltage is correct re place the speed sensor If the voltage is still 0 Vdc or very low replace the lower PCA If yo...

Page 35: ... chest strap receiver that is external of the heart rate PCA Note There are four typical failure modes for the hand held chest strap heart rate system They are hand held is normal no chest strap reading no hand held reading chest strap normal no hand held or chest strap reading constant or intermittent readings when neither hand held or chest strap are in use Diagram 6 4 Hand held chest strap hear...

Page 36: ...segregated into two groups One group has blue shrink wrap around it and the other group has black shrink wrap around it The blue group must go to the right hand contacts and the black group must go to the left hand contacts In both groups the black wire must go to the lower contact and the red wire must go to the upper contact I necessary rewire the hand held contacts as described above and test a...

Page 37: ...t heart rate readings when neither heart rate system is in use is caused by something in the near vicinity radiating RF energy that is being received by the chest strap portion of the heart rate PCA 15 Temporarily disconnect the external heart rate receiver from the heart rate PCA Set the on off switch in the on position and repeat the procedure in step 5 16 If the hand held signal is now being ac...

Page 38: ... the next step 4 Loosen the fastener that secures the top of the cover to the climber frame Loosen both screws if you are going to remove both covers Note The two screws above the pedals secure the covers to the cover bracket see Diagram 7 1 When you remove a cover always remove only one of the screws Leave the cover bracket attached to the last cover removed 5 Remove the screws that secure the co...

Page 39: ...g the Covers When you replace the covers install the screw on the cover bracket first 8 Choose one IF THEN You are replacing the left cover Continue with the next step You are replacing the right cover only Skip to Step 12 9 Position the left cover against the climber frame ...

Page 40: ...the climber frame Tighten both screws if you removed both covers 14 Position the front cover seal so that it overlaps the edges of both the right and left covers Press the strip firmly into place Repeat this step for the rear cover seal 15 Slide the collar down the column and over the column mounting screws Press down to ensure a snug fit 16 Plug the power cord into the wall outlet then turn on th...

Page 41: ...et of tabs toward the edges of the base plate as you lift the display housing Note Turn over the display housing and support it on the display base plate while you perform the following steps 4 Attach the wrist strap to your arm then connect the ground lead of the wrist strap to a metal section of the climber frame 5 Disconnect the upper ribbon cable from the upper PCA CAUTION Be careful not to da...

Page 42: ...pper ribbon cable to the upper PCA 13 Remove the ground lead of the wrist strap from the climber frame then remove the wrist strap from your arm 14 Line up the tabs on the display housing with the holes on the display base plate 15 Gently press the display housing onto the base plate until the tabs are pushed into the holes 16 Replace the screws that secure the display housing to the display base ...

Page 43: ...ge PLCC44 Each of these packages should be removed with a proper IC removal tool see the illustrations below 4 The IC s may inserted into their socket by hand by carefully aligning the notch on the IC with the notch on the IC socket and carefully pressing the IC into its socket See the illustrations below for the alignment notches Care must be taken that the IC legs on a DIP28 are all aligned in t...

Page 44: ...r entry module ground stud Remove the wires from the ground stud Note Set the power entry module on a work bench while you perform the following steps 4 Remove the brown wire from the circuit breaker line terminal Do not remove the brown wire from the circuit breaker load terminal Note The line and load terminals are marked on the paper label on the circuit breaker 5 Disconnect the in line connect...

Page 45: ... the outside of the power entry module 9 Using the pliers press the two sections of the strain relief together while you push the strain relief into the round hole on the front of the power entry module 10 Connect the in line connectors on the ends of the loose blue wires attached to the input filter assembly and the power cord see Diagram 7 3 11 Connect the brown wire on the power cord to the lin...

Page 46: ...sembly and power cord on the power entry module ground stud Install the nut that secures the wires on the ground stud Note Take care not to pinch the cables when you perform the next step 15 Push the power entry module into the climber Install the screws that secure the power entry module to the climber frame 16 Check the operation of the climber as described in Section Four Checking Unit Operatio...

Page 47: ...teners that secure the lower PCA to the power entry module 6 Set aside the lower PCA for eventual shipment to Precor Customer Service Note When you package the lower PCA provide the information listed in Procedure 2 5 Documenting Software Problems Replacing the Lower PCA 7 Position the lower PCA at its mounting location Orient the PCA so that the nine pin header is as close as possible to the tran...

Page 48: ... orientation of the circuit breaker before you perform the next step The new breaker must be positioned the same way when you mount it in the power entry module 4 Remove the fasteners that secure the circuit breaker to the power entry module Remove the circuit breaker from its mounting position Replacing the Circuit Breaker 5 Position the new circuit breaker at its mounting location on the power e...

Page 49: ...C762 C764 C764i Stairclimber Page 49 Diagram 7 4 The Power Module Line Filter Transformer Circuit Breaker Lower PCA ...

Page 50: ...s the wires on the power entry module ground stud Remove the wires from the ground stud Note Set the power entry module on a work bench while you perform the following steps 5 Remove the screws that secure the circuit breaker to the power entry module Remove the breaker from its mounting position Note The line and load terminals are marked on the paper label on the circuit breaker 6 Remove the bro...

Page 51: ...r cable to the lower PCA 13 Connect the brown wire removed in Step 8 to the load terminal of the circuit breaker 14 Connect the in line connectors on the ends of the loose blue wires on the line filter assembly and the power cord 15 Position the circuit breaker at its mounting location on the power entry module Install the screws that secure the circuit breaker to the power entry module 16 Positio...

Page 52: ...ntry module Note Notice the orientation of the transformer before you perform the next step The transformer must be positioned the same way when you mount it in the power entry module 5 Remove the transformer from the power entry module Replacing the Transformer 6 Position the new transformer at its mounting location on the power entry module Make sure that the orientation of the transformer is th...

Page 53: ...ame Pull the module out of the climber 3 Remove the nut that secures the wires on the power entry module ground stud Remove the wires from the ground stud 4 Reaching into the hole in the cover remove the screw that secures the ground cable assembly to the climber frame Replacing the Ground Cable Assembly 5 Insert the screw removed in the previous step onto one end of the ground cable assembly Moun...

Page 54: ...losure collar up on the column 3 Disconnect the lower ribbon cable from the upper ribbon cable see Diagram 7 5 4 Choose one IF THEN You are replacing the upper ribbon Skip to Step 20 cable You are replacing the lower ribbon Continue with the next step cable Note Take care not to damage the cables when you perform the next step 5 Remove the screws that secure the power entry module to the climber f...

Page 55: ...s mounted on the climber frame Replacing the Lower Ribbon Cable 11 Gently feed one end of the ribbon cable down through the left column frame upright 12 Connect the new lower ribbon cable to the upper ribbon cable and the lower PCA 13 Fold the ribbon cable in half and route it through the cable clips mounted on the climber frame Make sure that the ribbon cable does not come in contact with moving ...

Page 56: ...r Ribbon Cable 20 Remove the screws that secure the display housing to the display base plate 21 Push each set of tabs toward the edges of the base plate as you lift the display housing Note Turn over the display housing and support it on the display base plate while you perform the following steps 22 Disconnect the upper ribbon cable from the upper PCA Do not pull the cable out of the frame uprig...

Page 57: ...crews that secure the display housing to the display base plate Note Gently push any excess cable into the column 29 Connect the upper and lower ribbon cables to each other 30 Slide the enclosure collar down the column and over the column mounting screws Press down to ensure a snug fit 31 Check the operation of the climber as described in Section Four Checking Unit Operation ...

Page 58: ... secure the remote sensor to the disk bracket 5 Remove the remote sensor assembly from the disk bracket Replacing the Remote Sensor Assembly 6 Position the remote sensor assembly on the disk mounting bracket Make sure that the remote sensor assembly tabs straddle the target see Diagram 7 6 7 Install the fasteners that secure the remote sensor to the disk bracket Note The plain washer must be mount...

Page 59: ...C762 C764 C764i Stairclimber Page 59 Diagram 7 6 Speed Sensor and Target Disk Assembly Speed Sensor Target ...

Page 60: ...bly is installed correctly the wires will fit naturally around the magnet assemblies 5 Push the blue wire connectors on the magnet cable assembly onto the top terminals on the upper magnet coils see Diagram 7 7 6 Push the red wire connectors on the magnet cable assembly onto the top terminals on the lower magnet coils 7 Connect one yellow wire to the empty terminals on the magnet coils of the righ...

Page 61: ...C762 C764 C764i Stairclimber Page 61 Diagram 7 7 Magnet Wiring ...

Page 62: ...rocedure review the Warning and Caution statements listed in Section One Things You Should Know 2 Remove the blue red and yellow wires from the magnet coils on the magnet assembly you are removing 3 Remove the fasteners that secure the magnet assembly to the frame upright Set aside the magnet assembly 4 If you are removing only one magnet assembly THEN OTHERWISE Continue with the next step Repeat ...

Page 63: ...e upright see Diagram 7 9 Install the fasteners that secure the magnet assembly to the frame upright 6 If you are replacing only one magnet assembly THEN OTHERWISE Continue with the next step Repeat Step 5 for the second magnet assembly then continue with the next step 7 Inspect the gaps between the disk and the magnet assemblies as described in Procedure 5 1 Diagram 7 9 The Magnet Assembly ...

Page 64: ...lies 8 Push the blue wire connector onto the top terminal on the upper magnet coil Push the red wire connector onto the top terminal on the lower magnet coil Connect the ends of the yellow wire to the empty terminals on the magnet coils Repeat this step if you replaced both magnet assemblies 9 Check the operation of the climber as described in Section Four then replace the covers as described in P...

Page 65: ... procedure review the Warning and Caution statements listed in Section One Things You Should Know 2 Press down the stair arm with one hand With your other hand grasp and pull the end of the stairarm belt connected to the return spring Release the stair arm Remove the belt from the pulley and belt idler see Diagram 7 10 3 Remove the return spring from the grooved belt clamp and spring bracket 4 If ...

Page 66: ... spring into the outer hole on the bracket when you perform the next step see Diagram 7 11 6 Insert one end of the return spring in the spring bracket Note When you perform the next step make sure that the end of the spring points down when you place it in the clamp 7 Place the other end of the return spring in the grooved belt clamp Position the spring as shown in Diagram 7 11 Diagram 7 11 The Re...

Page 67: ...othed pulley Route the belt under the idler pulley 9 If you are replacing only one return spring THEN OTHERWISE Continue with the next step Repeat Steps 5 through 8 for the second spring then continue with the next step 10 Check the operation of the climber as described in Section Four then replace the cover as described in Procedure 7 1 ...

Page 68: ... down the stair arm with one hand With your other hand grasp and pull the end of the stairarm belt connected to the return spring Release the stair arm Remove the belt from the pulley and belt idler refer back to Diagram 7 10 3 Remove the spring from the grooved belt clamp 4 Remove the fasteners that hold the halves of the grooved belt clamp together see Diagram 7 12 5 Remove the fasteners that se...

Page 69: ... 9 Place the belt clamp against the belt positioned in the previous step Note Hold the belt clamp against the belt and slotted area on the underside of the pedal when you perform the next step 10 Install the fasteners that secure the belt clamp to the pedal see Diagram 7 11 11 Place and hold the other end of the belt against one half of the grooved belt clamp The end of the belt should be flush wi...

Page 70: ...p Position the spring as shown in Diagram 7 14 15 Lift the stair arm assembly from the frame weldment Grasp the stairarm belt and lift it over the toothed pulley Route the belt under the idler pulley 16 If you are replacing only one stairarm belt THEN OTHERWISE Continue with the next step Repeat Steps 7 through 15 for the second stairarm belt then continue with the next step 17 Check the operation...

Page 71: ...he stair arm Remove the belt from the toothed pulley and belt idler refer back to Diagram 7 10 3 Remove the retaining ring from the toothed pulley see Diagram 7 15 4 Remove the five thrust washers toothed pulley and wave washer from the sheave shaft 5 If you are replacing only one toothed pulley THEN OTHERWISE Continue with the next step Repeat Steps 2 through 4 for the second pulley then continue...

Page 72: ...the climber 8 Slide the toothed pulley onto the sheave shaft If the pulley is on the right side of the climber face the pulley and rotate it counterclockwise while you watch the sheave If the pulley is on the left side of the climber face the pulley and rotate it clockwise while you watch the sheave 9 If the sheave moves THEN OTHERWISE The pulley is correctly installed Remove the pulley and re pos...

Page 73: ...thed pulley Route the belt under the idler pulley 12 If you are replacing only one toothed pulley THEN OTHERWISE Continue with the next step Repeat Steps 6 through 10 for the second pulley then continue with the next step 13 Check the operation of the climber as described in Section Four then replace the cover as described in Procedure 7 1 ...

Page 74: ...m Remove the belt from the pulley and belt idler refer back to Diagram 7 10 3 Remove the retaining ring from the idler pulley refer back to Diagram 7 15 4 Slide the idler pulley and wave washer from the idler shaft weldment 5 If you are replacing only one idler pulley THEN OTHERWISE Continue with the next step Repeat Steps 2 through 4 for the second idler pulley then continue with the next step Re...

Page 75: ...othed pulley Route the belt under the idler pulley 11 If you are replacing only one idler pulley THEN OTHERWISE Continue with the next step Repeat Steps 6 through 10 for the second idler then continue with the next step 12 Check the operation of the climber as described in Section Four then replace the cover as described in Procedure 7 1 ...

Page 76: ...ings You Should Know 2 Loosen the drive belt by pushing down on the top end of the drive belt idler arm Hold the idler arm down while you pull the belt out of the sheave rim Place the belt on the left end of the sheave shaft 3 Choose one IF THEN You are removing a Version A disk Continue with the next step assembly You are removing a Version B disk Using a 17mm open end wrench assembly loosen the ...

Page 77: ...ets Push the disk in as far as possible Important Make sure that the remote sensor assembly tabs straddle the disk target refer back to Diagram 7 6 The outer nuts must be on the outside of the disk brackets 7 Choose one IF THEN You are replacing a Version A disk Continue with the next step assembly You are replacing a Version B disk Using a 17mm open end wrench assembly tighten the outer nuts on e...

Page 78: ...e between the disk assembly and the inner nut 13 Using the 17mm open end wrench tighten the inner nut you loosened in the previous step Remove the 030 feeler gauge from the disk assembly 14 Install the disk assembly on the climber as described in Steps 6 through 8 15 Stand at the back of the climber and face the disk assembly The drive belt must be positioned over the disk hub and behind the idler...

Page 79: ... Skip to Step 21 19 Remove the set screws that secure the sheave to the sheave shaft Gently tap the sheave to re position it on the sheave shaft 20 Add a drop of blue loctite to the tip of each set screw Using the 1 8 allen wrench replace the set screws on the sheave hub 21 Return to Step 17 22 Inspect the gaps between the disk and the magnet assemblies as described in Procedure 5 1 23 Check the o...

Page 80: ...are replacing the right sheave Perform Steps 4 and 5 for the right bearing toothed pulley You are replacing the left sheave Perform Steps 4 and 5 for the left bearing toothed pulley You are replacing both bearings or the Perform Steps 4 and 5 for both toothed sheave shaft or the sheave assembly pulleys 4 Using the snap ring pliers remove the retaining ring from the toothed pulley refer back to Dia...

Page 81: ...ave shaft Discard the bearing and set aside the set screws and flanges If you are removing both bearings repeat this step for the second bearing 10 If you are replacing the sheave or sheave shaft THEN OTHERWISE Continue with the next step Skip to Step 14 Removing the Sheave From the Sheave Shaft 11 Remove the set screws that secure the sheave to the sheave shaft Pull the sheave from the shaft 12 P...

Page 82: ...placing the Sheave Assembly When you install the sheave assembly the hub must be on the left side of the climber 15 Stand at the back of the climber and face the disk assembly The drive belt must be positioned over the disk hub and behind the drive belt idler refer back to Diagram 7 15 Line up the drive belt in the center of the grooves on the disk hub Note Place the four flanges inside of the she...

Page 83: ...he sheave b Hold the drive belt between the 12 o clock and 3 o clock positions on the sheave rim c Turn the sheave counterclockwise Note As you move the sheave the belt will position itself on the rim d Grasp the drive belt at the 4 o clock position e Turn the sheave counterclockwise to fully seat the belt on the sheave rim Sheave Assembly Hitch Pin Idler Arm Clevis Pin Disk Assembly Idler Pulley ...

Page 84: ...Kneel behind the stairarms Press down on the ends of the stairarms Watch the belts as they move over the toothed pulleys and idlers pulleys 23 If the belts are centered on the toothed pulleys and idlers pulleys THEN OTHERWISE Continue with the next step Skip to Step 29 Note Do not remove the bolts from the sheave brackets and outer flanges when you perform the next step 24 Remove the locknuts that...

Page 85: ...sheave bracket 33 Repeat Steps 28 through 33 for the sheave bearing and flanges on the opposite side of the sheave shaft Checking the Alignment of the Drive Belt 34 Kneel behind the stair arms Press down on the ends of the stair arms Watch the drive belt as it moves on the sheave drive belt idler and disk hub 35 If the drive belt does not track correctly THEN OTHERWISE Continue with the next step ...

Page 86: ...om the sheave brackets 6 Using the 17mm open end wrench loosen the outer nuts on each end of the disk axle refer back to Diagram 7 16 7 Slide the disk assembly out of the disk brackets and away from the drive belt Remove the belt from the climber Replacing the Drive Belt 8 Push the disk assembly through the new drive belt Position the belt against the disk hub and behind the drive belt idler as yo...

Page 87: ...tself on the rim d Grasp the drive belt at the 4 o clock position e Turn the sheave counterclockwise to fully seat the belt on the sheave rim Note Make sure that the belt is on the sheave rim before you continue with this procedure 16 Kneel behind the stair arms Press down on the ends of the stair arms Watch the drive belt as it moves on the sheave drive belt idler and disk hub 17 Choose one IF TH...

Page 88: ...ighten the outer nuts on each end of the disk axle 23 Return to Step 14 24 Remove the set screws that secure the sheave to the sheave shaft Gently tap the sheave to re position it on the sheave shaft 25 Add a drop of blue loctite to the tip of each set screw Install the screws on the sheave hub 26 Return to Step 16 27 Inspect the gaps between the disk and the magnet assemblies as described in Proc...

Page 89: ...dler arm 4 If you are replacing the idler spring THEN OTHERWISE Continue with the next step Skip to Step 9 Removing the Idler Spring An exploded view of the idler spring assembly is shown in Diagram 7 19 5 Remove the outer locknut on the idler spring assembly Remove the idler spring assembly from the frame upright 6 Remove the inner locknut on the idler spring assembly Remove the idler spring from...

Page 90: ...t the idler arm assembly on a work bench while you perform the following steps 11 Remove the retaining ring from the drive belt idler 12 Slide the drive belt idler and wave washer from the idler shaft weldment Replacing the Drive Belt Idler 13 Visually inspect the wave washer removed in Step 12 for wear or damage If the visual inspection indicates no wear or damage THEN OTHERWISE Use the original ...

Page 91: ... b Hold the drive belt between the 12 o clock and 3 o clock positions on the sheave rim c Turn the sheave counterclockwise Note As you move the sheave the belt will position itself on the rim d Grasp the drive belt at the 4 o clock position e Turn the sheave counterclockwise to fully seat the belt on the sheave rim Note Make sure that the belt is on the sheave rim before you continue with this pro...

Page 92: ...C762 C764 C764i Stairclimber Page 92 25 Check the operation of the climber as described in Section Four then replace the covers as described in Procedure 7 1 ...

Page 93: ...the retaining rings and nylon washers from the stair arm assembly see Diagram 7 20 5 Grasp the two arms and foot pad on the stair arm assembly Slide the stair arm assembly from the stair arm shaft weldments 6 If you are replacing one stair arm assembly only THEN OTHERWISE Continue with the next step Repeat Steps 2 through 5 for the second stair arm assembly then continue with the next step Replaci...

Page 94: ...m the frame weldment Grasp the toothed belt and lift it over the toothed pulley Route the belt under the idler pulley 14 If you are replacing one stair arm assembly only THEN OTHERWISE Continue with the next step Repeat Steps 7 through 13 for the second stair arm assembly then continue with the next step 15 Check the operation of the climber as described in Section Four then replace the covers as ...

Page 95: ...ers that secure the lower end of the handlebar assembly to the handlebar post see Diagram 7 21 Set aside the button head screw and locknut Note Do not remove the handlebar assembly from the post at this time 4 Loosen the fasteners that secure the handlebar assemblies to the upper handlebar clamp Slide the handlebars out of the handlebar clamp 5 Remove the handlebar assembly from the handlebar post...

Page 96: ... facing toward the base 8 Slide the lower end of the handlebar assembly onto the handlebar post 9 Push the upper end of the handlebar assembly into the upper handlebar clamp until the foam grip is flush with the clamp 10 Install the fasteners that secure the lower end of the handlebar assembly to the handlebar post refer back to Diagram 7 21 11 Slide the handlebar boot the handlebar until it is fl...

Page 97: ...ings You Should Know 2 Remove the handlebar assemblies as described in Procedure 7 24 3 Remove the fasteners that secure the upper handlebar clamp to the column 4 Slide the enclosure collar up on the column 5 Disconnect the lower ribbon cable from the upper ribbon cable 6 Remove the fasteners that secure the display base plate to the column see Diagram 7 22 Hold the display to prevent it from bein...

Page 98: ...form the next step make sure that the column mounting hardware does not fall into the climber 8 Remove the fasteners that secure the column to the climber frame see Diagram 7 23 Set aside the column Diagram 7 23 Upper Column Mounting Replacing the Column 9 Install the fasteners that secure the column to the climber frame 10 Push the loose end of the upper ribbon cable through the top of the column...

Page 99: ...e collar down the column and over the column mounting screws Press down to ensure a snug fit 14 Position the upper handlebar clamp next to the column Position the upper handlebar clamp so that it is parallel to the display base plate see Diagram 7 24 15 Install the fasteners that secure the upper handlebar clamp to the column 16 Replace the handlebar assemblies as described in Procedure 7 23 17 Ch...

Page 100: ...C762 C764 C764i Stairclimber Page 100 Wiring Diagram 8 1 C762 C764 120 Vac ...

Page 101: ...C762 C764 C764i Stairclimber Page 101 Block Diagram 8 2 C762 C764 120 Vac ...

Page 102: ...C762 C764 C764i Stairclimber Page 102 Wiring Diagram 8 3 C762 C764 240 Vac ...

Page 103: ...C762 C764 C764i Stairclimber Page 103 Block Diagram 8 4 C762 C764 240 Vac ...

Reviews: