


C844 Upright Cycle
Page 26
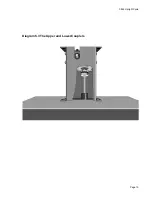
Procedure 6.4 - Display does not Illuminate (240 VAC Units)
Warning
Hazardous voltages will be tested in the following procedures. Exercise extreme caution when
performing these procedures.
Note:
Unless otherwise specified the AC voltage referenced in the following procedures will be AC line
voltage and should measure between approximately 195 VAC and approximately 245 VAC.
1.
Remove the C844 line cord from the AC outlet. Using an AC voltmeter, test the AC wall out-
let for AC voltage. If the AC voltage is incorrect or missing, check the AC service circuit
breaker and/or AC service wiring.
2.
Remove the AC line cord from the C844 AC input module. Using an ohmmeter, test the
three line cord conductors for continuity. Each conductor should read 1
Ω
or less. If any of
the three line cord conductors do not read correctly, replace the line cord.
3.
Plug the AC line cord into the C844 AC input module. Plug the AC line cord into AC wall
outlet. Using an AC voltmeter, check the AC voltage between the brown and blue wires on
the AC input module. If the AC voltage is incorrect or missing, unplug the AC line cord from
the AC wall outlet and remove the fuse from the AC input module. Using an ohmmeter,
check the fuse for continuity. If the fuse does not read 1
Ω
or less, replace the fuse. Plug
the AC line cord into the AC wall outlet, and test the operation of the C844.
4.
Set the C844 on/off switch in the on position. Using an AC voltmeter, check between the
blue and brown wires on the load side of the on/off switch (terminals 1 & 4). If the AC
voltage is incorrect or missing, replace the on/off switch.
5.
Using an AC voltmeter, check the AC voltage at the output side of the input line filter. If the
AC voltage is incorrect or missing, replace the input line filter.
6.
Using an AC voltmeter, check the AC voltage at pins 4 & 7 of plug P5 on the lower PCA. If
the AC voltage is incorrect or missing, replace the lower PCA.
7.
Using an AC voltmeter, check the AC voltage at pins 2 & 5 of plug P5 on the lower PCA.
The voltage should be approximately 9 VAC. If the voltage is significantly high, low or
missing replace the stepdown transformer assembly.
8.
If you have performed all of the previous tests and the green light emitting diode (LD1) on
the lower PCA is not lit, replace the lower PCA.
9.
Using a DC voltmeter, measure the voltage between TP1 (+) and TP2 (-) on the lower PCA.
The voltage should measure 6 VDC ± .25 VDC. If the DC voltage is incorrect or missing,
replace the lower PCA.
10. Using a DC voltmeter, measure the voltage between terminals 1 and 26 of the ribbon cable