


P O W I S P R I N T E R
Ô
M O D E L 3 1 U S E R ’ S M A N U A L
42
Using AutoFit, you don't have to worry about the right size font—
AutoFit figures it out for you. It’s true!
When you open a Design Window, AutoFit is active. Once you
modify the font size, though, you deactivate AutoFit. However, if
you change orientations in the zone, or move to a new zone,
AutoFit reactivates. You can also reactivate AutoFit by pressing
the AutoFit button in the Design Window, or going to the Format
menu, then Text, and choosing AutoFit.
Note: Without AutoFit, you can exceed the zone boundaries, and
enter too may characters, or select a font size that is too big for
your book. To avoid making design errors, we recommend using
AutoFit.
USE THE FORMAT MENU TO ACCESS THESE FEATURES.
7. Apply Style in All Zones
This convenient feature applies the font type and styles of the zone
you’re currently in to all other zones. For example, if you’re
working in a zone, using Times New Roman bold, and you want to
make your other zones match this, simply go to Format
è
Text,
and choose Apply Style in All Zones. Now all zones reflect Times
New Roman bold.
REMINDER:
Apply Style in All Zones applies only to character
formatting (i.e., font, style, size, and character spacing). This means any
line spacing you set in one zone will NOT transfer to other zones
when you select Apply Style in All Zones. You must apply line spacing
to each zone separately.
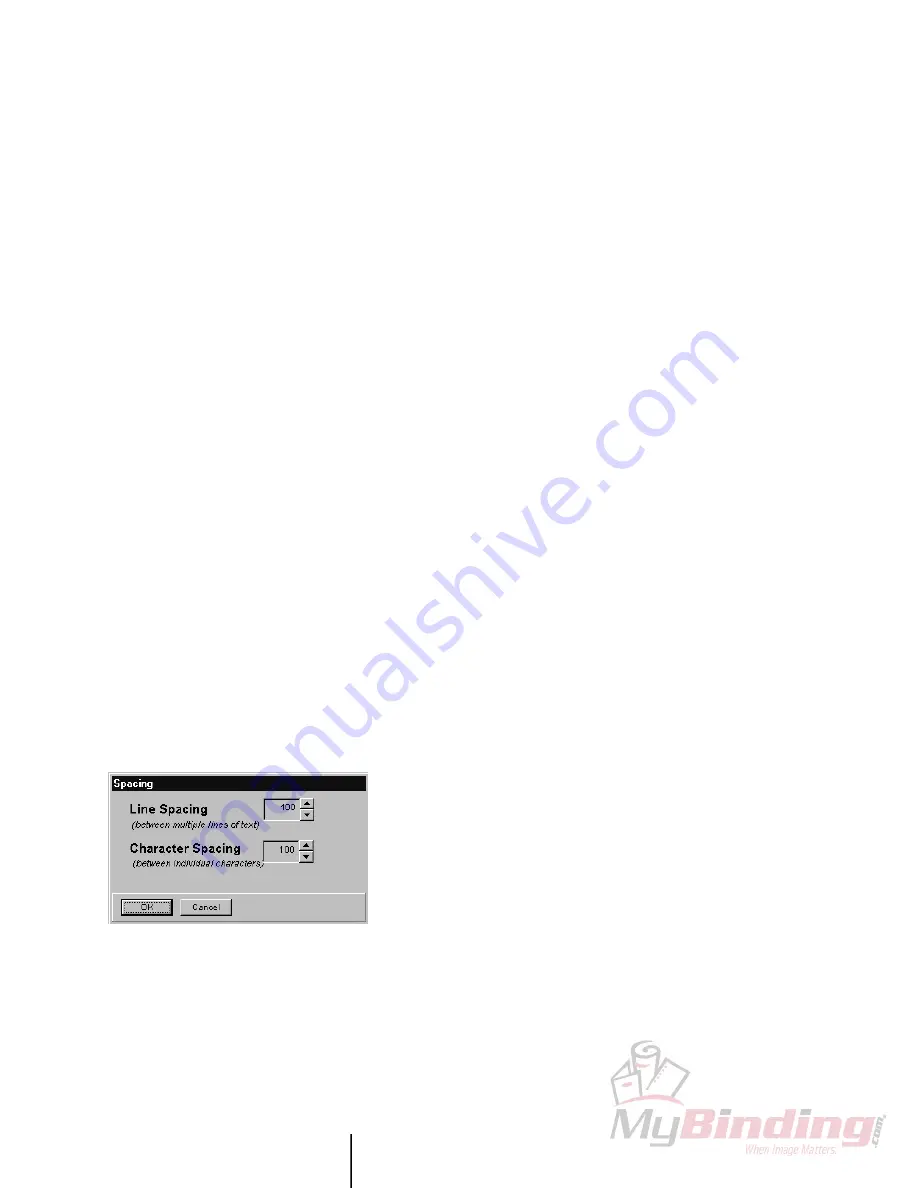
8. Spacing
This feature allows you to adjust the character and line spacing.
To take advantage of this, go to the Format
è
Text
è
Spacing.
The Spacing box pops up.
Line Spacing
To change the amount of space between multiple lines of text,
click the up and down arrow keys next to the Line Spacing
Indicator box (Figure 1). Normal line spacing is 100. You can
decrease the spacing to 50, but you cannot increase it beyond 100.
NOTE:
This feature only applies to text in Landscape and Portrait
orientations, since Stacked orientation allows only one line of text.
Character Spacing
You can control the individual character spacing from the Design
Window, or by going to Format
è
Text, and selecting Spacing.
Like the control in the Design Window, simply click the up and
down arrow keys to create more or less space between
characters. You may expand spacing to 130, and condense it to
90 (100 is normal spacing). Any character spacing changes, either
in the Spacing control box or the Design Window, will be
reflected in both places. (For more information on Character
Spacing, see page 40.)
G E T T I N G T H E M O S T F R O M P O W I S P R I N T ™
D I A G R A M A / S C H É M A / F I G U R E 1


