● You should now be ready to actually remove the nozzle. It’s going to be hot, so again,
make sure the paper towel is in place on the print bed, because if the nozzle drops the
paper towel will prevent it from melting the tape where it lands.
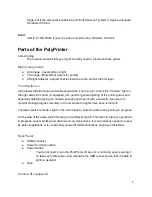
● Here’s the one tricky and important part:
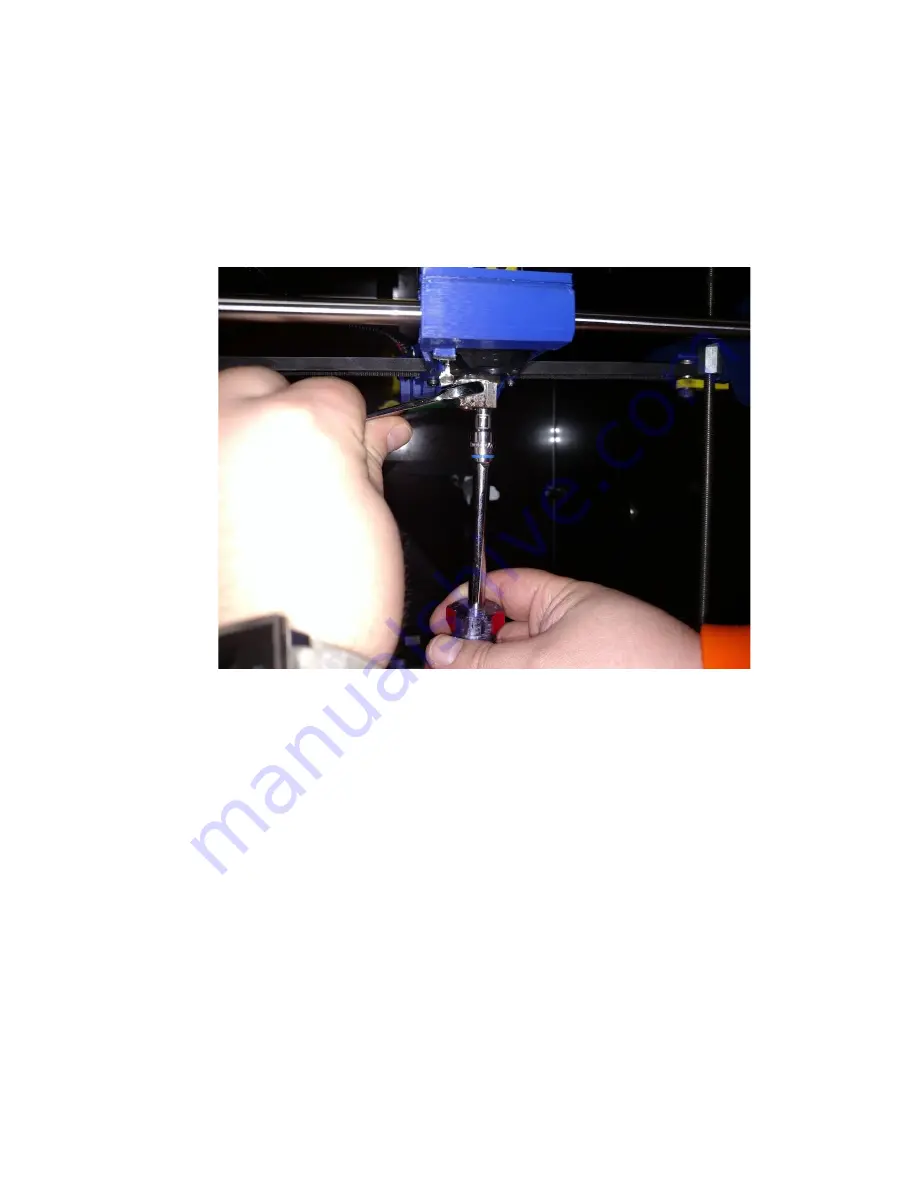
○ Slide the 13 mm open end wrench onto the aluminum block from the left. Slip the
7 mm nut driver onto the nozzle. (If you have a good feel for and experience with
this type of thing, feel free to use different orientations.)
○ The purpose of the wrench is to counter the twisting force on the aluminum block
(and therefore the relatively delicate Filament Tube) that will be applied to it
through the effort of loosening the nozzle. All you need to do is keep it from trying
to twist. You will therefore resist the nozzle-twisting force with a matching force.
○ If you take a long time with these next steps, the wrench will become too hot to
work with and you will need to remove it and wait for it to cool down before trying
again.
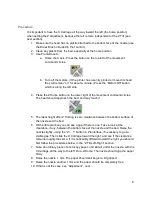
○ The nut driver on the nozzle needs to rotate with the near side traveling toward
your left. Slowly apply a twisting torque on the nozzle. Match that twisting force
using the 13mm wrench - thumb pressing near the aluminum block, fingers
pulling on the left end.
○ The nozzle should fairly easily break free and become easy to turn. At that point,
you can remove the 13mm wrench, and also turn off the head heat.
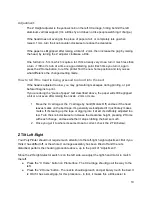
○ Spin the 7 mm nut driver a few times to remove the nozzle. Just leave it in the
end of the nut driver to cool down. Do not try to remove it until it has cooled down
- the nozzle will burn you if you try to grab it.
Installing the new nozzle
18


