Step 6:
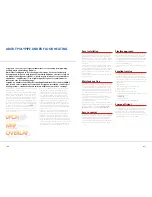
Circuits being laid at 100mm or 200mm centres must be laid in a spiral
configuration. The first loop of pipe should be laid around the perimeter
of the area to be covered by that circuit. The next loop of this circuit
should be laid either 200mm from the first loop of pipe for 100mm
centres or 400mm from the first loop of pipe for 200mm centres.
Step 7:
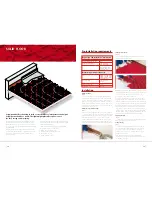
Continue to loop the pipe into the centre of the panels leaving
enough space to form a double return (‘S’ shape in the centre
of the loop).
Step 8:
Now work back out from the centre by filling the space between the
inwardly spiralling loop of the primary circuit ensuring the pipe is laid
at the correct spacing centres.
18mm pipe installation formation
Where 300mm centre spacing is require (18mm pipe systems only)
a meander pattern can be used. The pipe simply crosses the room
from one side to the other encapsulating 3 castellations at each
return bend.
Conduit pipe
A 400mm length of conduit pipe should be fitted over the under floor
heating pipe in any situation where damage may be caused to the
pipe i.e. where the pipe passes through internal walls or doorways,
where the pipe emerges through the floor up to the manifold
or where the pipe passes through either an expansion or day joint.
Preformed long radius bends can also be used to provide a neater
solution if required.
A section of conduit pipe 400mm long should be fitted around the
heating pipe where the pipe passes through the edge insulation strip,
e.g. room to room, or through expansion joints within the floor.
Conduit pipe should also be used where the pipe leaves the floor
adjacent to the manifold. This can be threaded down the pipe
after the pipework has been installed.
14
15
Expansion joint
BS EN 1264-4 recommends that an expansion joint is constructed
in stone and ceramic finished screeds for every 40m
2
of floor area
at a maximum length of 8m and an aspect ratio of 2:1.
An expansion joint is also required in long narrow areas such
as corridors, etc.
The image below shows a typical arrangement where the pipes
pass through either an expansion or a day joint. A strip of edge
insulation is used to provide the expansion capacity.
For further information regarding floor screeding requirements
for under floor heating systems please refer to BS8204-1 or the
BISRIA Guide: Screeds with Under Floor Heating.
Testing
Step 9:
Once the pipes circuits have been installed and pressure tested the
screed cover can be applied. Care should be taken to ensure that
the screed is tightly compacted around the pipe to ensure that no
voids are present. The system should remain under pressure (6 bar)
in order to prevent the risk of any damage being caused to the
walls of the pipe whilst the screed is being applied.
Laying the screed
Step 10:
The overall quality and thickness of a sand and cement screed
should meet the requirements of BS8204-1 which stipulates that
in domestic or light commercial applications a minimum thickness
of 65mm should be used. The thickness of alternative coverings,
such as anhydrite or polymer modified screeds, may differ depending
on construction requirements. This information should therefore
be provided by the specialist screed manufacturer/supplier.
After the screed has been laid the floor should be covered with
a membrane to retard the drying out process, particularly in warm
weather. The floor should be allowed to cure and dry naturally until
full strength is reached in accordance with relevant British Standards
and manufacturers’ instructions (approx 30 days for sand and
cement and concrete floors). Under no circumstances should the
under floor heating system be used to artificially dry/cure the screed
as this could cause the screed to crack and seriously undermine
the integrity of the floor construction. Once the screed has fully
cured the under floor heating system can be switched on and the
manifold flow temperature slowly increased up to the calculated
design temperature.
Finishing
Timber floors
Many people are concerned by the effect of heat on a timber
floor, but this concern is misplaced. The important factor is the
floor moisture content.
Timber floors can be laid directly over the screed at a moisture
content of 10-11% which during the heating season will reduce
to 8-9% and may cause a small amount shrinkage.
The floor will re-absorb some moisture when the heating is not
operating and the moisture content will increase to 12-13%.
Application of timber floors over solid floor systems
Where solid oak flooring is to be laid on a solid floor, joists can
be fitted at 1m centres to provide a fixing point for the boards.
Insulation, solid floor panels and pipe can be laid between
the joists and screed laid level with the top of the joists
(see diagram below).
Individual circuits of pipe are then laid between each set of joists
with care being taken to ensure the screed is completely dry prior
to fitting the solid oak covering (see diagram).
90°
180°
Screed
Timber floor covering
Solid floor plate
Joist at 1m spacings
Pipe
Conduit
Insulation
Sub floor


