background image

6 I

GB

Not 1:

 Your TV will switch to the 

STANDBY


mode in five minutes if there is no broadcast 

signal from antenna.

Note 2:

 Your TV is equipped to 

operate with TV buttons in case 

your R/C is broken or the batteries 

are exhausted.

3.

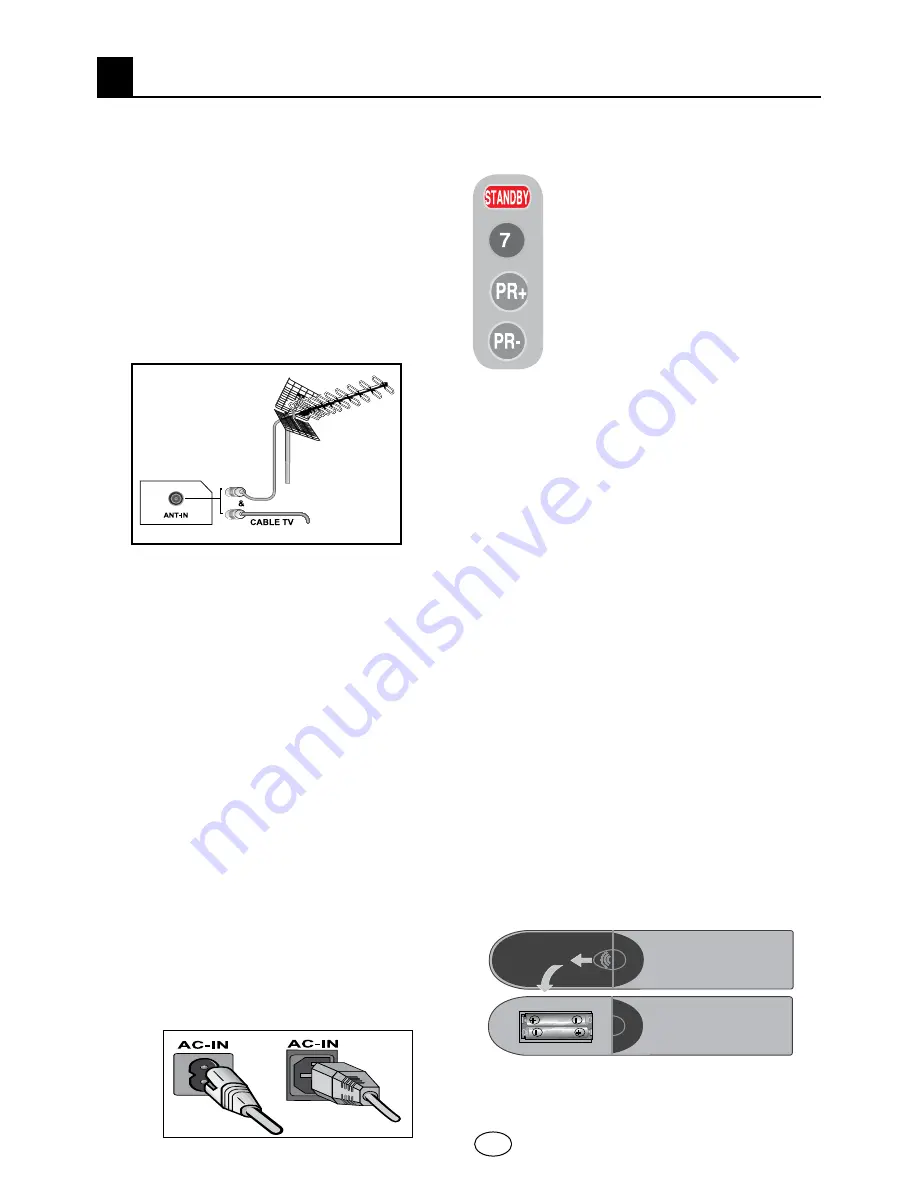
 To power on your television, 

press any numerical key or 

PR+

 or 

PR-

 keys on the remote control. 

For this process, you can also 

use the buttons on your TV. The 

picture will appear on the screen 

after a short while.

Note:

  If you are not going to use your 

television for a long time, unplug its power 

cable from the socket.

Initial power on and performing 

settings

To set up your television, read the sections 

on the TV controls and making the channel 

settings.

4.3-Batteries

Open the lid of the battery compartment 

and make sure that you have placed the 

batteries in the correct direction. For this 

remote control, UM-4, IEC R03 or AAA 1.5 V 

batteries are suitable.

Do not throw your old batteries into the fire, 

discard them in a dedicated waste area for 

this purpose.
Do not mix used batteries with new ones or 

different types of batteries together.
The performance of the remote control will 

be reduced at a distance of 8 meters from or 

at an angle of 30 degrees beyond the centre 

of the TV.

4


Start

Remove your television carefully from its 

box. You can keep the packaging of your 

television to use in future.
Contents of the box

Power cable

Remote control

2 batteries

Note: Scart, HDMI, VGA and RCA cables 

are not supplied with the device.

4.1-Antenna connection

If you use a 75 Ohm coaxial cable (round 

cable) as an antenna cable, connect the 

antenna plug directly to the antenna input 

located on the TV.

Motorized vehicles, energy lines and 

telecommunication lines affect your antenna. 

Therefore, be careful to install your antenna 

away from these and metal surface in such 

a way that it shall not swing. Do not make 

your antenna cable longer than required 

and do not coil it. Make sure that it is not 

crimped passing through a window or door. 

Your antenna and cable might be affected by 

natural phenomena such as rain, wind, smoke 

and humidity over time. Periodically check 

your antenna and equipment.

4.2-Powering on your device 

and the initial use

1.

 Insert the power cable into the power 

supply input located on the back panel of the 

LCD TV.

2.

 Insert the power cable plug supplied with 

the device into the mains socket.

or

Summary of Contents for TLU-44243B

Page 1: ...pictured above Questions Need some help This manual should help you understand your new product If you still have questions call our help line found on the insert with this icon Or visit www polaroid...

Page 2: ...television 7 5 1 TV Control Panel 7 5 2 Rear and Side External Connections 7 5 3 Remote Control 8 Performing the initial power on settings 9 6 1 TV controls 9 6 2 Turning on the TV and Setting the Ch...

Page 3: ...is television can receive and process all analog and digital broadcastings This television set has an integrated digital and analog receiver The digital receiver unit processes the signals coming from...

Page 4: ...iewing of all settings program numbers and all the processes Manual Fine Tuning 100 Analog Program memory 1000 Digital channel memory Infrared remote control equipped with all functions Parental Contr...

Page 5: ...ay break and cause serious injuries if something hits it 7 To ensure adequate ventilation please leave a clearance area of at least 10 cm around the television This clearance prevents the TV from over...

Page 6: ...e has an adaptor then use the adaptor and AC power cable supplied with your product Do not use defective sockets Make sure that the plug is firmly inserted into the socket If the plug remains loose th...

Page 7: ...ed batteries in accordance with the local laws and regulations in order to protect our environment 21 Do not dispose of your TV with regular household waste Observe local laws and regulations for disp...

Page 8: ...The performance of the remote control will be reduced at a distance of 8 meters from or at an angle of 30 degrees beyond the centre of the TV 4 Start Remove your television carefully from its box You...

Page 9: ...0 Component video input Y 11 Component video input Pb 12 Component video input Pr 13 Component audio input L 14 Component audio input R 15 HDMI 1 input 16 HDMI 2 input 17 VGA PC connection input 18 PC...

Page 10: ...rce in PIP mode button Right movement button Menu Change source in PIP mode button Menu selection confirm Program table selection button Volume down button Volume up button Program forward selection b...

Page 11: ...Select DIGITAL TV DTV ANALOG TV ATV or desired AV mode from the Setup menu with Up Down movement buttons and confirm with OK button so that your television will switch to the source you have selected...

Page 12: ...channel search automatically by pressing the Yellow button or end the search process by pressing the EXIT button 6 3 Performing Digital Tunings You can either tune the Digital programs automatically...

Page 13: ...t buttons to access program table and press OK button to confirm PROGRAM MANAGEMENT menu will be displayed You can also access all Programs directly by pressing the OK button on your remote control wh...

Page 14: ...r select the desired channel by pressing the up down movement buttons while you are in the Program Management TV menu and then press the GREEN button on your remote control The field into which you ca...

Page 15: ...set the Time Adjustment tab to Manuel Time Zone Daylight Saving tabs will be activated If you set it to Automatic these options will be deactivated 6 3 5 3 Parental Control You can restrict viewing s...

Page 16: ...confirm your selection with OK button Setup menu is displayed MENU AUTOPROGRAM SEARCHING 20 STOP MENU SETUP BG S06 0 P13 SELECT BACK SYSTEM CHANNEL FINE TUNE SEARCH PROGRAM NO STORE AUTOPROGRAM Select...

Page 17: ...Main Menu and confirm your selection with OK button Setup menu will be displayed Select the system in which you would like to make the search from the System tab Move into CHANNEL tab by pressing the...

Page 18: ...then select the desired letter number or sign again with the up down movement buttons After entering all the characters store the name you have written in the memory by pressing the YELLOW button To...

Page 19: ...adphones By connecting headphones to your television you can listen to the program sounds independently from your television To turn up and down the headphone volume level select HEADPHONE tab from th...

Page 20: ...button again Note You can select the equalizer options directly by pressing the button on your remote control 7 1 8 Dynamic Bass Optional Dynamic Bass makes the bass content of the music clearer thro...

Page 21: ...eft movement buttons Note If your TV is equipped with Active Contrast feature and this feature is set to On then Backlight tab is not displayed in the menu 7 2 7 MPEG NR Optional You may remove the ar...

Page 22: ...e transmitted in the 16 9 formatted broadcast then this setting will push the picture upwards in order to ensure the entire written text to be seen Note Since the use of certain functions in order to...

Page 23: ...you will connect to your television by the tuner of your television without needing any external source 7 4 Other Picture Features 7 4 1 Zoom Press the ZOOM button on your remote control while watchi...

Page 24: ...ase the size of the PIP window You can change the PIP size by pressing the Size button when there is a PIP picture on the screen 7 4 3 3 Switching the locations of the Main screen and PIP screen When...

Page 25: ...ou would like to turn the pages one by one you can go to the next page pressing the up button and to the previous page pressing the down button Press the INFO button to return to the Index page 8 3 Te...

Page 26: ...ue at the bottom of the teletext screen You can select the relevant topic by pressing the yellow or blue buttons on the remote control You can select the next page by pressing the red button and the p...

Page 27: ...the OK button AV To watch the picture of the broadcast device connected using the RCA Cinch input move onto this option and press the OK button PC To be able to watch the images in PC mode move onto t...

Page 28: ...puts By pressing the AV button on your remote control select the external source input to which you connected your device 9 2 PC Mode Your LCD television can also be used as a PC monitor via the VGA i...

Page 29: ...9 14 9 or 4 3 formats Note 1 4 3 16 9 and 14 9 picture formats are supported in 16 9 panels Only 4 3 picture format is supported in 4 3 panels Note 2 In the Monitor mode you can make the Brightness C...

Page 30: ...west setting Lighten the color Broadcast system setting if setting choice is available Select the broadcast system Problem in channel broadcasting Test with another channel No or defective teletext Te...

Page 31: ...V 50 Hz Program memory Digital 1000 Program memory Analog 100 RF Aerial input 75 Ohm Co axial Sound systems Mono Stereo Nicam Batteries 2xUM 4 IEC R03 or AAA 1 5V Channels received VHF Band I Channel...

Reviews: