TECHNICAL SUPPORT: [email protected] | (760) 727-0300
PG. 8
THIS DOCUMENT IS PROPRIETARY AND CONFIDENTIAL. © 2021 PRECISION MEASUREMENT ENGINEERING, INC. ALL RIGHTS RESERVED.
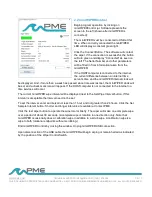
The picture to the left shows the required
alignment.
While maintaining the alignment (pictured to the
left), slide miniWIPER and Cyclops 7 Logger
relative to each other until the brush engages
the optical surface as shown below. You may
rotate the small pulley slowly by hand. This
causes the internal motor to turn but will not
damage miniWIPER.
DO NOT ROTATE THE LARGE PULLEY BUT
INSTEAD ALLOW THE BELT TO MOVE THIS
PULLY WHILE ROTATING THE SMALL
PULLEY BY HAND. ROTATION OF THE
LARGE PULLEY BY HAND CAN DAMAGE
miniWIPER.
We also suggest aligning the miniWIPER by
using the included magnet. By waving the
magnet over the miniWIPER, it will
automatically begin a wipe.
Tighten the 6 bolts while maintaining the
miniWIPER and Cyclops 7 positions. First
tighten the 4 outer bolts until the gap in white
plastic closes. Next tighten the inner two until
the miniWIPER and Cyclops 7 Logger are
securely held. A small gap in white plastic on
these inner bolts will remain when all is secure.
Trigger a wipe by passing a strong magnet
near the miniWIPER. Observe the wipe. The
wiper will move the brush past the optical
surface, then back up to the initial position.
Hopefully, this action will be detrimental to
whatever fouling organisms are attempting to
colonize the foil.
Please note that miniWIPER will not respond to
the magnet if miniWIPER is not in Wipe mode.


