24 of 63
Getting Media Files onto Your PleXtor MediaX
There are various ways of getting your media files on to your PleXtor MediaX
1.0
As an external HDD
Connecting your PleXtor MediaX to PC through USB target port
Before you connect your PleXtor MediaX to your computer, it is recommended
that you stop all functions and turn the power off.
1.
Connect your PleXtor MediaX to your computer via the USB cable.
2.
After connection, power up your PleXtor MediaX
3.
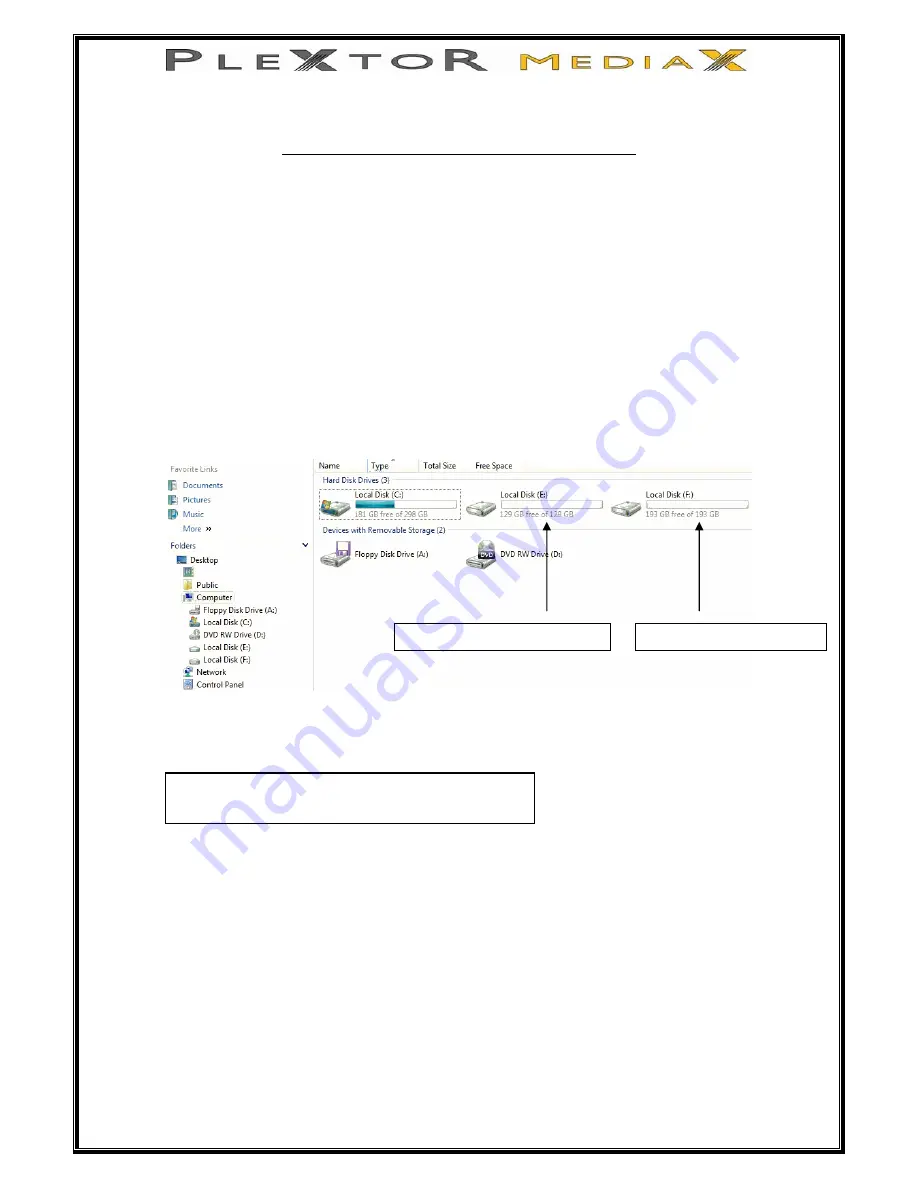
On your computer click on the Start button, then click on My Computer.
There you will see your PleXtor MediaX.
Here you can see the two file system partitions Local Disk (E:) is the FAT32
partition and Local disk (F:) is the NTFS partition.
4.
Now you can copy files or drag & drop files to your PleXtor MediaX as if
it where another hard disk on your computer.
•
The FAT32 file system has a single file size limit of less than 4GB.
If you want to copy a file that is larger than 4GB, please copy it
to the NTFS partition.
Plextor MediaX FAT 32 partition
Plextor MediaX NTFS partition
NOTE:
Drive name can be different depending on each computer
Summary of Contents for MEDIAX PX-MX Series
Page 1: ...1 of 63 PX MXxxxL Users Guide...
Page 9: ...9 of 63 1 3 A V Composite Video 2ch Audio 1 4 Component Video 2ch Audio...
Page 11: ...11 of 63 3 0 Connecting to a Digital Amplifier 3 1 Coaxial Audio Out 3 2 Optical Audio out...
Page 19: ...19 of 63 After the initial setup the format screen appears...


