44
Operating
INFO
NETWORK INTERACTIVE
1.
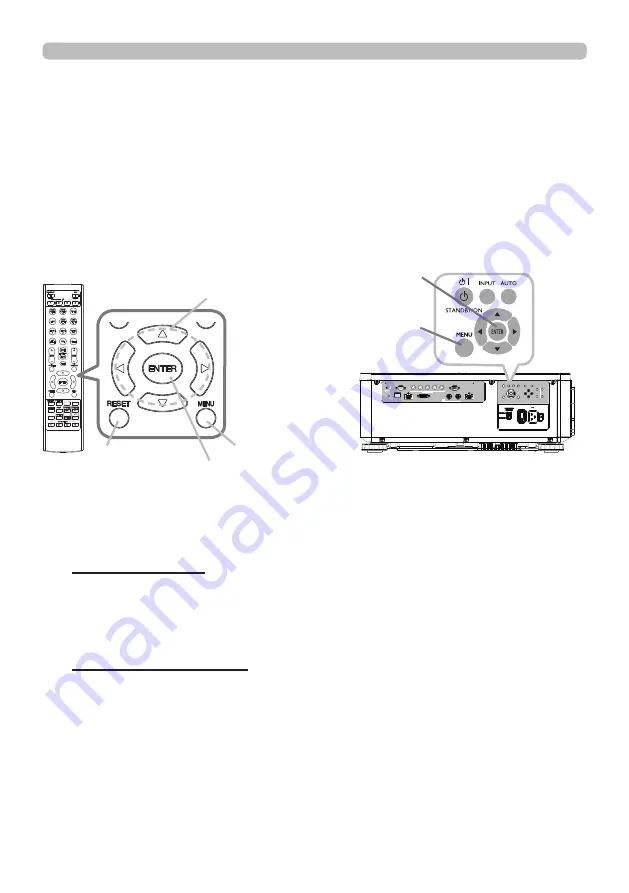
To start the MENU, press the
MENU
button. The MENU you last used (EASY
or ADVANCED) will appear. EASY MENU has priority to appear just after
powered on.
Using the menu function
2.
(1) Use the ▲/▼ cursor buttons to select an item to operate. If you want to
change it to the ADVANCED MENU, select the ADVANCED MENU.
(2) Use the ◄/► cursor buttons to operate the item.
This projector has the following menus:
PICTURE, IMAGE, INPUT, SETUP, SCREEN, OPTION, NETWORK, and EASY
MENU. EASY MENU consists of functions often used, and the other menus are
classified into each purpose and brought together as the ADVANCED MENU.
Each of these menus is operated using the same methods. While the projector
is displaying any menu, the
MENU
button on the projector works as the cursor
buttons. The basic operations of these menus are as follows.
Some items cannot be operated depending on the selected channel or input
signal. Items that cannot be operated are displayed in light gray.
In the EASY MENU
(continued on next page)
(1) Use the ▲/▼ cursor buttons to select a menu.
If you want to change it to the EASY MENU, select the EASY MENU. The
items in the menu appear on the right side.
(2) Press the ► cursor button or
ENTER
button to move the cursor to the
right side. Then use the ▲/▼ cursor buttons to select an item to operate
and press the ► cursor button or
ENTER
button to progress. The
operation menu or dialog of the selected item will appear.
(3) Use the buttons as instructed in the OSD to operate the item.
In the ADVANCED MENU
ENTER
button
MENU
button
ENTER
button
RESET
button
Cursor buttons
LAN
IN
OUT
SDI
COMPUTER IN 2
REMOTE
CONTROL
HDBaseT
HDMI 1
DVI-D
HDMI 2
CONTROL
V
H
B/Cb/Pb
G/Y
R/Cr/Pr
COMPUTER IN 1
EXIT
MENU
LENS
SHIFT
INPUT
ASPECT
BLANK
LENS
CENTERING
AUTO
FOCUS ZOOM
12V OUTPUT
(OPTION)
MENU
button


