PL721 User’s Manual
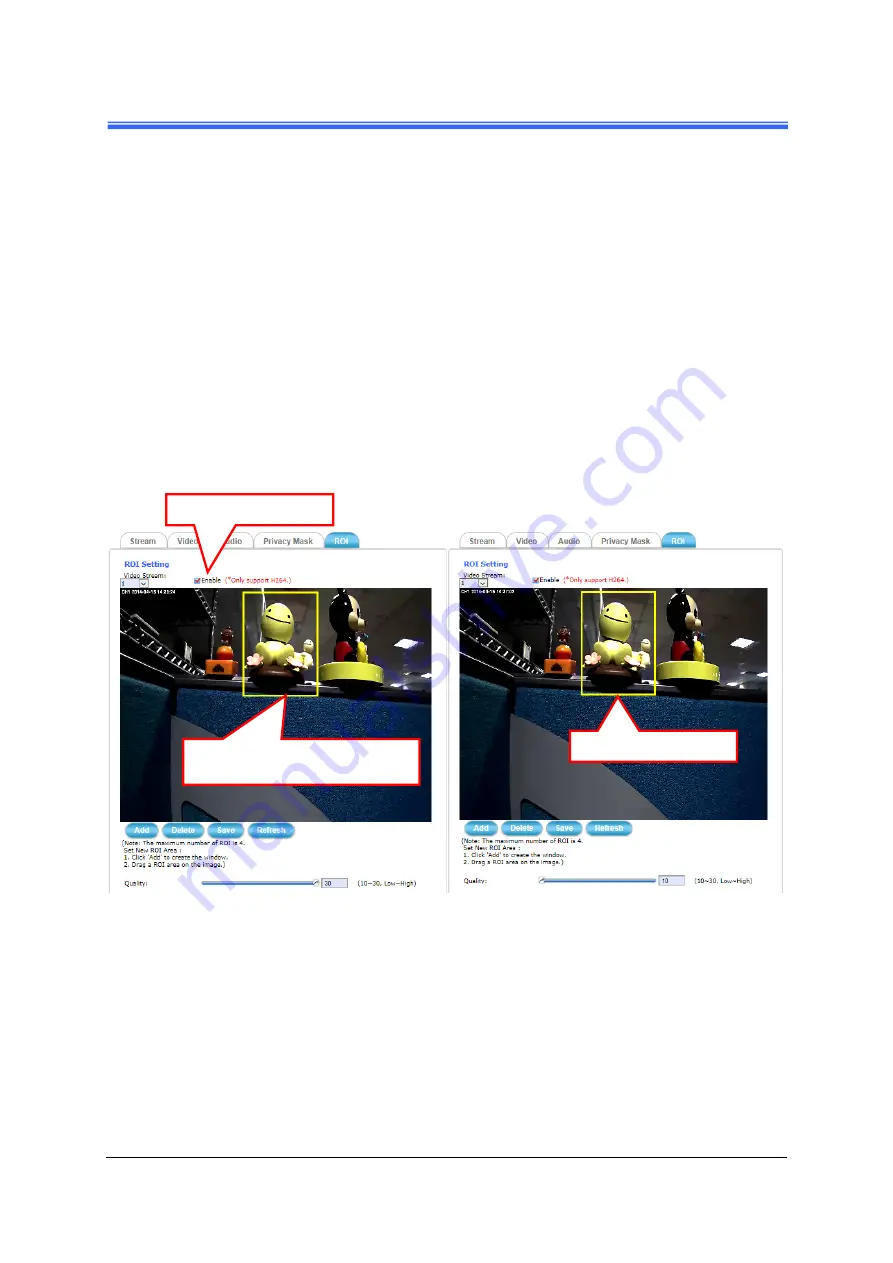
4.3.5 ROI Tab
When network capacity is constrained , or there is simply a desire to improve
network usage efficiency and storage, clicking the ROI button will display the
tabbed panes (see figure below) for defining enhance video quality area of the
camera.
Defining a single ROI detection area
:
1) Enable the
Enable
check box.
2) Click
Add
button and a default frame will pop-up on the screen.
3) Click and hold inside the frame to drag it to the location where you want to
focus detection. Resize the frame by dragging its corners or borders.
4) Click the
Save
button to apply.
※
only support H.264
Figure 4-18 Defining a Single ROI Area for the Camera
Defining multiple ROI detection areas
:
1) After satisfactory positioning of the first detection area as described above,
click the
Add
button again. A second default frame will pop-up on the screen.
Drag & resize the frame at the desired location.
2) Repeat the above step to add more detection area frames.
1. To enable “ROI” function.
2. To draw a region to define the
detection range.
Enhance video quality of ROI.
Summary of Contents for PL721
Page 1: ...July 2014 PL721 3MP IR Bullet Network Camera User s Manual Version 2 01...
Page 8: ...Chapter 1 2 Introduction PL721 User s Manual Hardware Overview...
Page 29: ...PL721 User s Manual...
Page 41: ...PL721 User s Manual 4 3 2 Video Tab Figure 4 13 Video Tabbed Pane...
Page 65: ...PL721 User s Manual Find Tools icon and then select Compatibility View settings Or...


