Pitney Bowes DM800 Series Operator'S Manual Download Page 105

SV61162 Rev. C  

5-33

DM800™ Series Digital Mailing System Operating Guide

c.  Select the appropriate class, in this example 

Priority Mail. 

Press 

Enter


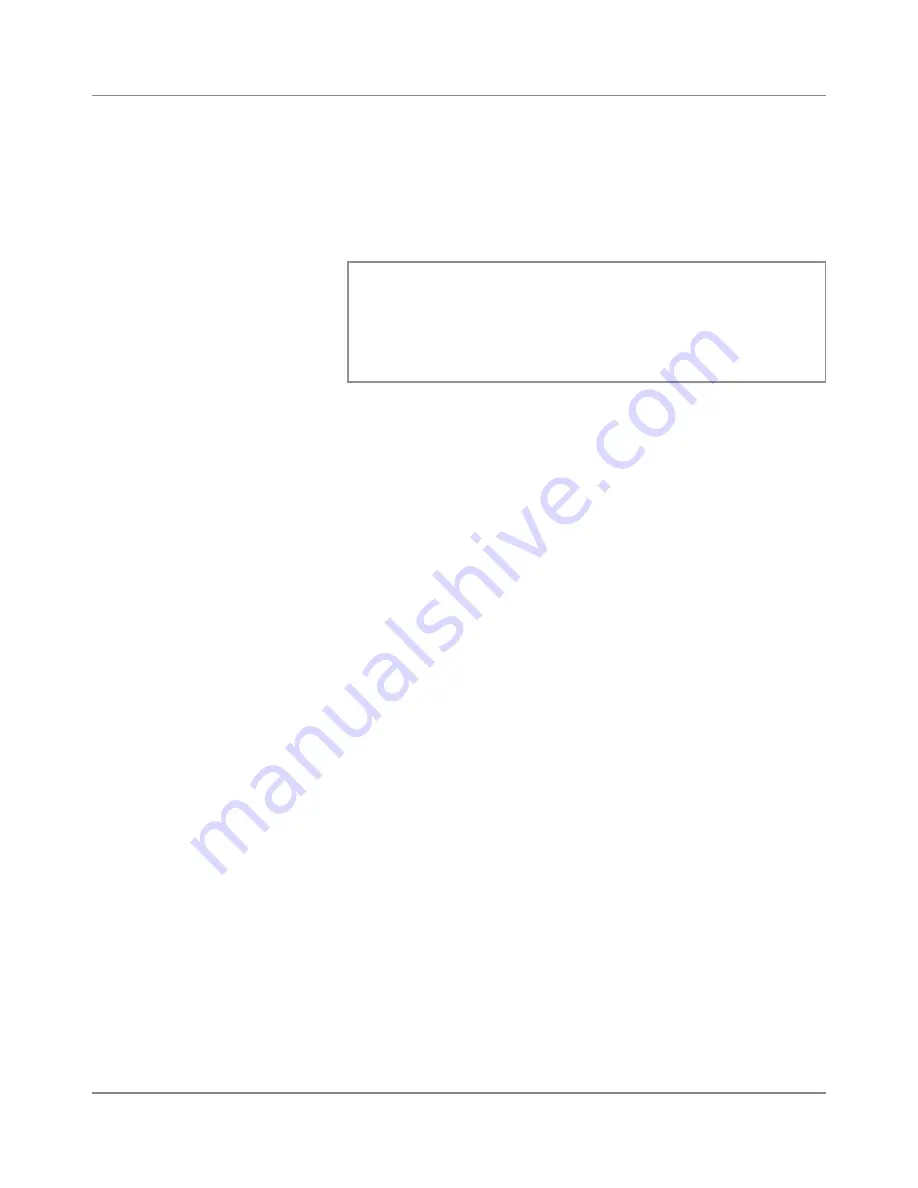
All of the weight breaks for this Smart Class™ appear in the dis-

play. Since we did not create a fourth weight break it is listed as 

None. 


Weight

Class/+Fees

0 lb

0.0 oz —

0 lb

 3.0 oz 1stAuto...r 5 Dig

0 lb

3.0 oz —

0 lb

13.0 oz 1st  Cls Presort

0 lb

13.0 oz —

1 lb

0.0 oz Priority Mail

0 lb

0.0 oz —

0 lb

0.0 oz None

8.  Press the 

Enter

 key again and "Select Custom Carrier" appears in the 

display. You are presented with a list of available custom carriers for 

grouping your Smart Classes.  

9.  Select one that is listed as "Available". You can have up to a maxi-

mum of 4 custom carriers. 

10.  Next, you are prompted to enter a "Carrier Name". Enter a name (up 

to 15 letters and/or numbers) for your Smart Class grouping, for ex-

ample, 

Carrier 1

. Press the 

Enter

 key. 

11.  You are now prompted to enter the "Smart Class™ Name". This will 

be the class name for the Smart Class™ you have created. Enter the 

name (up to 15 letters and/or numbers), for example, 

Smart Class 1

and press the 

Enter

 key. 

12.  To exit, press the left arrow key. The main display appears. You can 

now begin to use this Smart Class™.

13.  To use a Smart Class™, refer to 

Selecting a Smart Class™

 in 

Chap-

ter 4

 of this guide.

Summary of Contents for DM800 Series

Page 1: ...DM800 Series Digital Mailing System Operator Guide US English Version ...

Page 2: ......

Page 3: ...iability for the misuse or misappli cation of our products Due to our continuing program of product improvement equipment and material specifications as well as performance features are subject to change without notice Your postage meter may not have some of the features described in this book AccuTrac Ascent DM800i DM800 DM Series E Z Seal IntelliLink WEIGH ON THE WAY WOW Postage By Phone and Pit...

Page 4: ...wn expense Use only a shielded interface cable to operate this equipment with a scale or other peripheral device Alerting Messages Various messages are used throughout this guide to alert you to potentially hazardous or error caus ing conditions These messages are as follows WARNING Alerts you to conditions or practices that could cause serious injury CAUTION Alerts you to conditions or practices ...

Page 5: ...gister a complaint with the FCC If the user experiences trouble using this equipment the user shall disconnect the equipment from the telephone line to determine if the equipment is malfunctioning If the equipment is malfunctioning the use of the equipment shall be discontinued until the problem is corrected The telephone company may make changes to its facilities equipment operations or procedure...

Page 6: ...rgy and if not installed and used in accordance with the instruction manual may cause interference to radio communications Operation of this equipment in a residential area is likely to cause interference in which case the user will be required to correct the interference at his own expense CAUTION Changes or modifications to this equipment not expressly approved by the party responsible for compl...

Page 7: ... Series Digital Mailing System Chapter 3 Mail in a Minute Chapter 4 Running Mail Chapter 5 Mailing System Setup Chapter 6 Adding Postage Chapter 7 Accounting Setup Chapter 8 Reports Chapter 9 Maintaining and Updating Chapter 10 Troubleshooting Chapter 11 Supplies and Options Appendix A Glossary Appendix B Operator Training Checklist Appendix C Specifications Index ...

Page 8: ......

Page 9: ...w pb com and click on My Account To view inventory go to http www pb com and click on My Account To add postage to your Postage By Phone Meter Payment System account go to http www pb com and click on Add Postage to Your Meter Our Help Desk For direct questions call 1 800 522 0020 Customer Service Representatives are avail able Monday through Friday 8AM 8 00PM EST Pitney Bowes Supplies To order Pi...

Page 10: ......

Page 11: ... C 1 1 Read This First Contents What s in This Guide 1 2 Other Information 1 3 What You Need to Know 1 4 Safety Requirements 1 4 Important Information About Powering Your DM Series Digital Mailing System Off 1 9 1 ...

Page 12: ...s to your postage meter Postal Security Device using the Pitney Bowes Postage By Phone Meter Payment System Chapter 7 Accounting Setup explains how to set up accounts to track postage Chapter 8 Reports explains the different types of reports available and how to print them Chapter 9 Maintaining and Updating explains how to check the quality of the meter stamp and how to take care of the moistener ...

Page 13: ...ooklet details all the features of the Postage By Phone Meter Payment System Scale User Guide If you purchase an attached scale read this guide if you have questions about its operation On the System Quick Reference Cards Much of the information contained in the Operator guide such as how to set postage process mail or clear jams is summarized in the Quick Refer ence Card Set The cards are located...

Page 14: ...the main screen of the IntelliLink Control Center The system will then prompt you to connect to Pitney Bowes and perform an inspec tion The postage tape you use must meet USPS specifications Safety Requirements WARNING Follow normal safety precautions for all office equip ment whenever using the DM800 Series Digital Mailing System Read all instructions before you attempt to operate the machine Use...

Page 15: ...wes Supply Line to order supplies Refer to the Pitney Bowes Contact Information List at the front of this guide for the Pitney Bowes Supply Line phone number Always follow the specific occupational safety and health standards prescribed for your workplace NOTE The DM800 Series System requires annual cleaning by a Pitney Bowes service representative For continued safe operation contact your local P...

Page 16: ...itchen sink or laundry tub in a wet basement or near a swim ming pool Never touch non insulated telephone wires or terminals unless the telephone line has been disconnected at the network interface Use caution when installing or modifying telephone lines Do not use the telephone or equipment connected to the telephone line in the vicinity of a gas leak Do not connect your postage meter Postal Secu...

Page 17: ...cord supplied with the machine and plug it into a prop erly grounded wall outlet located near the machine and easily acces sible Failure to properly ground the machine can result in severe per sonal injury and or fire Avoid touching moving parts or materials while the machine is in use Keep hands loose clothing jewelry and long hair away from all moving parts Do not remove covers Covers enclose ha...

Page 18: ...ipment Use this equipment only for its intended purpose If your stacker has an AC adapter to power the stacker Use only the AC adapter designed specifically for the stacker and shown in Chapter 11 Supplies and Options Third party AC adapters may damage the stacker To protect against electrical shock plug the AC adapter power cord into a properly grounded wall outlet Do not route the AC adapter cab...

Page 19: ...ak performance Your DM Series System has a power switch for the location refer to Chapter 2 page 2 6 so that you can properly remove power to the sys tem If you need to power off your system you must use the power switch When you power off the system the system immediately moves the printhead back to the capping station to keep the printhead from drying out Powering off your system by any other me...

Page 20: ......

Page 21: ...SV61162 Rev C 2 1 Introducing the DM800 Series Digital Mailing System 2 2 Features and Benefits 2 2 Parts of the Mailing System 2 5 Meet the DM800 Series Digital Mailing System 2 Contents ...

Page 22: ...e it lowers your operating costs and helps pre serve the environment Office equipment is the fastest growing electricity load in the commercial buildings sector The U S Environmental Protection Agency EPA pro motes energy efficiency because electricity generation contributes to air pollution including 35 percent of all U S emissions of carbon dioxide one of the key contributors to global warming I...

Page 23: ...unications with Pitney Bowes support services as well as external mail parcel carriers Communications with Pitney Bowes provides the following benefits Postage By Phone Meter Payment System refills Remote postage inspections USPS Confirmation Services Delivery Confirmation Signature Confir mation and electronic filing of Certified Mail Ability to download graphic images ads inscriptions and permit...

Page 24: ...er refer to the Business Manager Operator Guide SV61178 Advertisements and Inscriptions Ads and inscriptions are messages you can include in the meter stamp A number of standard advertisements and inscriptions are included with your mailing system You can order customized ads and inscriptions by calling the Pitney Bowes Supply Line refer to the Pitney Bowes Contact Infor mation List at the front o...

Page 25: ...ter Postal Security Device Feed Cover Protects moving parts and prevent foreign objects from en tering the machine The feed cover protects the feeder and the main cover protects the transport area WOW WEIGH ON THE WAY Cover Protects the WOW transport area on DM800 Digital Mailing System that have the optional WOW module Printer Cover protects the print head and ink cartridge components Thickness A...

Page 26: ...quick ref erence card set DropStacker The DM800i Digital Mailing System IntelliLink Control Center Printer cover Feed cover Thickness adjustment knob Integrated platform scale Feed deck Transport release knob Side guide On Off Switch Left Side View of the DM800i Digital Mailing System ...

Page 27: ...Series Digital Mailing System Operating Guide Right Side View of the DM800i Digital Mailing System with Optional DJPS Power Stacker DJPS Power Stacker DM800i Digital Mailing System with Optional WOW WEIGH ON THE WAY WOW Module ...

Page 28: ...vices like a printer an external scale a PC or modem If you have an external modem and you need to connect to one of these ports refer to External Modem Connections in this chapter Power Stacker Connector Use this connector to attach an optional power stacker Serial Port Connector One Pitney Bowes serial port connector This is for Pitney Bowes use only Dual external device USB ports Serial port Fo...

Page 29: ... not located near an analog phone line and you need to remove the control center when you perform feature updates or add postage you can connect the external modem to this connector Refer to External Modem Connections in this chapter IntelliLink Control Center AC Adapter Receptacle The receptacle for the AC adapter is located on the back of the IntelliLink Control Center If you need to remove the ...

Page 30: ...ter it has been removed from the mailing system and moved to an analog phone line External Modem Connections Back of the Mailing System Base If you are using an external modem and there is an analog phone line near your mailing system you should connect the modem to the USB connector on the back of the control center as shown in the figure below External modem External USB modem cable External USB...

Page 31: ...the WOW trans port deck E Z Seal Sealing Solution Bottle This contains the E Z Seal solution used for moistening and sealing envelopes Mailing System Interior Thickness Adjustment Knob Use this to adjust for the thicknesses of the envelopes You do not have to lift the cover to adjust the knob For thicker pieces of mail 3 8 to 5 8 or mail containing several inserts use the thick mail setting For ma...

Page 32: ...ntinued WOW transport jam release lever WOW Transport Jam Release Lever Pull this to clear jams on the transport deck Pressure Sensitive Postage Tape In the DM800i System with op tional WOW module the pressure sensitive postage tape is located as shown below in the WOW module WOW Transport Deck This transports the envelopes to the printer Postage tape holder in WOW module WOW transport deck ...

Page 33: ...igital Mailing System Operating Guide Ink Cartridge This contains the ink used to create the meter stamp Printhead This produces the meter stamp Interior of DM800i Digital Mailing System Under the Printer Cover Ink cartridge Printhead ...

Page 34: ... seal the envelopes at all adjust the wetness or prime the moistener 7 Accounts Key Press to set up and edit accounts 8 Custom Preset Key Use this to choose frequently used system key settings for running different jobs 9 Menu Key Press to view the following settings and options Meter Stamp Options Set Up Zero Scale Maintenance Turn Features On Adjust Display Contrast 10 Funds Key Allows you to ob...

Page 35: ... See Specifications in Appendix C of this guide for details 18 Stop Key Ends a mail or tape processing job in progress 19 Clear Key Clears an entry or takes you back one screen 20 Alpha Keyboard Use to enter accounts and other setup information This keyboard is under a cover that opens for access B N M H J K L Y U I O P Symbol _ Enter Start Tape Stop Q A Z X C V S D F G W E R T Shift Space Custom ...

Page 36: ...nformation 1 Advertisement Display The optional message to be printed on the envelopes or tape if selected 2 Account The account number or name charged with postage 3 Class The class you selected for the piece of mail 4 Main Status Area Important information such as warnings or help or navigation tips For example if you select a class a message appears in this area 5 Weight Display Area The weight...

Page 37: ...SV61162 Rev C 3 1 Mail In A Minute Contents Mail In A Minute 3 2 Preparing Your Mail 3 2 Running the Mail 3 4 Printing Postage Tapes 3 4 3 ...

Page 38: ...eces of mail flats and postcards or any mail that is easily damaged refer to Tips on Feeding Mail in Chapter 4 in this guide Mail In A Minute Preparing Your Mail 2 Sort the mail by envelope size If you are using the accounting feature sort by account as well 3 Shingle the envelopes so they are slanted slightly to the left as shown in the picture on the right Envelopes shingled to the left 1 Remove...

Page 39: ...e meter If the message Low Funds appears on the screen make sure you can complete the mail run with the funds you have If you do not have enough funds see Chapter 6 Adding Postage in this guide Thick mail setting Normal mail setting 5 Adjust the side guide so it is close to but not touching the bottom edge of the envelope stack Be sure and leave a slight clearance between the side guide and enve l...

Page 40: ...ion or jams in the mechanism and possible loss of post age To print a postage tape 1 Locate the tape exit on the right side of the mailing system 2 With the correct postage set on the main screen press the Tape key to print one tape 3 To print more than one tape use the numeric keys to type in the num ber of tapes you want then press the Tape key The system prints the tapes NOTE Do not lift any of...

Page 41: ...e 4 4 Preparing Your Mail 4 6 Selecting the Postage Mode and Running Mail 4 10 Selecting or Deselecting an Account 4 18 Selecting the Class Carrier Special Services or Options 4 19 Selecting the Meter Stamp Options 4 21 Using Electronic Confirmation Services 4 25 Adding Postage or Changing the Date 4 30 Clearing the Batch Count 4 32 4 ...

Page 42: ...ck one screen or more clear an entry or return to the Ready screen press the Clear key Pressing the left arrow key returns you to the main screen Other selection or navigation or help information appears at the bottom of the screen Also check for messages next to the arrow keys on the bottom right side of the screen Navigating Hints Arrow Keys and Help Information Screen Options Select Mode 1 Key ...

Page 43: ... Mail Choosing the mode for running your mail and tapes 4 Selecting or Deselecting an Account to Print Postage Refer to this section if your system uses accounting 5 Selecting the Class Refer to this section if you need to specify a class or select a special service 6 Selecting Meter Stamp Options This section describes how to change the elements printed on your piece of mail 7 Using Electronic Co...

Page 44: ...eder Meet the other requirements for mail feeding listed in Appendix C Specifications in this guide 3 If your mail meets the above requirements for feeding select the ap propriate mode from chart A below 4 If your mail does NOT meet the requirements for direct printing you MUST print a postage tape Select the applicable postage mode from chart B on the following page Chart A Printing on Mail If Us...

Page 45: ... systems You know the weight Manual Weight Entry An op tion you can purchase not available on all systems Your pieces of mail vary in types sizes and or weights Differential Weighing Chart C Mail Modes with NO Postage If Use this Mode Your mail requires a permit Print Permit An option you may be able to purchase Not available on all systems You only want to seal the envelope and do NOT want to app...

Page 46: ...t weight or bulky pieces of mail flats and postcards or any mail that is easily dam aged refer to Tips on Feeding Mail in this section 2 Preparing Your Mail 1 Sort the mail by envelope size If you are using the accounting feature sort by account as well 2 Shingle the envelopes so they are slanted slightly to the left as shown in the picture on the right 3 Place the stack of mail on the feed deck s...

Page 47: ...s of mail 3 8 to 5 8 or mail con taining several inserts use the thick mail setting For mail containing only single in serts or for postcards use the normal mail setting Refer to the figure on the right To pick a setting turn the knob to the arrow located on the feed cover 6 Make sure you have sufficient funds in your postage meter If the message Low Funds appears on the screen make sure you can c...

Page 48: ... easily damaged mail You may want to reduce the speed at which the pieces of mail travel through the machine To do this press the Mode key then press the left arrow key speed to change between normal and reduced speed Any mail with the flap on the opposite side For mail where the indicia is located on the side opposite of the flap the flap is on the bottom of the mail piece make sure the mail is c...

Page 49: ...ling System is designed to use a special pressure sensitive adhesive tape made exclusively for it WARNING Use only fresh rolls of Pitney Bowes tape to avoid distortion or jams in the mechanism and possible loss of post age To print one tape you simply press the Tape key instead of placing mail on the feed deck To print more than one tape use the numeric keys to type in the number of tapes you want...

Page 50: ...is mode if you know what the correct amount of postage is for your mail and you intend to apply this postage to each piece 1 Press the Mode key 2 Select Key In Postage 3 Key in the correct postage value using the numeric keys on the IntelliLink Control Center then press the Enter key If you are done place the mail on the feed deck and press the Start key otherwise go to step 4 4 If you want to cha...

Page 51: ...tage applied to the mail piece To run mail in the WOW mode 1 Press the Mode key 2 Select WOW Weigh on the Way 3 Press the Class key if required and select the class For more informa tion refer to 5 Selecting a Class Carrier or Special Service in this chapter NOTE If the weight you enter is invalid for the class you are prompted to select another class 4 Press the Seal key and select your sealing o...

Page 52: ...un mail in this mode 1 Press the Mode key 2 Select Weight First Piece 3 Press the Class key if required and select the class For more informa tion refer to 5 Selecting a Class Carrier or Special Service in this chapter NOTE If the weight you enter is invalid for the class you are prompted to select another class 4 Press the Seal key and select your sealing option 5 Place the stack of mail on the f...

Page 53: ... key then select Zero Scale 3 Press the Mode key then select Differential Weighing 4 The system prompts you to place the mail on the scale CAUTION Make sure you center the mail on the scale and check to be sure it is not touching any other surface or object 5 Once you place the mail on the scale If you have previously selected a class the system displays the fol lowing prompt at the top of the scr...

Page 54: ...mber of pounds and press Enter If the weight of your mail is less than 1 lb press the right arrow key to go to the ounces field 4 Type in the number of ounces and press Enter 5 Press the Class key if required and select the class For more informa tion refer to 5 Selecting a Class Carrier or Special Service in this chapter NOTE If the weight you enter is invalid for the class you are prompted to se...

Page 55: ...r the mail on the scale and check to be sure it is not touching any other surface or object 5 If the class displayed in this screen is incorrect press the Class key and select the class For more information refer to 5 Selecting a Class Carrier or Special Service in this chapter 6 If this is a package press the Tape key otherwise go to step 7 7 Place the piece of mail on the feed deck 8 Press the S...

Page 56: ...is not touching any other surface or object CAUTION Do not lean on or touch the scale since the system will interpret this as a piece of mail and will deduct postage The system prints a tape every time you place another piece of mail on the scale Selecting the Postage Mode and Running the Mail continued 3 Mode Selection Print Permit This feature may be offered as an optional feature and is not ava...

Page 57: ...djust Wetness Prime Moistener For more information refer to the Adjusting the Wetness and Priming the Moistener sections in Chapter 9 of this guide 6 If you are using the optional DJPS DMPS Power Stacker we recom mend you remove your mail in manageable stacks and not allow the deck to fill completely The system will halt the stacker if it is filled to its maximum capacity To select a Print Permit ...

Page 58: ...ted you are prompted to enter the password 4 The system displays the main screen showing the account name number as well as any subaccount or subsubaccount names For example if you have a top level account named Engineering with a subaccount named Mechanical the following account name ap pears in the display Engineering Mechanical The lowest account name in this case Mechanical is the account that...

Page 59: ...reen If you purchased the Smart Class option you can select a custom ized class This is available only on systems with the WOW module For more information refer to Setting up the Optional Smart Class Feature in Chapter 5 in this guide To select a Smart Class refer to Selecting a Smart Class in this section 2 Select the class and press Enter 3 If a ZIP Code or Zone is required you are prompted to e...

Page 60: ...5 of this guide 1 When you select a class you may be prompted to enter the ZIP Code or Zone 2 To access the Intra BMC Package Services Parcel Post rates enter only the first 3 digits of the ZIP Code To access the Inter BMC Package Services Parcel Post rates enter all 5 digits of the ZIP Code 3 Press Enter Selecting a Smart Class 1 Press the Class key 2 Press the right arrow key All Rates 3 You are...

Page 61: ...n the menu on the right are described in this section Meter Stamp Options Date Ad Messages Inscription Piece ID Number Print Position Multiple Tapes International use only Meter Stamp Options Date 1 Press the Menu key 2 Select Meter Stamp Options 3 Select the Date option Depending on your previous selections a com bination of the following selections appears Don t Print Date Print only Month and Y...

Page 62: ...mailing system refer to Chapter 11 Supplies and Options in this guide To add more advertisements refer to Performing Updates or Adding Fea tures in Chapter 9 in this guide 1 Press the Menu key 2 Select Meter Stamp Options 3 Select the AdMessage option 4 Use the down arrow key to scroll through the advertisements 5 Press the screen key that is next to the advertisement you want The advertisement th...

Page 63: ...ates or Adding Features in Chapter 9 in this guide 1 Press the Menu key 2 Select Meter Stamp Options 3 Select the Inscription option 4 Use the down arrow key to scroll through the inscriptions 5 Press the screen key that is next to the inscription you want The in scription then appears next to the meter stamp The inscriptions provided with your system are shown here Presorted First Class Presorted...

Page 64: ... key 2 Select Meter Stamp Options 3 Select the Print Position option 4 Use the left and right arrow keys to switch between the possible posi tions 1 9 where 1 is the position closest to the right edge Meter Stamp Options Multiple Tapes This provides an alternate method for printing multiple tapes 1 Press the Menu key 2 Select Meter Stamp Options 3 Select the Multiple Tapes option 4 Enter the numbe...

Page 65: ... NOTE When using these services you cannot type in the postage manually You can however use manual weight entry Discounts for Confirmation Services When you use any of these services with your mailing system and send the barcodes electronically over the phone line you get a dis count on the cost of the service In some cases like adding Electronic Delivery Confirmation to a Prior ity letter you onl...

Page 66: ...b site at www usps com Adding Services or Making Changes If you already have postage on the mail and then decide you want to add a service follow the instructions here for Adding Confirmation Ser vices After Printing Postage If you need to add more postage to cover the confirmation services refer to the section Add Postage and or Change the Date in this chap ter If you realize you have put the wro...

Page 67: ...n scan in the number a If you have used the confirmation service before the next barcode value in the series of barcode labels appears minus the last digit b If you have used all of the labels in a series of barcode labels make sure you start with the top label with the lowest last 4 digits and not the bottom label with the highest last 4 digits If you have a barcode scanner you can scan in the nu...

Page 68: ...ue in the series of barcode labels appears minus the last digit If you have used all of the labels in a series of barcode labels make sure you start with the top label with the lowest last 4 digits and not the bottom label with the highest last 4 digits If you have a barcode scan ner you can scan in the number 10 If you are using a barcode scanner and have set up your system to au tomatically ente...

Page 69: ...own arrow key and then select Confirmation Services 3 To edit an existing record select Edit records You can edit either the ZIP Code or barcode entry To modify the class or service you need to delete the record and add it as a new record To delete a record select Mark record for deletion you cannot delete a record once you have sent it to Pitney Bowes To send all of the confirmation service recor...

Page 70: ... are printing on a tape go to step 3 2 Turn the piece of mail around 180 degrees so that the meter stamp is in the lower left corner as shown here Then place the envelope on the feed deck with the flap facing down 3 To add more postage press the Mode key and select Key In Postage 4 Enter the additional amount using the numeric keys and press Enter Press the Start key If you are printing a tape pre...

Page 71: ...p facing down 3 Press the Mode key and select Key In Postage 4 Enter the 00 00 for the postage value using the numeric keys and press Enter 5 Press the Menu key and then select Meter Stamp Options 6 Select the Date option and make the appropriate selection 7 Follow the prompts on the main screen Press Enter when complete 8 Press the Start key If you are printing a tape press the Tape key 9 The dat...

Page 72: ... new run The batch count appears on the display in the lower right corner To clear the batch count 1 Press the Funds key 2 The View Funds screen appears 3 Press the right arrow key to clear the batch count 4 If you have specified that a supervisor password must be entered to clear the batch count you are prompted to enter the password now Enter the password and press the Enter key Clearing the Bat...

Page 73: ...pervisor Password 5 6 Setting Up a Lock Code 5 7 Setting Up the Scale and Selecting Rates 5 8 Setting Up Postage By Phone Meter Payment System 5 12 Configuring High Low Funds Warnings 5 17 Configuring Low Ink Warnings 5 17 Configuring System Timeouts 5 18 Defining Presets 5 21 Taking the Meter Out of Service 5 25 Adding an Optional Printer 5 25 Configuring the Optional Barcode Scanner 5 26 Setting...

Page 74: ...essing the Enter key To go back one screen or more clear an entry or return to the Ready screen press the Clear key Pressing the left arrow key returns you to the main screen Other selection or navigation or help information appears at the bottom of the screen Also check for messages next to the arrow keys on the bottom right side of the screen Arrow Keys and Help Information Screen Options Select...

Page 75: ...play Contrast and Volume Control 3 Setting the Date and Time of Day 4 Setting up a Supervisor Password 5 Setting up a Lock Code 6 Setting up the Scale and Selecting Rates 7 Setting up Postage By Phone 8 Configuring High and Low Funds Warnings 9 Configuring Low Ink Warnings 10 Configuring System Timeouts 11 Defining Presets 12 Taking the Meter Out of Service 13 Setting up the Optional Printer 14 Co...

Page 76: ...the Enter key to save this setting To adjust the volume 1D00 only 1 Press the Menu Key 2 Press the down arrow key and then select Volume Control 3 Select the volume level you want 0 off 1 low 2 medium 3 high 4 Press the Enter key 2 Adjusting Display Contrast and Volume Control 1 Setting the Display Language Depending on the model of your mailing system you may be able to set the display to any of ...

Page 77: ...ct Set Up 3 Press the down arrow and select Time of Day 4 You can select Current Time Date will Advance After Daylight Saving 5 For Current Time or Date will Advance After enter the correct time Use the right arrow key to toggle between AM and PM You do not need to enter the colon between hours and minutes For Date will Advance After as soon as your system reaches the time you set it automatically...

Page 78: ...stem prompts you to enter the password and then confirm it NOTE Passwords are case sensitive and must be at least 4 characters or digits long To password protect an operation 1 Press the Menu key 2 Select Set Up then select Basic Settings 3 Press the down arrow and select Supervisor Set Up 4 Select the option that corresponds to the operation you want to pass word protect The options are a Refill ...

Page 79: ...o options are displayed a Lock Code On Off b Change Lock Code If this is the first time you are setting up a lock code Off appears next to the Lock Code selection 4 Select Lock Code and enter a four digit code Press Enter and the system prompts you to confirm it As soon as you confirm the code On appears next to the Lock Code selection 5 Press the Clear key or the left arrow to exit and set the lo...

Page 80: ...e between Normal and Adjust for Motion 4 Press the Enter key to accept If you have a scale on your DM800 Series Digital Mailing System you can use this section to set up how your scale works with your system For example the Attached Scale op tion allows you to set your scale to ac commodate for environments subject to vibrations The Class if new Piece Dest if new Piece and Dest if new Class option...

Page 81: ...efer to the Selecting the Postage Mode and Running Mail section in Chapter 4 in this guide When your system is shipped the trip weight is set to 0 5 ounces 10 grams It is best to set the trip weight as high as possible to match the lowest weight that you will use For example a 10 envelope with a single insert typically weighs 0 4 ounces In this case you would set the trip weight to 0 4 ounces This...

Page 82: ...ale Rates Destination if New Piece Use this option to set the system to clear the destination ZIP or Zone code each time you change the class of mail or to keep the last destination ZIP or Zone code used 1 Press the Menu key on the control center and select Set Up Press the down arrow key and select Scale Rates 2 Select Dest if new Class To clear the destination select Clear set destination to non...

Page 83: ... if this option is accessible on your system This is for international use Use this option to apply discounts and or sur charges to a different carriers and classes 1 Press the Menu key on the control center and select Set Up Press the down arrow key and select Scale Rates 2 Select Discount Code 3 Select Create new to create a new discount code Select one of the displayed carrier names to edit an ...

Page 84: ...e Rates 2 Select Confirm Svc Barcode Prompt to toggle between on and off 3 Press Clear or the left arrow to exit 7 Setting Up Postage By Phone Meter Payment System This section describes how to set up Postage By Phone Meter Payment System on your mailing system It also includes advanced phone setup instructions for modifying individual phone connection parameters user ID and password and server IP...

Page 85: ...n to enter the Pitney Bowes phone number that you use to add postage to your postage meter 1 Press the Menu key on the control center Select Set Up from the main screen then select Phone Network Set Up 2 Select PB Phone This number is supplied by your Pitney Bowes representative 3 Use the numeric keypad to enter the phone number you need to dial to connect to Pitney Bowes to add postage or select ...

Page 86: ... the modem to tone or pulse dialing 1 Press the Menu key on the control center Select Set Up from the main screen then select Phone Network Set Up 2 Select Dialing Type 3 Use the right arrow key to toggle between tone or pulse dialing 4 Press the Clear key or the left arrow to exit Phone Network Set Up Secondary PB This feature may be offered as a standard or optional feature and is not available ...

Page 87: ...t Up Modem Type Use this option allows you to select the modem type USB Serial or In ternal Once you select the type the Phone Network Set Up screen reap pears 1 Press the Menu key on the control center Select Set Up from the main screen then select Phone Network Set Up 2 Select Modem Type and the Select Modem Type screen appears 3 Select the appropriate modem type USB or Serial The Phone Net work...

Page 88: ...elect Network Settings The Network Set Up screen appears and displays the following options Distributor Parameters Mailing System Network Settings 3 If you select Distributor Parameters the system displays the follow ing connection parameters Global Account User Id Global Password ANI LCZ Server IP ANI LCZ Server Port Primary DNS Server Secondary DNS Server Distributor URL Backup Data Center URL 4...

Page 89: ... postage amount that is more than you need 1 Press the Menu key on the control center select Set Up from the main screen and then select Basic Settings 2 Select High Value Warning 3 Enter the high value warning amount 0 99 99 using the numeric keypad 4 Press the Enter key 5 Confirm that the high value warning amount that appears in the dis played is correct Press the key corresponding to the optio...

Page 90: ...meouts Display Sleep This option allows you to specify how long the system can remain inactive before the display turns off You can set the timeout for 1 30 minutes in 1 minute increments The default timeout is 5 minutes The display turns on again when you press any key on the control center or if you place mail in the feeder or on the scale either integrated or at tached external scale 1 Press th...

Page 91: ... Pressed 5 If you entered the number of seconds press the Enter key Timeouts Normal Preset Timer The normal preset timer option allows you to specify how much time you want to allow the system to remain idle before it returns to the Normal Preset settings refer to 11 Define Preset section in this chapter for more information on Normal Presets You can set this timeout for 0 1440 minutes in 1 minute...

Page 92: ...ess the Enter key Timeouts Waiting for Env Timeouts Transaction Timer This option is available only if your mailing machine is connected to the AccuTrac Mail Accounting system Use this option if you routinely batch your mail runs This option allows you to specify how much time to allow the system to remain idle before it ends the current accounting transaction You can set this timeout for 10 65520...

Page 93: ...on How to Define Normal Preset Values 1 Enter the values you use most often to run a mail job for example the weighing mode the postage value class and carrier etc NOTE Proceed as if you were actually running a job Select the mode and class and service etc By doing this you are entering the values that you will use for the normal preset Refer to Chapter 4 Running Mail in this guide for more inform...

Page 94: ...t Value in this section 6 The system prompts you to Enter New Preset Name 7 Type in the name using the alphanumeric keys 8 Press the Enter key The View Preset screen appears and displays all of the values you defined in this session To use these values in the future simply press the Custom Presets Key and select the screen key corresponding to this preset name 9 Press the Enter key to return to th...

Page 95: ...ance date press the Menu button select Meter Stamp Options then select Advance Date Example 2 If you have previously set up your system so that it automatically advances the date at 3 PM and you created a custom preset with the Advance Date set to zero that is you did not advance the date then a if you recall the preset before 3 PM it will print today s date on your postage b if you recall the pre...

Page 96: ...ss the screen key next to the name of the preset you want to edit 7 Press the Enter key to view the preset values Press Enter again to return to the main screen How to View Rename or Delete Presets 1 Press the Custom Presets key 2 A list of presets starting with 0 Normal appears Select the appro priate preset 0 4 presets are displayed on the screen To view the other preset names press the down arr...

Page 97: ...sfers the funds and displays the amount transferred 5 To print this amount on an envelope place an envelope on the feed deck and press the Start key To print on a tape simply press the Tape key 13 Adding an Optional Printer You can connect a Pitney Bowes J624 printer to your mailing system To add this optional external printer all you need to do is plug the USB con nector from the printer into one...

Page 98: ... any set up operations here Refer to the appropriate topic in this section If you are using an accounting system on your DM800 Series Digital Mailing System you can set the default scan type so that your system recognizes your particular accounting application when it scans the barcode Refer to Setting the Default Scan Type If you are attempting to scan barcodes that were defined for other ac coun...

Page 99: ...own arrow key and then select Barcode Scanner 3 At the Barcode Scanner Setup menu select Default Scan Type 4 Select the appropriate option according to the table here If your accounting system is And the barcode contains Select Business Manager Account Name Account Name Business Manager Account Code Account Code Budget Manager Account Name Account Name Budget Manager Speed Code Speed Code AccuTrac...

Page 100: ... 1 or 2 whichever is appropriate 5 Select the appropriate prefix option according to the table here If your accounting system is And the barcode contains Select this Prefix Option Business Manager Account Name Prefix Account Name Prefix Business Manager Account Code Prefix Account Code Prefix Budget Manager Account Name Prefix Account Name Prefix Budget Manager Account Speed Code Prefix Account Co...

Page 101: ...lue To select the character to join multiple barcode scans 1 Press the Menu key on the control center then select Set Up 2 Press the down arrow key and then select Barcode Scanner 3 At the Barcode Scanner Setup menu select Concatenate Scans 4 A list of possible join character options is displayed Select the char acter you use to combine the barcode values 5 As soon as you make your selection the B...

Page 102: ...an operator verifies that the correct barcode has been scanned By default the system will automatically enter the value as soon as it scans in the barcode To require you to press Enter to accept each scan 1 Press the Menu key on the control center then select Set Up 2 Press the down arrow key and then select Barcode Scanner 3 At the Barcode Scanner Setup menu select Auto enter 4 Select Off to disa...

Page 103: ...ll use the following three classes For weight break Use Class 0 0 oz to 3 0 oz 1st Class Automation Letter 5 Digit 3 0 oz to 13 0 oz 1st Class Non Automation Presort 13 o oz to 1 0 lb Priority 1 Press the Menu key 2 Select Set Up then press the down arrow and select Scales Rates 3 Press the down arrow depending on your system you may have to press it twice and select Smart Classes 4 Select Create ...

Page 104: ...ress the Enter key Enter 13 for oz and press the Enter key c Select the appropriate class in this example 1st Cls Presort Press Enter d As soon as you press Enter the display shows the first and sec ond weight break for this Smart Class Weight Class Fees 0 lb 0 0 oz 0 lb 3 0 oz 1stAuto r 5 Dig 0 lb 3 0 oz 0 lb 13 0 oz 1st Cls Presort 7 To set the next weight break point select Add Another Class a ...

Page 105: ...ted with a list of available custom carriers for grouping your Smart Classes 9 Select one that is listed as Available You can have up to a maxi mum of 4 custom carriers 10 Next you are prompted to enter a Carrier Name Enter a name up to 15 letters and or numbers for your Smart Class grouping for ex ample Carrier 1 Press the Enter key 11 You are now prompted to enter the Smart Class Name This will ...

Page 106: ......

Page 107: ...our Postage Meter 6 2 USPS Rekey Requirements 6 2 Managing Your Postage Funds 6 3 Connecting Your Postage Meter to an Analog Phone Line 6 4 Checking Available Funds in Your Postage Meter 6 6 Checking Your Postage By Phone System Account Balance 6 6 Adding Postage 6 7 Contents 6 ...

Page 108: ...em Account Bal ance in this chapter This satisfies the inspection requirements If you have questions call the Postage By Phone System number Refer to the Pitney Bowes Contact Information List at the front of this guide for the phone number Postage By Phone Postage By Phone Meter Payment System is a Pitney Bowes service that you use to add postage to your meter You can access the Postage By Phone S...

Page 109: ...e meter to an analog line This shows the recommended connections for when the analog line is close to your mailing system and when you have to remove the IntelliLink Control Center and take it to a remote location 2 Checking Available Funds in Your Meter Follow this procedure to see if you have sufficient funds in your meter 3 Checking Your Postage By Phone System Account Balance Follow this proce...

Page 110: ...ine Refer to Connecting Your Postage Meter Remote Analog Phone Line in this section External modem External USB modem cable Connecting Your Postage Meter Remote Analog Phone Line If you need to connect to an analog phone line that is not located near your mailing system you can remove the IntelliLink Control Center and move it to a location near the analog phone line At the remote location plug on...

Page 111: ...back of the control cen ter and plug it into an AC outlet Refer to the figure below External USB Modem Cable External Modem Telephone Cord for Analog Line 26 AWG AC Adapter plugged into IntelliLink Control Center 6 Add or check your postage funds as described in Checking Your Post age By Phone Account Balance in this chapter 7 Reinstall the IntelliLink Control Center by sliding it into the docking...

Page 112: ...funds in your account move funds to your postage meter see Adding Postage in this chapter 3 Checking Your Postage By Phone Meter Payment System Account Balance Before adding postage to your meter you should check the funds avail able through the Postage By Phone System Remember with your new mailing system it is no longer necessary to prepay for postage Your mail ing system is designed to save you...

Page 113: ...the amount you want to add up to 1000 Use whole dollars only do not key in cents Your meter automatically adds two decimal places 6 Press the Enter key The system dials Pitney Bowes to connect to your account and begins to add the postage to your meter 7 The system notifies you when it finishes adding your postage and dis plays the message Refill Complete The system prompts you to Press Tape to Pr...

Page 114: ......

Page 115: ...ts and Subaccounts 7 9 Turning Account Password Protection On or Off 7 9 Resetting Clearing All Accounts 7 10 Turning Reset Individual Accounts On or Off 7 10 Transferring Funds 7 11 Setting the Station ID 7 12 Selecting Your Accounting Type 7 13 Your Accounting System Features 7 14 Account Structure and Hierarchy 7 15 Contents 7 The information in this chapter applies only to the Standard Account...

Page 116: ...ns displayed is 5 To view more options press the down arrow key You can select a numbered option either by pressing the screen key next to the option or by pressing the corresponding number on the keyboard and then pressing the Enter key Pressing the left arrow key returns you to the main screen Arrow Keys and Help Information Screen Options Select Account 0 None 2 Account Name subacct sub subacct...

Page 117: ...tem refer to the documentation provided with these applications For the Budget Manager refer to SV60957 For the AccuTrac Mail Accounting System SA refer to SV60514 For Business Manager refer to SV61178 For information on your system s accounting features or if this is the first time you are setting up accounts and would like some examples of ac counting structures and hierarchy see sections Your A...

Page 118: ... set up accounts pressing the Accounts key dis plays a list of all the accounts Press the right arrow key to enter the Set Up Accounts screen Using the Account Setup Procedures The following is a list of all the account setup procedures For details on each procedure refer to the section number listed here 1 Viewing Accounts or Subaccounts 2 Creating Accounts and Subaccounts 3 Editing Accounts 4 Se...

Page 119: ...ts you to enter an account name 5 Type in the name using the keyboard or numeric keypad and press Enter The Account Information screen appears and displays the op tions Edit Name Edit Number Add Change Password Add Subaccount to account Subsubaccount to subaccount Create Another Account Subaccount Subsubaccount 6 Select the appropriate option and follow the prompts NOTES a By default the system as...

Page 120: ...e option and follow the prompts NOTES a The account number and password and total pieces and funds used if they exist are transferred to the first subaccount created the next working chargeable account They are further transferred down when a subsubaccount in this link is created the new chargeable account b By default for addition subaccounts the system assigns the next avail able account number ...

Page 121: ... to Active or In active Pressing the screen key for Status switches between active and inactive c Reset Account Select this to clear all number of pieces and funds in this account When you select this the system prompts you to print a report of the account data Once cleared the data are unrecoverable To keep a record of your data select Print Re port then select Reset to clear the data Before you ...

Page 122: ...mat MM DD YYYY EXAMPLE If you selected a monthly accounting period and entered a cut off date of 03 31 2004 as soon as your system reaches April 1 2004 12 01 a m you must reset clear your account data Your machine prompts you to do so at startup Once you reset the accounts the system automatically resets the cutoff date to 04 30 2004 6 Press Enter Turning Standard Accounting On or Off To turn the ...

Page 123: ...isplay as two separate accounts under the main account title Engineering Software Engineering Industrial Design 5 As soon as you select an account the system prompts you to print a report Once you delete an account its data cannot be retrieved To keep a record or your account data select Print Report then select Delete By turning passwords on you can protect each account from unauthorized access N...

Page 124: ...t Reset All Accounts the system prompts you to Print Report Reset 5 To keep a record of your account data select Print Report The sys tem prints a Multi Account report 6 Once you print a Multi Account report clear all accounts by selecting Reset The system prompts you to confirm that you want to clear the accounts Turning Reset Individual Accounts On or Off If you want to be able to reset clear in...

Page 125: ...baccount Prototypes The subaccounts and subsubaccount appear in the display as separate accounts under the main account title transfers can be made among Software Industrial Design and Prototypes Engineering Software Engineering Industrial Design Engineering Mechanical Prototypes 4 Select an account to transfer funds from and press Enter 5 The system displays a list of all of your accounts again S...

Page 126: ...tion ID 4 Type in a unique alphanumeric identification up to two characters in length and press Enter 11 To transfer pieces 9 Select Transfer Piece Count The system displays a screen of the same accounts and prompts you to Enter Number of Pieces to Trans fer Enter the number of pieces or select Transfer Entire Piece Count and press Enter 10 The system displays a screen of the from to accounts and ...

Page 127: ...depending on the option s you purchased dis plays the following Off Standard Business Manager Budget Manager AccuTrac Meternet 5 To disable the current accounting select Off NOTE If accounting is enabled whenever you run mail you MUST select an account To avoid having to do this select Off 6 To enable the standard accounting provided with your system select Standard If you have purchased Business ...

Page 128: ...t ID number Item total This is the total number pieces of mail charged to an ac count since it was last cleared Value total This is the total amount of postage charged to an account since it was last cleared Account password Your mailing machine has 25 standard accounts You have the option to increase your accounts to 100 or 300 accounts Only your chargeable lev el accounts are counted towards you...

Page 129: ...r subaccounts If you create subsubaccounts for subaccounts the subsubaccounts become the end links and identify the departments that are charged for postage EXAMPLES Account Engineering Subaccount Software Subsubaccount Software Testing Account Engineering Subaccount Software Subsubaccount Software Design Account Engineering Subaccount Industrial Design Subsubaccount Graphics and Layout Account En...

Page 130: ... By Phone When you view accounts or print reports you are being given information on funds used and pieces processed for each account in the hierarchal structure For example Engineering with totals for all its subaccounts and subsubaccounts The subaccounts e g Industrial Design show to tals for their subsubaccounts e g Graphics and Layout and User Friendly Testing and the subsubaccounts show their...

Page 131: ...2 Single Account Report 8 3 Multi Account Summary 8 4 Last 5 Refills Report 8 6 USPS Confirmation Services Report 8 7 Permit Mail Report 8 8 Account List Report 8 8 Funds Report 8 9 System Setup Report 8 10 Error Report 8 11 Job Report 8 12 Data Capture Short Report 8 13 8 ...

Page 132: ...ow To View a Report 1 Press the Reports key 2 Select the report you want to print The report appears in the main dis play Printing a Report You may print reports using the internal mailing system printer or an at tached external printer if one is connected to your system How to Print a Report 1 Press the Reports key 2 Select the report you want to print The report appears in the main dis play Pres...

Page 133: ...e report Accounts can be printed even if they are inactive Screen Display Single Account Report Account name Subacct Sub Subacct Account Number Account Number Pieces Account Piece Count Postage Account Value Total Select Another Account Printed Report The Single Account Report prints on one envelope or a strip of tape Information contained in the report Date report is printed Time report printed M...

Page 134: ...Total Account Number Account Piece Count Postage Value Total Printed Report Date report is printed Time report is printed Meter Stamp Serial Number identifies the meter which printed the re port Account Number Number of each account that has used postage Pieces Total of pieces run for account Postage Total postage value for account no sub total is provided for subaccounts or sub subaccounts Statio...

Page 135: ...unts displays as Subtotal Screen Display Account Summary Account Pieces Postage Account name Account Piece Count Postage Value Total Account name Account Piece Count Postage Value Total Printed Report The Multi Account Summary prints out on an attached printer This report provides the following information Meter stamp number Date report is printed Time report is printed Page number Station ID a us...

Page 136: ...te Time Refill Amount Date Time Refill Amount Date Time Refill Amount Date Time Refill Amount PbP Account Account Printed Report The Refill Statement provides the following information Date of Refill Time of Refill Refill Amount Amount of the last five refills for this particular account Account No Postage By Phone Meter Payment System account number Meter Stamp Serial Number identifies the meter ...

Page 137: ... Confirmation Services Report Barcode Service Postage Class ZIP Date Uploaded Print tapes for last group sent Printed Report System Printer The report provides the following information about a piece of mail Barcode or package identification code Destination ZIP Code of the package The Postage by Phone Meter Payment System account number Meter Serial number Date and time record was uploaded via In...

Page 138: ...ount Printed Report The Permit Mail Report provides the following information Permit Name Identifying Text for each active permit mail class Counter Resettable Permit Mail Piece Count for each active permit mail class Total Pieces Non resettable Permit Mail Piece Count for each active permit mail class Date Printed Time Printed Meter Serial Number Permit Mail Report Account List Report External Pr...

Page 139: ...Control Sum Batch Count Batch Count Batch Value Batch Value Printed Report The Funds Report provides the following information Date report is printed Time report is printed Meter Stamp Serial Number Used Postage funds currently spent Available Postage funds still available for processing Control Sum The total of used funds and available funds Total Pieces Total of pieces imprinted with postage Bat...

Page 140: ...ords Funds and Piece Information Funds Used Funds Available Control Sum Total Pieces Batch Value Batch Count Warning Values High Value Low Funds Maximum Settable Value Time Settings Time Zone Offset Daylight Time Offset Daylight Savings Clock Drift Adjustment Date Advance Time Advertisements Advertisement ID and Name Inscriptions Inscription ID and Name Accounting Set Up Accounting Feature on off ...

Page 141: ...cal order with the most recent error at the top It prints on an envelope or tape strip Screen Display Error Report Date Time Location Error ID Date Time Location Error Code Date Time Location Error Code Date Time Location Error Code Date Time Location Error Code Printed Report The Error Report gives the following information Date report printed Time report printed Meter Stamp Serial Number The Err...

Page 142: ...creen Display Job Report Account Name SubAccount Sub SubAccount Account Number Account Number Pieces Account Piece Count Job Mode Printed Report The Job Report gives the following information Time date printed report printed Meter Stamp Serial Number identifies the meter which printed the re port Station ID A user defined number to identify the meter Pieces Total of pieces processed for the accoun...

Page 143: ...iling system through Pitney Bowes Data Center to the Post Office The Data Capture Report prints on an envelope or tape Installed Pending Rates This report displays only on the screen Rate Description name File Name Part Number Version Service level Effective date Active or Inactive Last Rates Downloaded This report displays only on the screen View Download Log This report displays only on the scre...

Page 144: ......

Page 145: ...eaning the Exterior 9 2 Tape Maintenance 9 2 E Z Seal Sealing Solution Maintenance 9 5 Moistener Maintenance 9 6 Printer Maintenance 9 9 Replacing the Ink Cartridge 9 11 Changing the Printhead 9 13 Changing the Wiper Blade Assembly 9 16 Performing Updates or Adding Features 9 17 9 ...

Page 146: ... DM800 Series Digital Mailing System uses adhesive tape A red stripe appears along its edge approximately 22 inches from the end to in dicate a low tape condition Replace the tape when the stripe appears To order new tape refer to Chapter 11 Supplies and Options in this guide CAUTION If you do not use Pitney Bowes supplied tape you will not be able to determine when the tape is running out and thi...

Page 147: ...t Maintenance c Select Load Tape d Select Unload Tape 2 If your DM800i Digital Mailing System does not have the optional WOW module open the feed cover and remove the tape roll If your DM800i Digital Mailing System has the optional WEIGH ON THE WAY WOW module open the WOW cover Refer to the appropriate figure below Location of tape roll under the WOW cover on DM800i system with optional WOW module...

Page 148: ...to the right The protective backing on the tape should be facing down Pull about 10 inches of tape from the end of the roll up toward the cover and then loop it down into the slot CAUTION Do not load a tape strip that has any pink or black stripes showing This will cause the last piece of tape to jam in the machine which and you will need to place a service call 4 From the Out of Tape or Load Tape...

Page 149: ...ciency To order E Z Seal Solution refer to Chapter 11 Supplies and Options in this guide 1 Open the feed cover and lift out the E Z Seal bottle The bottle is located to the left of the tape roll 2 Remove the cap from the bottle 3 Add enough E Z Seal to bring the level up to the bottom of the fill cap CAUTION Do not overfill the E Z Seal Bottle CAUTION Make sure you do not spill any solution in the...

Page 150: ...ive can install a new moistener tank CAUTION Never remove the E Z Seal bottle and the moist ener tank at the same time This can result in E Z Seal leaking into the mailing machine Cleaning or Replacing the Moistener Brush 1 Lift the feed cover 2 Push down on the moistener brush button and release 3 Grasp the moistener brush assembly and lift it up and out towards you Moistener brush button Moisten...

Page 151: ...unning the brush under warm water 5 If you need to clean or replace the wick go to Cleaning or Replacing the Wick procedure below Otherwise go to step 6 6 Replace the existing clean moistener brush assembly or install a new one by pushing the assembly back on its track until it snaps into position 7 Verify that the moistener brush assembly is perfectly level with the feed deck Moistener brush Clea...

Page 152: ...rease the amount of fluid moved into the sealer 1 Press the Seal key 2 Press the Adjust Wetness screen key The Select Sealer Wetness screen appears Press the left arrow key to decrease the wetness Press the right arrow key to increase the wetness 3 Press Enter when done Moistener Maintenance continued ...

Page 153: ...er imprint with out spending any of your postage funds To print a test pattern 1 From the IntelliLink Control Center press the Menu key 2 Select Maintenance 3 Select Print Test Pattern 4 The Print Test Pattern screen appears and prompts you to Press Tape or print an envelope 5 Load an envelope on the feed deck and press Start or press Tape to print on a tape 6 Once the test pattern prints the syst...

Page 154: ...ttern as described above in Printing a Test Pattern to verify that you can print a clean and clear meter stamp 6 Repeat this operation at least one more time Printing a Test Pattern continued 8 Once the cleaning operation completes the Print Test Pattern screen appears again 9 Repeat steps 5 and 6 again If the print pattern still has broken or miss ing lines you may need to replace the ink cartrid...

Page 155: ...w Refer to Supplies and Options Chapter 11 in this guide Out of Ink displays when there is no more ink left in the cartridge and your mailing system stops printing In order to resume printing you must change the ink cartridge WARNING WARNING WARNING WARNING You must use only ink cartridges supplied by Pitney Bowes The use of any other ink cartridges will void your warranty and maintenance agreemen...

Page 156: ...t up the main cover and locate the ink car tridge lid 2 Push the tab on the front of the cartridge lid Lift the lid up and push toward the back of the machine 3 Remove the ink car tridge by lifting it straight up Ink cartridge lid Ink cartridge Replacing the Ink Cartridge continued ...

Page 157: ...changed the print cartridge and the meter stamp is still not satisfactory replace the printhead CAUTION Do NOT attempt to clean the printhead Instructions for replacing the printhead are included with each replacement and are repeated here for your convenience 1 Press the Menu key 2 Select Maintenance 3 Select Replace Printhead The Printhead Warning Continue screen appears Read this screen careful...

Page 158: ...Grasp the printhead cover and pull up as shown here 6 Push the printhead tab to the left as shown here 7 While continuing to press the printhead tab to the left pull the assembly forward as shown here This ex poses the printhead cover Printhead cover ...

Page 159: ...nthead shown here Changing the Printhead continued 10 Grasp the printhead stand off and lift the printhead up and out 11 Discard the old printhead 12 Locate the new printhead Remove the orange packing tab from the new printhead as shown here 13 Install the new printhead in the printhead slot Printhead stand off ...

Page 160: ...ace Wiper Blade Assembly The Preparing Wiper Blade screen appears During this time the system moves the printhead assembly back so that you can access the wiper blade assembly 4 The Replace Wiper Blade Assembly screen appears instructing you to remove the wiper blade assembly from the package 5 Lift the main cover and lo cate the wiper blade assem bly 6 Push the wiper blade tab toward the back of ...

Page 161: ...nt to enable 3 Type in the code and press the Enter key The system notifies you that the feature is now turned on Perform Software Updates 1 Press the Menu key 2 Select Set Up and then press the down arrow key 3 Select Updates and Add Ons 4 Select Check for Updates The system connects to Pitney Bowes and requests a list of updates 5 If no updates are available click OK to exit this screen 6 If upd...

Page 162: ...you select Feature Code you are prompted to enter the numeric value of the feature you want to enable Type in the code for the feature and press the Enter key The system then notifies you that the feature is now turned on To get a list of all the current features enabled on your system se lect the Feature Code then press the right arrow key and a list of the features appears c Phone Download If yo...

Page 163: ...bleshoot Your Mailing System 10 2 Envelope Sealing Problems 10 2 Envelope Feeding Problems 10 4 Tape Feeding Problems 10 8 Printing Problems 10 9 Postage Refill Problems 10 10 Display Problems 10 11 Weighing Problems 10 12 Troubleshooting 10 ...

Page 164: ...correctly or side guide is out too far Place the envelopes with the flaps down and against the rear wall Make sure the envelopes are pushed far enough so that they cover the feed sensor on the rear wall Adjust the side guide so it is close to but not touching the bottom edge of the enve lope stack Be sure and leave a slight clearance between the side guide and envelopes about 1 16 inch clearance T...

Page 165: ...Operating Guide Envelope Sealing Problems Possible Causes Solution Envelope s not sealing or not sealing properly Envelope flap dimensions are not within the acceptable range Use envelopes with flap depths between 1 and 3 7 8 25 4 mm and 98 4 mm Flap depth ...

Page 166: ... is incor rect OR Envelopes are too thick or thin for the feeder adjustment setting Adjust the thickness adjustment knob to correspond to the envelope thickness For thicker pieces of mail 3 8 to 5 8 or mail containing several inserts use the thick mail setting For mail containing only single inserts or for postcards use the normal mail setting Normal mail setting Thick mail setting Trying to feed ...

Page 167: ... in this guide for the acceptable envelope dimensions To clear a jam in the Feed deck 1 Lift the feeder cover 2 Pull up on the top release jam lever 3 Lift up the lower release lever 4 Remove the envelope 5 Depending on how badly the envelope is damaged you may need to replace it 6 Make sure the feed deck is clear and the jam release levers are down 7 To continue processing mail close the cover an...

Page 168: ... range To clear a jam in the WOW deck 1 Lift the WOW cover 2 Pull the WOW transport jam release lever to the left 3 Remove the envelope 5 Depending on how badly the envelope is damaged you may need to replace it 6 Make sure the WOW deck is clear and the jam release lever is down 7 To continue processing mail close the cover and select Start to continue from the display WOW transport jam release le...

Page 169: ...transport release knob 2 Remove the envelope 3 If the jam occurred before the system applied postage to the envelope the system will now print the postage on a tape Apply the postage tape to the enve lope 4 Push the transport deck back up until it snaps into position 5 Make sure the transport deck is level with the feed deck 6 Run a test pattern to make sure the printhead isn t damaged Refer to th...

Page 170: ...leading edge of the tape is completely covered with the protective backing and that you have a clean straight cut 5 Put the tape back in so that it feeds from the bottom of the roll to the right The protective backing on the tape should be facing down Pull about 10 inches of tape from the end of the roll up toward the cover and then loop it down into the slot Feed the tape back into the tape slot ...

Page 171: ...dd postage If you do not need to add postage at this time simply log onto the Pitney Bowes Data Center and check for updates The system will automatically perform a meter inspection Your postal rate or special service requires a ZIP Code or Zone Enter the ZIP Code or Zone Refer to the Entering ZIP Codes and Zones section in Chapter 4 in this guide Meter imprint is out of align ment Envelope is ske...

Page 172: ...ne is not con nected to an analog line or is loose Reconnect the phone line to the back of the IntelliLink Control Center Phone cord is damaged Check phone cord for damage cuts crimps and replace if necessary Problem with the phone line Test the main phone outlet and repair if neces sary You are using the wrong Postage By Phone Meter Payment System telephone number Contact the Help Desk for correc...

Page 173: ... Bowes Contact Informa tion List in this guide for the phone number of the Help Desk Unable to ac cess display or keyboard does not respond This may be a system error Call the Help Desk Refer to the Pitney Bowes Contact Information List in this guide for the phone number of the Help Desk Difficult to read the display You need to adjust the dis play contrast Adjust the display contrast refer to the...

Page 174: ... 4 plastic grommets in the scale are seated correctly The 4 plas tic posts of the top cover fit into these grommets 2 If a grommet or any part of a grom met is pushed below the surface of the metal on the scale reseat it until it appears as shown here Grommet pushed below surface Properly seated grommet 3 Check to make sure the bubble is cen tered in the circle as shown If not and you have a flatb...

Page 175: ...until the bubble is centered in the circle 5 Replace the top cover and test the scale To test the scale 1 Place a piece of mail of known weight and correct postage on the scale 2 Press the Mode key 3 Select Attached Scale Attached Scale Mode appears on the control center screen 4 Press the Class key and enter a class 5 Press the Enter key 6 Check to see that the correct postage amount appears on t...

Page 176: ......

Page 177: ... C 11 1 Contents Ordering Supplies 11 2 Consumables You Can Order 11 2 Moistener Kits 11 2 Printhead Kit and Wiper Blade Replacements 11 2 Accessories You Can Order 11 3 USPS Supplies 11 4 Supplies and Options 11 ...

Page 178: ...nty and maintenance agreement Self Adhesive Tape 5 Box of 3 rolls 627 8 E Z Seal Sealing Solution Pint Bottles four 16 oz bottles per box 601 0 You can order supplies through the Pitney Bowes Supply Line or you can order from the Pitney Bowes web site The web site features a wide assortment of genuine Pitney Bowes supplies at attractive prices You can take advantage of special quantity pricing and...

Page 179: ...owes web site Refer to the Pitney Bowes Contact Information List at the front of this guide for the Pitney Bowes Supply Line phone number and the Pitney Bowes web site addresses Advertisements included with your DM800 Series Digital Mailing System Inscriptions included with your DM800 Series Digital Mailing System Address Service Requested Return Service Requested Seasons Greetings United States F...

Page 180: ...S Post Office and obtain in a permit license The Post Of fice provides you with the permit number s 2 Contact the Pitney Bowes Supply Line and provide them with the permit number s You request Pitney Bowes to create customized art work for the permit s Refer to the Pitney Bowes Contact Information List at the front of this guide for the Pitney Bowes Supply Line phone number 3 Pitney Bowes sends yo...

Page 181: ...SV61162 Rev C A 1 Glossary A ...

Page 182: ... and permits Barcode A series of vertical bars and spaces that represent a correct ZIP code for the delivery address on a piece of mail Budget Manager This is an optional enhanced accounting package you can acquire for your DM Series Digital Mailing System It allows you to create and more accounts with higher levels of detail Business Manager Business Manager is an enterprise accounting system tha...

Page 183: ...r Priority Mail and Package Services which includes Parcel Select Parcel Post Bound Printed Matter Special Standard Mail and Library Mail You may combine Delivery Confirmation with other services such as COD insured mail registered mail parcel airlift PAL or special handling There is no charge for Delivery Confirmation when you ship by Priority Mail and provide an electronic file to the Postal Ser...

Page 184: ...nting more postage than you need Indicia See Meter Imprint Ink Cartridge Cartridge containing the ink used to produce the meter stamp Inscription An optional message such as First Class or Non Profit that prints vertically to the immediate left of the postage imprint Inspection A meter check required by the USPS Insufficient Funds A warning message that alerts you when you attempt to use more post...

Page 185: ...nt You open a permit account at the Post Office These permits provide you with special processing or discount rates Postage by Phone System The Pitney Bowes system that allows you to purchase postage over the phone line Postage Meter See Postal Security Device Postal Security Device PSD The PSD contains the funds and performs all of the calculations necessary to print meter stamps that comply with...

Page 186: ... front of the feed deck used to stabilize the envelope position when feeding it Signature Confirmation A signature proof of delivery service which provides mailers with the signature and text name of the recipient along with the date time and ZIP Code that is provided with Delivery Confirmation Actual signatures can be easily obtained from the USPS via fax or mail This service meets the needs of m...

Page 187: ...EIGH ON THE WAY WOW A mail weighing mode that weighs mixed mail as it passes along the feed deck and applies the appropriate postage Wiper Blade Part of the printing assembly that wipes excess ink off the printhead ZIP Code A ZIP Code is a numeric code used by the USPS to identify general and specific geographic areas in the United States ZIP 4 Code A 9 digit numeric code incorporating the origina...

Page 188: ......

Page 189: ... Operations B 3 Advanced Operations B 4 If You Need to Change Your System Set up B 5 What You Need to Do to Maintain Your System B 7 If You Have Problems with Your System B 8 The Advanced Operations section contains topics for all possible options you can purchase with your system Your representative will cover only those options that apply to your specific system configuration For additional trai...

Page 190: ...tem 2 5 The IntelliLink Control Center and the main display screen Chapter 2 The IntelliLink Control Center 2 14 DM Series Digital Mailing System throughput Appendix C Specifications C 2 Mailing material you can use with your system Appendix C Mailing Material C 4 How to get technical phone support Pitney Bowes Contact Information List How to get information on the web Pitney Bowes Contact Informa...

Page 191: ...ting on your system Chapter 4 Selecting or Deselecting an Account 4 18 Add postage to your mail af ter you have already printed it Chapter 4 Adding Postage or Changing the Date 4 30 Change the date on your mail after you have already printed it Chapter 4 Adding Postage or Changing the Date 4 31 Connect your IntelliLink Control Center which con tains your postage meter to an analog phone line for a...

Page 192: ... confirmation services adding barcode labels to your mail Chapter 4 Using Electronic Confirmation Services 4 25 Track your confirmation ser vices records on the internet Chapter 4 Tracking Information on the Internet 4 26 Select an optional Smart Class Chapter 4 Selecting a Smart Class 4 20 Setting up the optional Smart Class feature Chapter 5 Setting up the Optional Smart Class Feature 5 31 Clear...

Page 193: ...retain the class value when you add a new weight on the scale Chapter 5 Scales Rates Class if New Piece 5 9 set up to clear or retain the ZIP or Zone value when you add a new weight on the scale Chapter 5 Scales Rates Destina tion if New Piece 5 10 set up to clear or retain the ZIP or Zone value when the class changes Chapter 5 Scales Rates Destina tion if New Class 5 10 set up to prompt the opera...

Page 194: ... inactive be fore it shuts down power to the printer and the meter Chapter 5 Configuring System Timeouts Display Sleep 5 18 set how much time to wait before your system restores the default or normal preset values Chapter 5 Configuring System Timeouts Normal Preset Timer 5 19 set up how much time to wait before the feeder stops after the last enve lope is fed Chapter 5 Configuring System Timeouts ...

Page 195: ...roll Chapter 9 Tape Maintenance 9 2 Refill the E Z Seal Sealing Solution Chapter 9 E Z Seal Sealing Solution Maintenance 9 5 Clean the moistener brush that wets the envelope flap Chapter 9 Moistener Maintenance 9 6 Replace the moistener wick for the moistener brush Chapter 9 Cleaning or Replacing the Wick 9 7 Check the print quality by doing a print test Chapter 9 Printer Maintenance 9 9 Change th...

Page 196: ...0 Envelope Sealing Problems 10 2 Envelopes are not feed ing correctly or are getting jammed Chapter 10 Envelope Feeding Problems 10 4 Tape is jamming Chapter 10 Tape Feeding Prob lems 10 8 Postage is not printing correctly Chapter 10 Printing Problems 10 9 Cannot add postage to your meter Chapter 10 Postage Refill Problems 10 10 Difficult to read the display Chapter 10 Display Problems 10 11 Getti...

Page 197: ...SV61162 Rev C C 1 Specifications C ...

Page 198: ...r 72 32 7 Optional WOW Module 35 15 9 Optional Power Stacker DMPS 31 14 1 For standard drop stacker add 12 305 mm to the overall length for the optional Power Stacker DMPS add 31 787 mm Electrical Electrical Requirements 100 240 VAC 50 60 Hz 6 5 amps max Agency Approvals UL and CSA Compliance ENERGY STAR Operating Conditions Temperature Range F C Min 40 04 Max 109 43 Rel Humidity Min 8 Max 95 Capa...

Page 199: ... information on running in reduced speed mode Sealing Sealing Method Sealing with flap closed E Z Seal Sealing Solution Fluid Sensing Warning message for low fluid level of E Z Seal Ink Capacity Without Ads or Inscriptions Up to 42 100 impressions With Ads or Inscriptions Up to 21 000 impressions Note both quantities require a minimum of 80 impressions per day Internal Modem 33 6Kbytes second Tele...

Page 200: ...15 9 mm Acceptable Envelope Materials Include Standard envelope paper Self mailers Tri fold mail Pre sealed envelopes Envelope Flap Profiles Commercial square and baronial Executive Monarch Weight of the Piece of Mail 10 lbs maximum for each piece Tape Roll Width Either 4 in 102mm or 5 inches 127 mm Specifications continued Advertisements and Inscriptions Advertisements Up to 10 custom advertiseme...

Page 201: ...SV61162 Rev C C 5 DM800 Series Digital Mailing System Operating Guide 13 in 330 mm 13 in 330mm Maximum 3 7 8 in 98 4 mm Minimum 3 5 in 88 1 mm 1 in 25 4mm 5 in 127mm Envelope Dimensions ...

Page 202: ......

Page 203: ...SV61162 Rev C I 1 Index ...

Page 204: ...description 2 15 location 2 15 Analog phone line definition 2 9 Analog phone line connection 2 10 6 4 Arrow keys description 2 15 location 2 15 on the main screen 4 2 5 2 Art card location 2 5 2 6 to perform updates 9 18 Attached scale autotape mode how to use 4 16 when to use 4 5 Attached scale mode how to use 4 15 when to use 4 4 4 5 B Barcodes using for USPS Confirmation Services 4 27 Barcode sca...

Page 205: ...nds setting the high value warning 5 17 setting the low funds warning 5 17 tranferring account funds 7 11 Funds key adding postage 6 7 checking available funds 6 6 check Postage By Phone 6 6 clear batch number 4 32 description 2 14 location 2 15 Funds report 8 9 H Help Postage By Phone 6 2 High funds warning description 5 17 setting up 5 17 I Ink cartridge location 2 13 ordering 11 2 replacing 9 1...

Page 206: ...splay 2 16 postage indicia 2 16 status area 2 16 Manual weight entry mode how to use 4 14 when to use 4 5 Menu key description 2 14 location 2 15 using to change elements on mail 4 21 Meter taking out of service 5 25 Meter stamp change the elements of 4 21 on the main screen 2 16 Modem advanced connection settings 5 16 connecting to base 2 10 connecting to ICC 2 10 6 5 connector on base 2 8 connec...

Page 207: ... 17 Postage tape description 2 11 2 12 location 2 11 2 12 location in option WOW module 2 12 printing 3 4 specifications C 4 when to use 3 4 4 9 Postal Security Device 2 2 6 2 Postcards printing postage for 3 2 4 4 Power stacker optional DJPS 2 3 2 5 2 7 4 10 4 11 4 12 4 14 4 15 4 17 4 19 Presets custom presets how to define 5 22 how to delete 5 24 how to edit 5 24 how to rename 5 24 how to view 5 2...

Page 208: ...r definition 2 5 Start key description 2 15 location 2 15 Subaccount add 7 5 7 6 Subsubaccount add 7 5 Supplies ordering 11 2 System Setup Report 8 10 T Tape installing 9 2 ordering 11 2 specifications C 4 Tape key description 2 15 location 2 15 when printing tapes 3 4 Thickness adjustment knob description 2 11 location 2 6 2 11 possible problems 10 4 10 9 settings 2 11 Timeouts display sleep 5 18 f...

Page 209: ... 2 5 location 2 7 Weighing mail differential weighing 4 11 4 12 4 13 using WEIGH ON THE WAY 4 11 4 12 using Weigh First Piece 4 12 Weight on the main screen 2 16 Weigh First Piece using 4 12 when to use 4 4 Wiper blade replacing 9 16 Z ZIP Code entering 4 20 setting system to prompt for 5 10 Zone entering 4 20 setting system to prompt for 5 10 ...

Page 210: ......

Reviews: