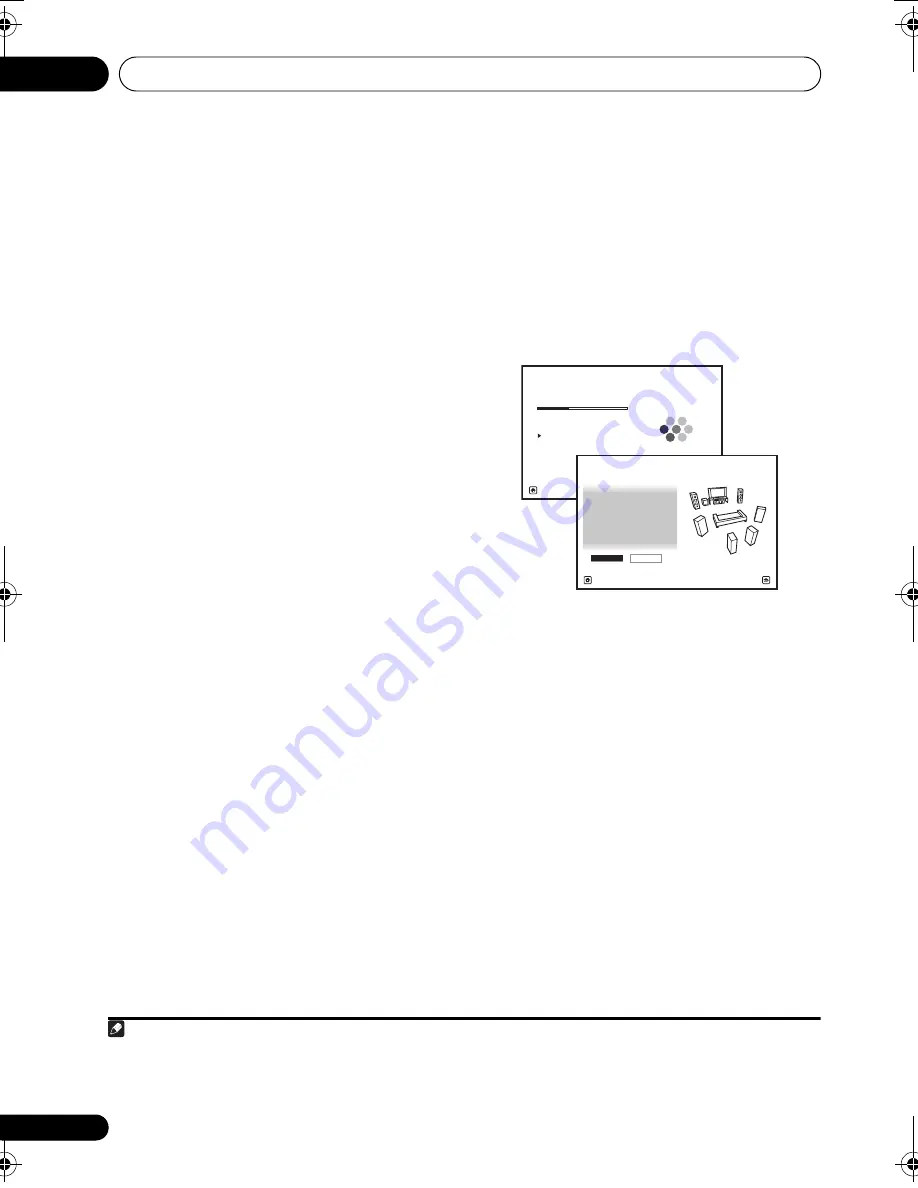
The Advanced MCACC menu
10
80
En
4
When you’re finished settings the
options, select START then press ENTER.
5
Follow the instructions on-screen.
• Make su
r
e the mic
r
o
p
hone is connected.
• If you’
r
e using a subwoofe
r
, it is
automatically detected eve
r
y time you
switch on the system. Make su
r
e it is on
and the volume is tu
r
ned u
p
.
• See
Problems when using the Auto MCACC
Setup
on
p
age 39 fo
r
notes
r
ega
r
ding high
backg
r
ound noise levels and othe
r
p
ossible
inte
r
fe
r
ence.
6
Wait for the Auto MCACC Setup to finish
outputting test tones.
A
pr
og
r
ess
r
e
p
o
r
t is dis
p
layed on-sc
r
een while
the
r
eceive
r
out
p
uts test tones to dete
r
mine the
s
p
eake
r
s
pr
esent in you
r
setu
p
. T
r
y to be as
quiet as
p
ossible while it’s doing this.
• Do not adjust the volume du
r
ing the test
tones. This may
r
esult in inco
rr
ect s
p
eake
r
settings.
• With e
rr
o
r
messages (such as
Too much
ambient noise!
o
r
Check microphone
)
select
RETRY
afte
r
checking fo
r
ambient
noise (see
Problems when using the Auto
MCACC Setup
on
p
age 39) and ve
r
ifying the
mic connection. If the
r
e doesn’t seem to be
a
pr
oblem, you can sim
p
ly select
GO NEXT
and continue.
7
If necessary, confirm the speaker
configuration in the GUI screen.
1
The configu
r
ation shown on-sc
r
een should
r
eflect the actual s
p
eake
r
s you have.
If no o
p
e
r
ations a
r
e
p
e
r
fo
r
med fo
r
10 seconds
while the s
p
eake
r
configu
r
ation check sc
r
een
is being dis
p
layed, the Auto MCACC Setu
p
will
r
esume automatically. In this case, you don’t
need to select ‘
OK
’ and
pr
ess
ENTER
in ste
p
8.
• If you see an
ERR
message (o
r
the s
p
eake
r
configu
r
ation dis
p
layed isn’t co
rr
ect), the
r
e
may be a
pr
oblem with the s
p
eake
r
connection.
If selecting
RETRY
doesn’t wo
r
k, tu
r
n off
the
p
owe
r
and check the s
p
eake
r
connections. If the
r
e doesn’t seem to be a
pr
oblem, you can sim
p
ly use
/
to select
the s
p
eake
r
and
/
to change the
setting and continue.
• If
Reverse Phase
is dis
p
layed, the
s
p
eake
r
’s wi
r
ing (+ and –) may be inve
r
ted.
Check the s
p
eake
r
connections.
2
If the connections we
r
e w
r
ong, tu
r
n off the
p
owe
r
, disconnect the
p
owe
r
cable, then
r
econnect
pr
o
p
e
r
ly. Afte
r
this,
p
e
r
fo
r
m the
Full Auto MCACC
pr
ocedu
r
e again.
Note
1 This sc
r
een is only shown if you selected
ALL
o
r
Speaker Setting
f
r
om the
Auto MCACC
menu.
2 If the s
p
eake
r
is not
p
ointed to the mic
r
o
p
hone (listening
p
osition) o
r
when using s
p
eake
r
s that affect the
p
hase
(di
p
ole s
p
eake
r
s,
r
eflective s
p
eake
r
s, etc.),
Reverse Phase
may be dis
p
layed even if the s
p
eake
r
s a
r
e
pr
o
p
e
r
ly
connected. If this ha
pp
ens, select
GO NEXT
and continue.
Now Analyzing...
2/10
Environment Check
1b.Auto MCACC
A/V RECEIVER
Exit
Cancel
Ambient Noise
: OK
Microphone :
Speaker YES/NO
:
L : YES
R : YES
C : YES
1b.Auto MCACC
SR : YES
SBR :
YES
SBL :
YES
SL : YES
SW :
YES
10
OK
RETRY
A/V RECEIVER
Exit
Cancel
VSX-1019_KU.book 80 ページ 2009年2月17日 火曜日 午前11時56分


