29
Section
04
English
En
CAUTION
For proper operation of the DVD player,
the chassis must be mounted within
30° of horizontal. Make sure the unit is
mounted within this limitation.
4 Place the unit in front of the dashboard
opening so the wiring can be brought
through the mounting sleeve. Follow
the wiring diagram carefully and make
certain all connections are secure and
insulated with wire nuts or electrical tape.
After completing the wiring connections,
turn the unit on to confirm operation
(vehicle ignition must be on). If the unit
does not operate, re-check all wiring until
the problem is corrected.
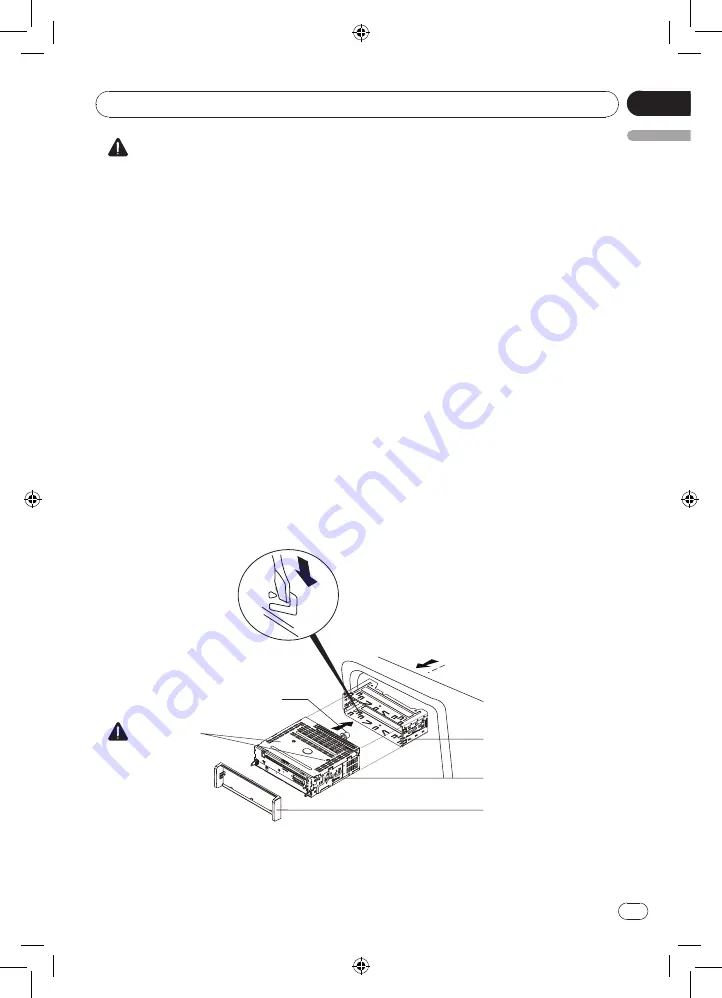
5 Make sure the radio is right-side up, then
carefully slide the radio into the mounting
sleeve until it is fully seated and the
spring clips lock it into place.
Optimum performance is obtained when
the unit is installed at an angle of less
than 20°.
Installation
6 Secure the rear of the unit to the car
body using the mounting bolt and rubber
cushion.
7 Test the unit using the "Operation"
instructions that follow.
Kit installation
If your vehicle requires the use of an
installation kit to mount this unit, follow the
instructions included with the installation
kit to attach the unit to the mounting plate
supplied with the kit.
1 Wire and test the unit as outlined in the
Mounting Sleeve Installation instructions.
2 Install the radio/mounting plate assembly
to the sub-dashboard according to the
instructions in the installation kit.
3 Replace the dashboard trim panel.
Mounting bolt
rubber cushion
Screwdriver
Mounting sleeve
The rear of the unit
Note
Fix the trim plate at proper direction, the upper side is thicker than lower side.
Trim plate
Transport
screws
When not removing
transport screws,
the disk player
does not work
properly.
Please installation
after removing
transport screws.


