05
29
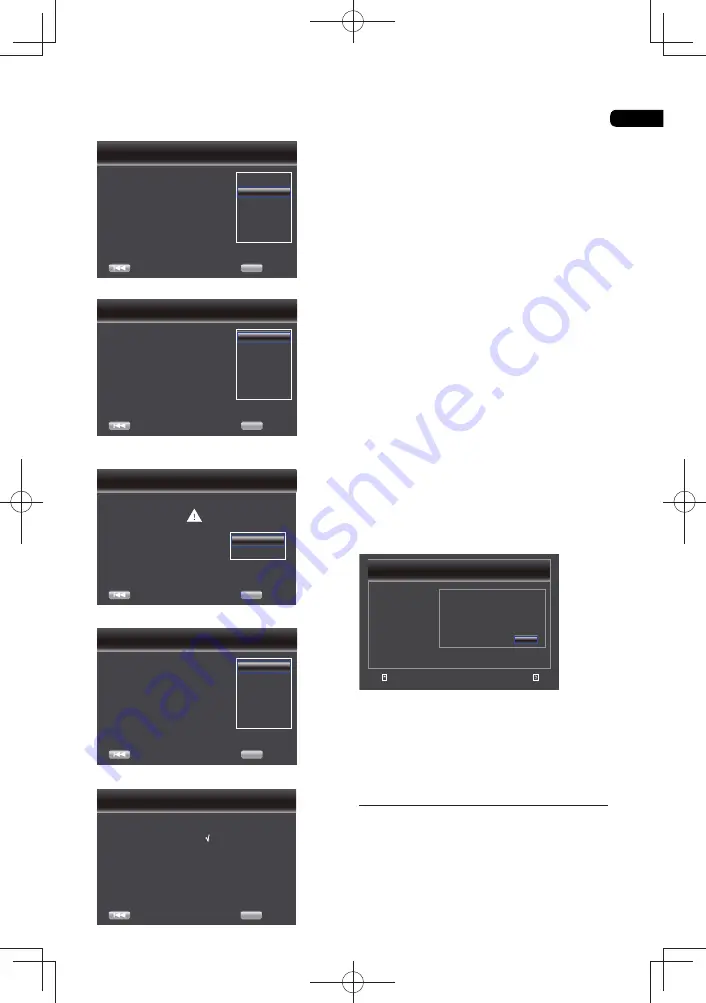
5. Press
ENTER
to enter language setting.
Press
select to language.
Choose
Previous
an OSD language before starting.
The language selected will be applied not only here
but aslo in other OSD windows, menus etc.
English
Deutsch
Hungarian
Czech
Slovak
Polish
OK
Next
page
:
2/5
Setup Navigator
6. Press
ENTER
to enter Resolution setting.
Auto
480p/576p
720p
1080i
1080p
1080/24p
Choose
Previous
a resolution that fit your TV.
Change will be applied immediately, you have 15s to
determine whether to save the setting or rollback to
prior resolution. Better performance will be provided
by a HDMI connection!
OK
Next
page
:
3/5
Setup Navigator
Press
to select an option. Press
ENTER
.
Use
to select an “Yes” or “No”.
Video Resolution
Previous
has been changed!
Does everything locks all right with this resolution?
Press Yes if you want to apply it. Press No to
rollback to previous one.
OK
Next
page
:
3/5
Setup Navigator
14s
Yes
No
7.
Press
ENTER
to enter Aspect ratio setting.
Choose
Previous
an aspect retio that fit your TV.
Change will be applied in next page, you should
determine whether to save the setting or rollback to
prior aspect ratio.
16:9 Full
16:9 Normal
4:3 Pan&Scan
4:3 Letterbox
OK
Next
page
:
4/5
Setup Navigator
Press
to select an option. Press
ENTER
.
Setting
Previous
wizard is to be finished!
Now press Finish button to go to Home Menu. Please
enjoy it.
OK
Finish
page
:
5/5
Setup Navigator
8. Press
ENTER
to
return
Gereral Setting
Menu.
•
[Upgrade]
You may select to Upgrade the software from
the USB
fl
ash drive.
1. Connect the USB
fl
ash drive which contains
the upgrade
fi
le package.
2. Follow the instruction on the TV screen to
con
fi
rm upgrade operation.
- Upgrade complete the software, the
system will reboot after 5s or Enter key is
pressed.
Notes:
• Do not unplug the power cord or remove
the USB
fl
ash drive/disc during software
updating. Also, do not press the reset button
during updating. Otherwise, the updating will
be aborted and malfunction may occur with
the player.
• If the upgrade
fi
le package did not pass
the veri
fi
cation, error prompt is displayed ,
check the package again (such as the
package is not complete)
• Make sure the
fi
rmware version is not an
old version.
•
[BUDA]
During insert more than 1GB empty USB
device, you can operate BD-Live function.
And Blu-ray DVD system will be automatic
name a BUDA content.
BUDA will display Information.
1. Press
ENTER
.
2. Follow the instruction on the TV screen to
select {BUDA Information}.
&YJU
6TFDVSTPSLFZUPNPWFGPDVTVTFþ&OUFSÿLFZ
UPTFMFDU
3FUVSO
(FOFSBM4FUUJOH
4ZTUFN
-BOHVBHF
1MBZCBDL
1BSFOUBM-PDL
/FUXPSL
#6%"*OGPSNBUJPO
'SFFTJ[F.#
'NUCVEB
3. Press
ENTER
to select “Fmt buda”, BUDA
of
fi
les will be cleaned.
•
[Quick Start]
{
On
} - Select to shorten the required time to
boot up.
{
Off
} - Select to perform normal bootup.
Language
Select the OSD(On-Screen Display)
Language, Disc Menu Language, Audio
Language, Subtitle Language default
language for the player.
Summary of Contents for BDP-100- K
Page 90: ...06 46 ...
Page 91: ...06 47 ...


