39
Chapter
3
Set
ting a Route to Y
our Destination
NA
VI
3
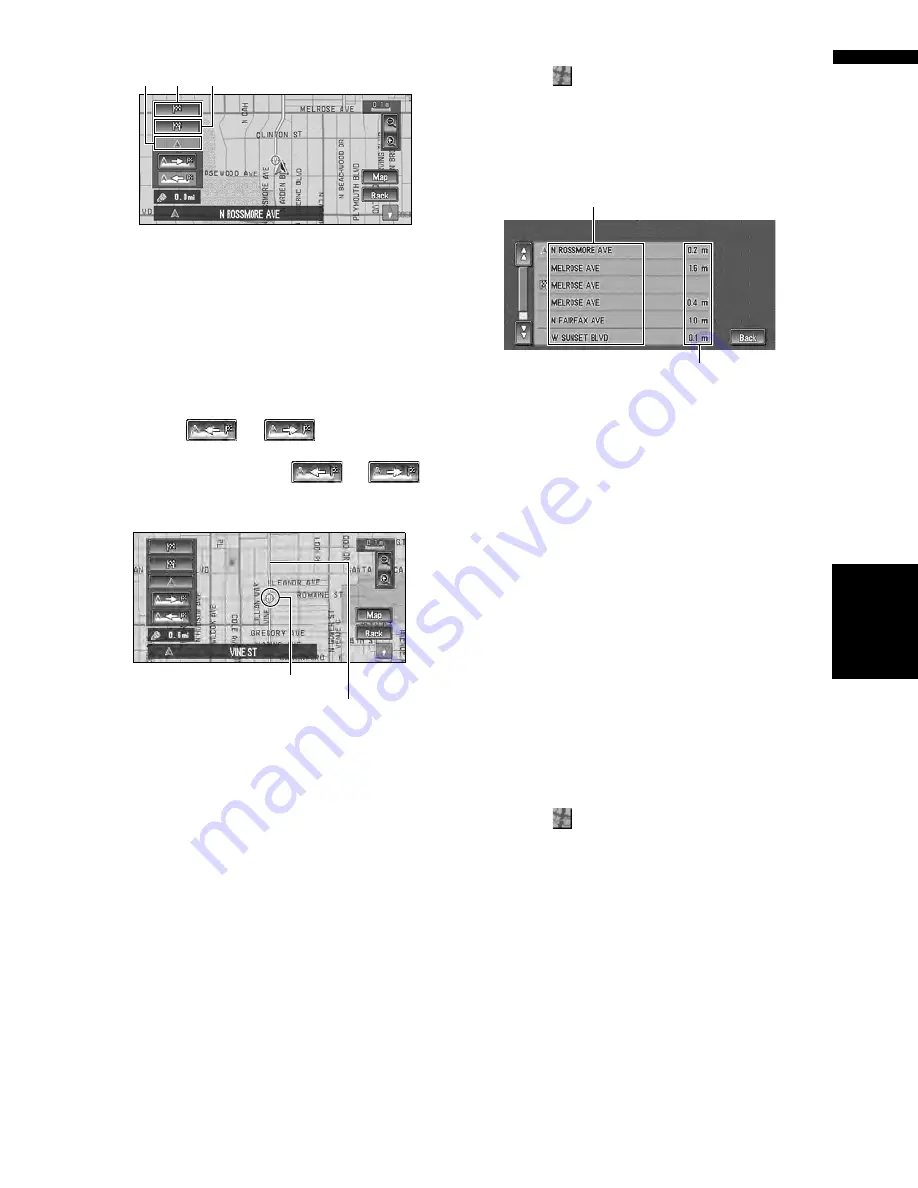
Touch the point to start scrolling.
You can select the following items:
(1) Starting Point
(2) Way Point (If this is set)
(3) Destination
❒
If you have selected “
Way Point
”, a list of
the way points on the route is displayed.
Touch the place you want to start scrolling
from and proceed to step 4.
4
Touch
or
to scroll the map.
To continue scrolling after you release your
finger, touch and hold
or
.
If necessary, the scale of the map can be
changed.
You can select the following items:
Map :
The scroll screen is displayed.
➲
Searching the destination by map
➞
Page 33
5
Touch “Back”.
You can return to the previous display.
Checking the set route by text
This function is not available if your vehicle has
deviated from the set route.
1
After touching “Route Options” in the
main menu, touch “View Current Route”.
❒
“
View Current Route
” is displayed only
when the route is set.
❒
You can also see the destination by touch-
ing
on the right of the list.
2
Touch “Profile”.
3
Check the contents on the display.
Scroll the list as necessary.
4
Touch “Back”.
You can return to the previous display.
❒
When a long distance route is calculated,
your navigation system may not be able to
list all the roads. (In this case, the remain-
ing roads will be shown in the list as you
drive on.)
Checking the entire route over-
view
You can check the entire shape of the current
route.
1
After touching “Route Options” in the
main menu, touch “View Current Route”.
❒
“
View Current Route
” is displayed only
when the route is set.
❒
You can also see the destination by touch-
ing
on the right of the list.
2
Touch “Overview”
A map of the whole route up to the destination
is displayed.
❒
You can also check the overview by using
the shortcut menu if “
Whole Route Over-
view
” is selected on the “
Short-Cut
Selection
”.
Checking the set route from the
shortcut menu
You can also check the information about the set
route from the shortcut menu.
(3)
(1)
(2)
Scroll Cursor
Current Route
Name of the streets you are driving through
Driving distance
Summary of Contents for AVIC-D2
Page 28: ...26 Chapter 1 Basic Operation NAVI AV ...
Page 36: ...34 Chapter 2 Menu and Map Display NAVI ...
Page 70: ...68 Chapter 5 Customizing Your Navigation System NAVI ...
Page 80: ...78 Chapter 6 Using the AV Source Built in CD Drive and Radio AV RADIO ...
Page 98: ...96 Chapter 7 Using the AV Source Pioneer AV Equipment AV AUX AV ...
Page 108: ...106 Chapter 8 Customizing the Audio Source Setting AV Other Functions ...


