background image

2. Change the Note value


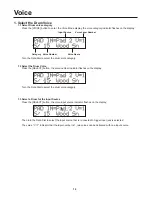
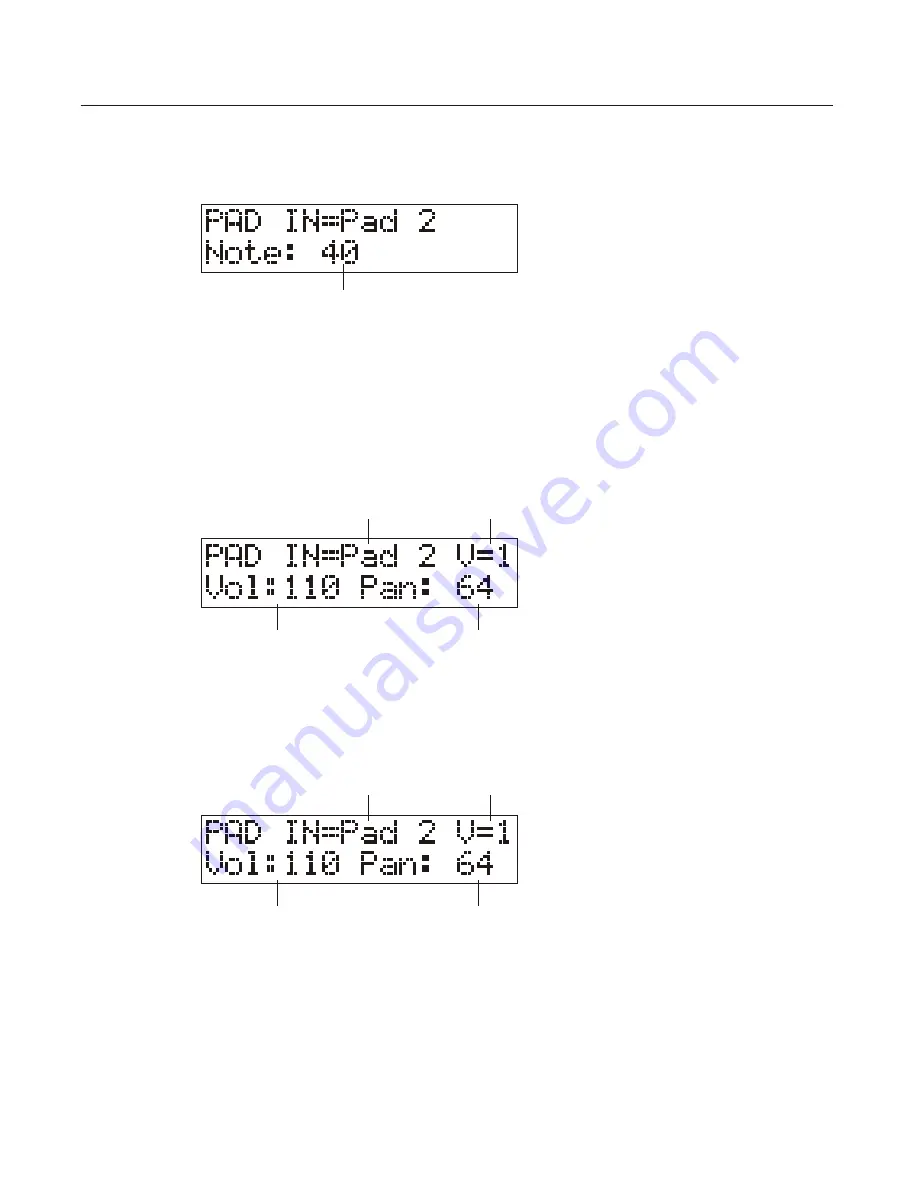
ress the [PAGE +] button to select the Note value setting display shown below:


Change the note value of each pad's MIDI out.

       In the Voice Mode, p

      Turn the Data Dial to define the note value.
      Use the [SELECT] button to select the input source.

3. Change the Drum Volume


3.1 Change the PAD Volume

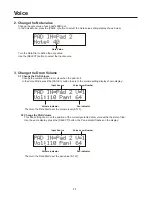
            Change the volume of the drum voice when the pad is hit.
            In the Voice Mode, press the [PAGE +] button to select  the volume setting display shown display:
             

      Then turn the Data Dial to set the volume level (0-127).

Note Value

 Volume indicator

Pan indicator

Input Source

Voice Layer Number


3.2 Change the PAN Volume

            This Pan setting can move the position of the currently selected drum voice within the stereo filed.
            Use the same display, press the [SELECT] button, the Pan indicator flashes on the display :

      Then turn the Data Dial to set the pan value (0-127).

 Volume indicator

Pan indicator

Input Source

Voice Layer Number

Voice

17

Summary of Contents for E-Gig

Page 1: ......

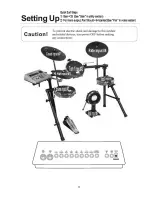
Page 2: ... 0 by turning knob FOR ALL CYMBALS DRUMS f PUSH Page g ADJUST Velcurve to Hard 2 by turning knob h PUSH KITS TO EXIT AND SAVE SETTINGS 5 AMPLIFIER SETUP a STEREO AMPLIFIERS i A STEREO CABLE FROM AUX OUT TO A STEREO INPUT REQUIRES NO MODULE SETTING ADJUSTMENT ii A STEREO SPLITTING CABLE TIP RING SLEEVE SPLITTER IS REQUIRED TO SEND LEFT AND RIGHT SEPARATE CHANNELS TO DUAL INPUT AMPLIFIERS b MONO AMP...

Page 3: ...essary components 1 First you will need to locate the Front Curved bar and leg assemblies 2 Extend legs forward into an A frame position 3 Insert the 20 Z knobs and bolts into the open holes on the rack clamps LMAC 4 Insert the extended legs into the pipe connecting clamps attached to the front curved bar ...

Page 4: ...structions 5 Locate the straight cymbal arms CA 1 and the universal module mount UM 1 6 Insert them into your choice of the clamps on the on the rack 7 The last part you will need to install into the rack will be the L tom arms LR 78 ...

Page 5: ...to be used for an extended period of time o Unplug the AC adaptor during electric storms o Avoid plugging the AC adaptor into the same AC outlet as appliance with high power consumption such as electric heaters or ovens Also avoid using multi plug adaptors since these can result in reduced sound quality operation errors and possibly damage Cleaning o Clean the module with a soft dry cloth o A slig...

Page 6: ...g with Click Voice 7 Change the Drum Kit SONG 1 Repeat Playback 2 Merge Track 3 Play Back Track 4 Quantize Notes 5 Clear Track 6 Song Copy 7 Delete Song VOICE 1 Select the Drum Voice 2 Change the Note Value 3 Change the Drum Volume 4 Change the Pad Function 5 Select Pad Song 6 Adjust the Reverb 7 Voice Copy SONG RECORDING 1 Select the User Song 2 Set the Track 3 Get ready to record 4 Start Recordi...

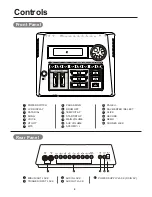
Page 7: ... TEMPO TAP START STOP MAIN VOLUME AUX VOLUME ACCOMP Rear Panel 1 2 3 4 5 1 2 5 MIDI IN OUT JACK TRIGGER INPUT JACK POWER SUPPLY JACK DC IN 9V 3 4 AUX IN JACK AUX OUT JACK KICK 7 CRASH 6 RIDE 5 TOM 3 4 TOM 2 3 TOM 1 2 SNARE 1 HI HAT HI HAT CONTROL AUX IN DC IN 9V AUX OUT MIDI OUT MIDI IN TEMPO TAP PAD ASSIGN KITS UTILITY VOICE DRUM OFF SONG START STOP 1 2 3 20 4 4 5 6 7 8 9 10 11 12 13 14 15 16 17 ...

Page 8: ......

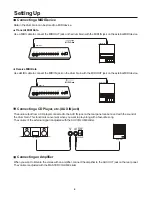
Page 9: ...e AUX IN jack on the rear panel can be mixed with the sound of the drum brain This function is convenient when you want to play along with a favourite song The volume of the external signal is adjusted with the AUX VOLUME slider Amplifier CD Player Connecting an Amplifier When you want to listen to the voices with an amplifier connect the amplifier to the AUX OUT jack on the rear panel The volume ...

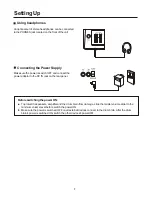
Page 10: ...nd the drum brain from damage slide the master volume slider to the minimum volume level before switch the power ON Make sure the power is switched OFF on all external devices connect to the drum brain After the drum brain s power is switched ON switch the other devices s power OM Using headphones An optional set of stereo headphones can be connected to the PHONES jack located on the front of the ...

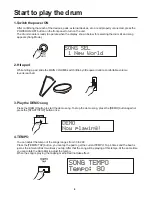
Page 11: ...tle upward until a comfortable volume level is reached 3 Play the DEMO song Press the DEMO button to start the demo song To stop the demo song press the DEMO button again or press the START STOP button once 4 TEMPO You can adjust the tempo of the songs ranges from 30 to 280 Press the TEMPO TAP button you can tap the pad to get the currentTEMPO Tap 4 times and the beat is just as the interval of la...

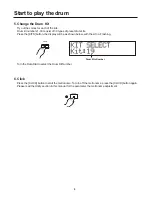
Page 12: ...Press the KITS button the display will be as shown below with the kit no Flashing 6 Click Press the CLICK button to start the metronome To turn off the metronome press the CLICK button again Please read the Utility section in this manual for the parameter the metronome adjustment Turn the Data Dial to select the Drum Kit Number Drum Kits Number 9 ...

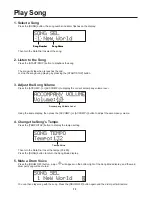
Page 13: ... press the ACCOMP or ACCOMP button to adjust the accompany volume 4 Change the Song s Tempo Press the TEMPO TAP button to display the tempo setting Then turn the Data Dial to set the tempo 30 280 Press the SONG button to return the Song Mode display 5 Mute a Drum Voice Press the DRUM OFF button a sign will appear on the bottom right of the Song Mode display and the main drum part song will be mute...

Page 14: ... CLICK Button again 7 Change the Drum Kit Press the KIT button to select a different Drum Kit with song Drum Kit Number Then turn the Data Dial to select the drum kit number 1 30 When a song is started the kit number will shift to its default automatically If you want to use another kit you can change it when the song is playing Play Song 11 ...

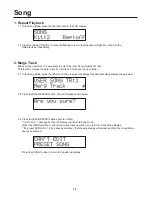
Page 15: ... to cancel the merge track operation and return to Song Mode display If a preset SONG No 1 50 is already selected the following display will appear and the User Song Mode cannot be entered Press the SONG button to return to Song Mode display Song 1 1 1 In the Song Mode press the PAGE button the LCD diaplay Repeat Playback 1 2 Press the SELECT button to move the flashing cursor to the Repeat on off...

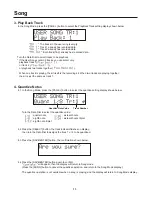
Page 16: ...iplet 4 3 Press the SAVE ENTER button the confirmation shown below 4 4 Press the SAVE ENTER button again to confirm will appear then the display will return to Song mode Press the SONG button to cancel the quantize operation and return to the Song Mode display The quantize operation is not available when a song is playing and the display will return to Song Mode display Song 3 Play Back Track In t...

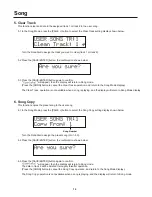
Page 17: ...shown below 6 3 Press the SAVE ENTER button again to confirm will appear then the display will return to Song mode The data in track 2 will be deleted thoroughly thisafter operation Press the SONG button to cancel the Song Copy operation and return to the Song Mode display The Song Copy operation is not available when a song is playing and the display will return to Song mode Song 5 Clear Track Th...

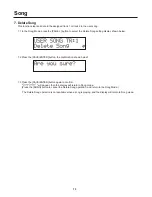
Page 18: ... button to cancel the Delete Song operation and return to the Song Mode The Delete Song operation is not available when a song is playing and the display will return to Song mode Song 7 Delete Song This function clears all data in the assigned track 1 or track 2 in the user song 7 1 In the Song Mode press the PAGE button to select the Delete Song setting display shown below 15 ...

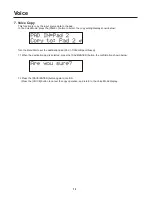
Page 19: ... 2 Select the Drum Voice Press the SELECT button the voice number indicator flashes on the display Turn the Data Dial to select the drum voice category 1 3 Select a Drum for the Input Source Press the SELECT button the voice input source indicator flashes on the display Then turn the Data Dial to select the input source that is connected to trigger input jack is selected The value V 1 indicator th...

Page 20: ...s hit In the Voice Mode press the PAGE button to select the volume setting display shown display Then turn the Data Dial to set the volume level 0 127 Note Value Volume indicator Pan indicator Input Source Voice Layer Number 3 2 Change the PAN Volume This Pan setting can move the position of the currently selected drum voice within the stereo filed Use the same display press the SELECT button the ...

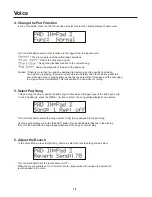
Page 21: ... song function is assign the pad song number when the trigger type of the pad s pad song In the Voice Mode press the PAGE button to select the song setting display shown below Turn the Data Dial to select the song number 1 54 that is assigned to the pad song Use the same display press the SELECT button the repeat indicator flashes in the display then turn the Data Dial to assign repeat playback of...

Page 22: ...display shown below Turn the Data Dial to set the destination pad Pad 1 7 Pedal Open Closed 7 1 When the destination pad is selected press the SAVE ENTER button the confirmation shown below 7 2 Press the SAVE ENTER button again to confirm Press the VOICE button to cancel the copy operation and return to the Voice Mode display Voice 19 ...

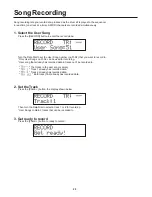
Page 23: ...l to select a track 1 or 2 for recording User Songs contain 2 tracks that can be recorded to 3 Get ready to record Press the PAGE button to ready to record Turn the Data Dial to set the User Song number no 51 54 that you want to record to Only User Songs no 51 54 can be used for recording User song that already has recorded data in tracks can t be recorded to The tracks in the user song is empty T...

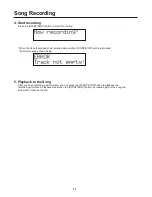
Page 24: ...ded performance Playback stops when the START STOP button is pressed again or the song will stop when it reaches the end When the track that already has recorded data and the START STOP button is pressed the error message shown below 4 Start recording Press the START STOP button to start to recording Song Recording 21 ...

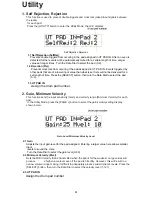
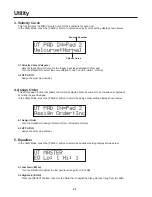
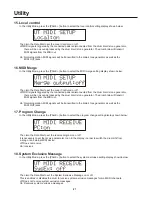
Page 25: ...CT button then turn the Data Dial to select the pad 0 9 1 3 UT PAD IN Assign the drum pad number 2 Gain Minimum Velocity This function sets the input sensitivity Gain and velocity range Minimum Velocity for each pad In the Utility Mode press the PAGE button to select the gain velocity setting display shown below Gain Level Minimum Velocity Level 2 1 Gain Adjusts the input gain level for the pad as...

Page 26: ...s set the pad function that allows the currently selected drum kit number to be increased or decrease by hitting the specified pad In the Utility Mode press the PAGE button to select the assign order setting display shown below 4 1 Assign Order Turn the Data Dial to assign Increment Inc or Decrement Dec 4 2 UT PAD IN Assign the drum pad number 5 Equalizer In the Utility Mode press the PAGE button ...

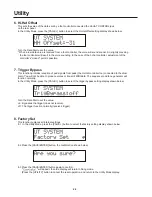
Page 27: ...oller too connected to the drum brain You will not be able to produce voices or transmit MIDI data The sequencer and tone generator will function normally In the Utility Mode press the PAGE button to select the trigger bypass setting display shown below Turn the Data Dial to set the value on Bypasses the trigger does not receive off The trigger function normally receives trigger 8 Factory Set This...

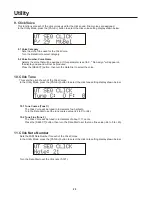
Page 28: ...o select the voice 10 Click Tune This sets the pitch of each of the Click Voices In the Utility Mode press the PAGE button to select the click tune setting display shown below 10 1 Tune Coarse Tune C The Click Voice will be tuned in increments fo a half setp Turn the Data Dial to set the tune coarse value 24 to 0 to 24 10 2 Tune Fine Tune F The Click Voice will be tuned in increments of about 1 17...

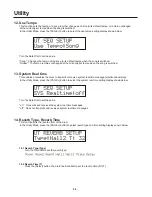
Page 29: ...nables or disables the drum to transmit or receive system real time message start continue stop ress the PAGE button to select the system real time setting In the Utility Mode p display shown below Turn the Data Dial to set the value on Transmits and receives the system real time messages off Does not transmits and receives system real time messages 14 Reverb Type Reverb Time This function sets th...

Page 30: ...tor there will be no sound produced by the drum brain s tone generator The drum brain will transmit MIDI signals from the MIDI out On Normal operation MIDI signals will be transmitted to the brain s tone generator as well as the MIDI OUT jacks 17 Program Change ress the PAGE button In the Utility Mode p to select the program change setting display shown below Then turn the Data Dial to set the rec...

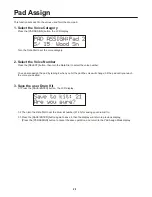
Page 31: ...SAVE ENTER button the LCD display Save the user Drum Kit 3 1 PadAssign You can also assign the pad by taping it when you hit the pad the voice will change hit the pad until you reach the voice you desired 3 2 Then turn the Data Dial to set the drum kit number 21 30 for saving your drum kit to 3 3 Press the SAVE ENTER button again to save it then the display will return to previous display Press th...

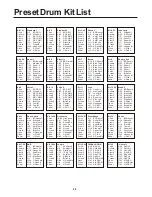
Page 32: ...edal Kit 10 1 kick 2 snare 3 tom1 4 tom2 5 tom3 6 ride 7 crash Open Close Pedal Kit 15 27 1 kick 2 snare 3 tom1 4 tom2 5 tom3 6 ride 7 crash Open Close Pedal Kit 17 28 1 kick 2 snare 3 tom1 4 tom2 5 tom3 6 ride 7 crash Open Close Pedal Kit 18 29 1 kick 2 snare 3 tom1 4 tom2 5 tom3 6 ride 7 crash Open Close Pedal Kit 19 30 1 kick 2 snare 3 tom1 4 tom2 5 tom3 6 ride 7 crash Open Close Pedal Kit 20 1...

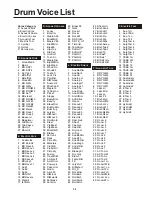
Page 33: ...Dark AnaHit Analog H Analog L AnalogH1 AnalogL1 AnaTite AnaWide AnaWiRim AnHitRim AnSStick Dance Dance01 Dance02 Dance03 Dance05 Dance06 Electrik SAmbie4 SAna1 CapGun CapRim Dryroom HiFive AnaBzRim AnaShh AnaShRim AnaSlegh AnVelRim ASOBI Blaaaghf Dry Guy Elem3 FantaRim FX JelyRoll RIMshort RO_S RockRim RollEm2 RollEm3 RollRim2 RollRim3 60 61 62 63 64 65 66 67 68 69 70 71 72 73 1 2 3 4 5 6 7 8 9 10...

Page 34: ... 1 2 3 4 5 6 7 8 9 10 11 12 13 14 15 16 17 18 19 20 21 22 23 24 25 26 27 28 29 30 31 32 33 34 35 36 37 38 39 40 41 HHRocKcls H Opn13 H OpnDW H OpnDWX H OpnL1 H OpnL2 H OpnL3 H OpnLK H OpnLX1 H OpnNB HHRoKopn Hhopen 1 H Pdl13 H PdlLit H PdTit H OpnAMu H OpnAn AgogoH1 AgogoH2 Bell Tre Bongo Hi Bongo Lo Cabasa1 Cabasa2 Castanet ClapA Clvs ClvsA Conga8H CongaM CongaMv CongaAn CongaO CongBe CowB1 CowBM...

Page 35: ...OVA REGGAE FUNK 1 FUNK 2 FUNK 3 SHUFFLE FUSION BIG BAND JAZZ DISCO HOUSE JUNGLE R B 1 R B 2 R B 3 R B 4 ROCK N ROLL 1 ROCK N ROLL 2 8BEAT 1 8BEAT 2 16 BEAT 1 BALLAD 1 BALLAD 2 BALLAD 3 BALLAD 4 BALLAD 5 BALLAD 6 WALTZ MARCH JING OPEROR CHINESERYTH 1 2 3 4 5 6 7 8 9 10 11 12 13 14 15 16 17 18 19 20 21 22 23 24 25 26 27 28 29 30 31 32 33 34 35 36 37 38 39 40 41 42 43 44 45 46 47 48 49 50 32 ...

Page 36: ...ts 1 demo song 50 preset 4 user songs POWER SWITCH SONG VOICE UTILITY KITS PAD ASSIGN DRUM OFF TEMPO TAP START STOP MASTER VOLUME AUX VOLUME ACCOMP VOLUME PAGE SAVE ENTER SELECT CLICK RECORD DEMO DATA DIAL LCD display DC IN Aux Out Aux In Hi Hat control Hi Hat Snare Tom 1 Tom 2 Tom 3 Ride Crash Kick MIDI IN OUT DC 9V 33 Specifications ...

Reviews: