


User Guide
Doc# A824D001 v2.0
15-Nov-2018
Page 19 of 28
PI (Physik Instrumente) L.P.
16 Albert Street, Auburn, MA 01501
Tel: 508-832-3456 Fax: 508-832-0506
Email: [email protected]
3. Turn on the power on the A-824 using the switch on the front panel.
4. Start the SPiiPlus MMI Application Studio software on the host PC.
5.
Click “Add Controller” on the main menu toolbar.
6.
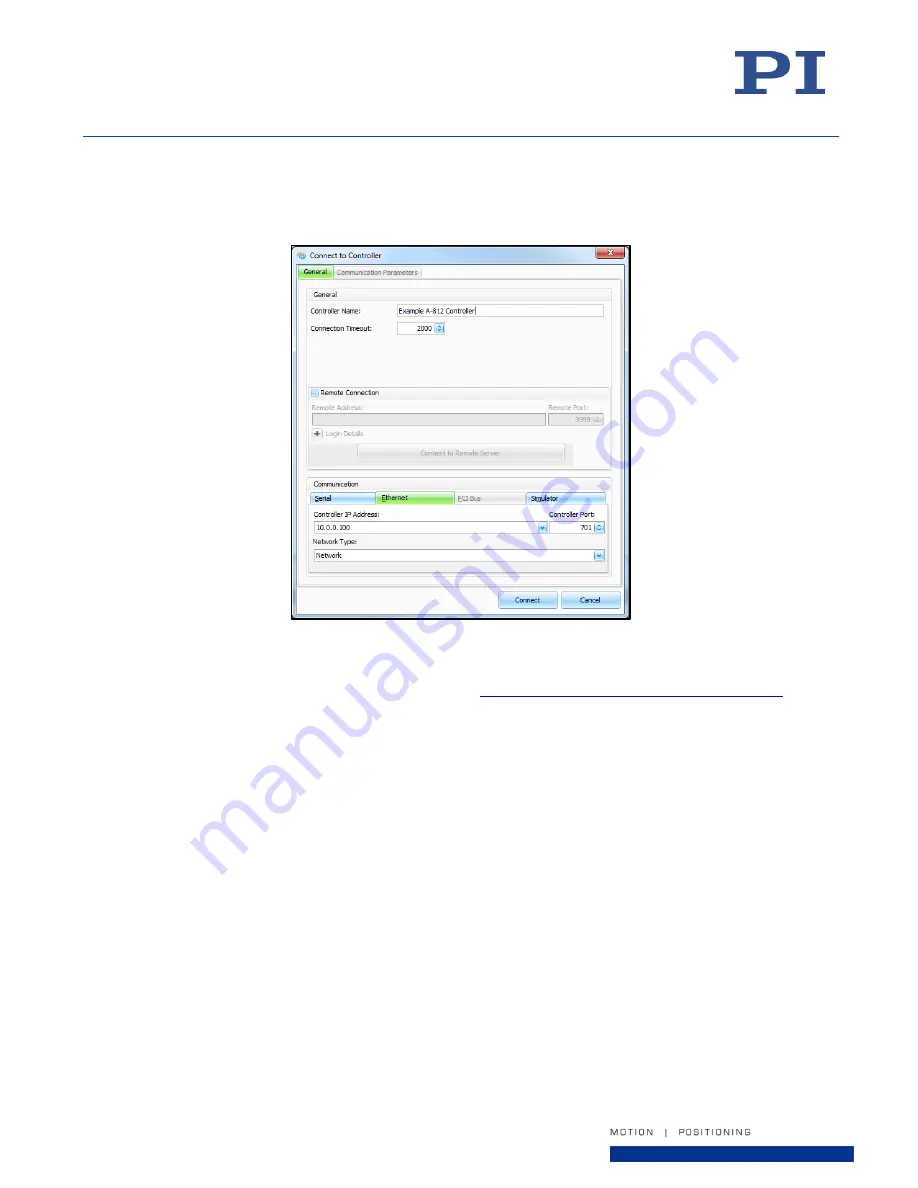
In the “Connect to Controller” dialog, give your controller a name, select the “Ethernet” tab, and enter IP
address
10.0.0.100, Port 701
. This is the default IP address of the A-824 controller set at the factory.
Figure 10 - Connect to Controller Dialog
See the ACS document “SPiiPlus MMI Application Studio User Guide” for details on connecting to the controller.
For additional tutorials on the use of the MMI software, see
https://www.acsmotioncontrol.com/downloads
and
click under the “Training Materials” section. You may need to create a user account to access these materials.
13. Operation
The SPiiPlus MMI Application Studio software can be used to control the system, to develop user programs, and
to alter the system configuration. For complete instructions, see the ACS documentation provided with this
system.
Note: The SPiiPlus MMI Application Studio software also has extensive online help. To access it, press
“F1” from any screen in the program.
13.1. Basic Setup
To access the most-used features of the MMI, you must add components to the controller object. The following
figure shows a typical setup. Components can be added by right-clicking on the controller object in the
Workspace area of the MMI, then selecting “Add Component”, then selecting the desired component(s) from the
pop-out menu.